Tuesday, 31 May 2016

Planting Cucumbers

This year, as for the past few years, I am growing a few of the so-called "cocktail" Cucumber plants - the little ones also sometimes known as Lebanese Cucumbers. They are not huge plants and they produce small (approx. 6" / 15cm) fruits.


Photo from 2013


I don't have a greenhouse, but I find that I can grow these plants quite successfully outdoors, as long as I don't start them off too early. This year I sowed mine on April 19th. Initially I kept them indoors, but after they developed their first true leaves I moved them outside into one of the plastic mini-greenhouses. On sunny days I have had them out in the fresh air, acclimatising. Now I have planted a couple in their final location, which is a big container filled with compost-enriched soil:


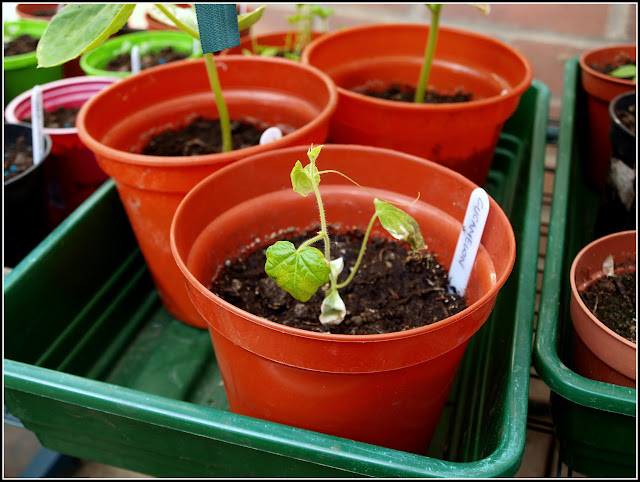
I am intending to put in at least one more plant, but for the time being I'm only risking two. I'll keep the others in their pots until I'm sure that frost is no longer a risk. I only have a total of 5 plants, and one of those is definitely not going to be any good. This one is the sole example of "Mini Munch", a leftover from last year. Whether it's because it's an old seed, or for some other reason, this one has not developed properly at all and I think it will have to be thrown away.


In any event, the two Cucumbers I have planted out will have their own protection anyway, because I have made sure that they will fit under one of my biggest plastic cloches, at least for the time being:


In a couple of weeks they will have out-grown that cloche, so I'll remove it and at that time give the plants some support by putting in a wigwam of bamboo canes.


As I've probably mentioned at some stage, I'm also having a go with Cucamelons, but don't hold your breath, they are still very tiny and frail-looking. This is the best of the pair!


It doesn't look good, does it? If (and that's a big "if"), either of them begins to look like becoming anything decent, I'll put it / them in the same container as the Cucumbers.


Who else has grown Cucamelons? Are they normally this frail?

Monday, 30 May 2016

Harvest Monday - 30th May 2016

This week the salads have come on stream in quantity.


I picked another big batch of Baby Leaf Salad - the third from my little 18" square mini-bed.


After harvesting these leaves I pulled up the plants from which they came, and started again. This time I have used a mix of several types of Lettuce and a couple of types of Endive. Specifically no Oriental Brassicas!


We have also had Lettuces. First to come into the kitchen was this "Tom Thumb":


We liked this one. The texture was particularly good - firmer than a Butterhead, but softer than a Cos. Nice flavour too.


Later in the week we had this "Dubacek" Lettuce, one of those grown from seeds sent to me from the Czech Republic.


Another good lettuce. It's somewhat like "Salad Bowl", but perhaps a bit more robust. Not one that gives up as soon as it hits the salad-dressing!


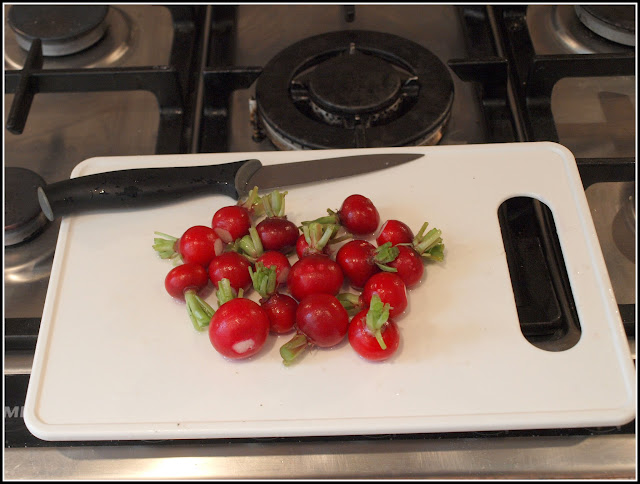
Of course there were more Radishes too:


This is going to be the last batch for a while. We have finished all those I sowed in April. I do have a few more coming on, but I only sowed them a few days ago so it will be a couple of weeks before they are ready.


Another batch of Rhubarb. This stuff grows pretty quickly once it gets going!


I'm linking this post to Harvest Monday, hosted by Dave at Our Happy Acres.

Sunday, 29 May 2016

Bragging about brassicas

Despite all the dire warnings that have been circulating about it being a bumper year for slugs and snails because the mild Winter didn't kill them off, my brassicas are almost completely untouched.


No-one could be more surprised about this than me. I have come to expect a certain amount of damage; it's normal. I haven't used any different slug-control tactics this year. As usual, I have protected my plants with the blue slug-pellets. They are usually fairly effective, but seldom 100% so.


I have not lost any brassica seedlings to the Cabbage Root Fly this year either. Normally I lose about 20% of my seedlings and have to replace them with spares raised specifically for this reason, but not this year. Last week I applied the nematodes that I normally use to reduce the incidence of Cabbage Root Fly. I had been thinking I had left it a bit late, but as it happens the nematodes were probably unnecessary. Why? Were my home-made brassica-collars super effective? I doubt it.


Even the Kale plants, which have had no protection at all are (at this minute) still in near-perfect condition!


Could it be that my brassicas have been stronger, quicker-growing and more pest-resistant than previously? It's possible. To the soil in which they are growing I added four different types of nutrient-booster: home-made garden compost; "Growmore" general-purpose fertiliser; pelleted chicken manure; and Seer Rockdust. To be fair, I always use 3 of those 4. The new one is the rockdust. I'm always a bit sceptical about the claims of vendors of products like this, but on this occasion I'm inclined to say that I think it has made a difference. Just look at the size of these cabbages:


Considering the fact that they are really still little more than seedlings, and have not even begun to heart-up, they are enormous. I planted 12 cabbages in 2 rows of 4, but I'm beginning to think it was too many! This closer view also allows you to see that the leaves are still pristine, with not a hole to be seen.


Is this too good to last? Is there some other dreadful problem that will take down my cabbages waiting for the opportunity to strike? Who knows. Gardening is always to a certain extent a gamble, and a crop is never successful until it's on the kitchen worktop! I live in hope.


Today I also want to show you how my finger carrots are getting on. "Finger carrots" are ones that are harvested small (finger-sized!) rather than grown for bulk. I grow some each year in a raised wooden container outside our kitchen window. As you will see here, the carrots are in black plastic crates, protected by Enviromesh from the dreaded Carrot Root Fly:


The crate on the right is a bit behind the one on the left, because its first batch of seeds failed to germinate (it was an old pack). The carrots in the left-hand crate look pretty good though.


I deliberately sow these carrots very thickly and don't thin them out, because they don't need much room to develop and they will be very slim even when mature. You'll have noticed that I have not taken the mesh off for the photographs. I'm not taking any chances, you know. The fewer opportunities the flies have of sneaking in, the better! Nets are the key to vegetable-raising success in my part of the world, that's for sure.

Saturday, 28 May 2016

The prospect of peas

This year I'm having another try with peas.


In the past whenever I grew peas they were a disappointment - small crops, and big problems with mildew. Pea-moth grubs were sometimes an issue too. I see this as a challenge though: I must do better! Since I last grew peas (probably 6 or 7 years ago) I have improved the soil in my raised beds a lot; in fact I have improved the raised beds a lot! The new-pattern beds are much deeper and thus retain moisture better, which I'm sure the peas will welcome.


My peas are also in a bed that has never had legumes in it, and is sited away from my main patch of six raised beds, which means that it will be in a different "micro-climate" area. I think the incidence of mildew is increased when ventilation is poor, so I have tried not to over-crowd the plants. I had also read that the application of volcanic rock-dust reduces the chance of mildew, so I added some of that Seer Rockdust that I bought. All these are factors that may contribute towards success. So far, things are looking pretty good, and the plants seem very healthy. There are flowers on them, so the prospect of eating home-grown peas is now real again.


A couple of days ago I removed the chicken wire that had been protecting the peas and their attendant beetroot plants, because the peas were beginning to grab hold of the wire. If the wire were to remain in place it would be very difficult to pick the pea-pods, so off it came. Unfortunately the badgers and other nocturnal creatures like to root around in the soil at the edges of the raised beds, so I have done my best to protect the little beetroot plants by creating a forest of sticks. It might work...


The beetroot is far from ready, but it looks OK so far. Fortunately the foliage on the peas is relatively sparse, so even the row of beetroot in the centre seems to be getting enough light.


This is the first actual pod to form. It is on one of the "Douce Provence" plants:


So far the twiggy pea-sticks I used are proving sufficient. Now that the plants are flowering I don't expect them to get much taller. The metal posts I installed are there in case I need to add a few strings for extra support, but at present it doesn't look as if they'll be needed.


Hopefully before very long I will be reporting a harvest of peas. I wonder if any of them will make it as far as the kitchen...?


The Bluetits have fledged!

The baby Bluetits from our nesting-box have fledged today!


This one is evidently very bemused. His parents are frantically dashing to and fro, and chirping enthusiastically to encourage him to fly up out of harm's way. Flying downwards is probably relatively easy, but flying upwards is more difficult!


We first suspected that something was going on when the two parent Bluetits started screeching wildly and dive-bombing a cat that was wandering through the garden. A newly-fledged Bluetit would be an easy target for a cat. Last year I found two Bluetit baby corpses in the garden. Let's hope they are luckier this time!


Friday, 27 May 2016

Potting-on the chillis

I have chilli plants at lots of different stages, but the majority of the ones I am growing from seed this year (as opposed to ones kept from last year, or given to me by other people) are at the point when they need to go into their final containers. I use 10-inch pots for chillis (occasionally a 12-inch one if there are some spare). Chillis definitely adjust their size to the pot in which they grow: give the plant a small pot and it will never grow big. If you want big chilli plants, give them big pots!


The tall one at the back (centre) is my solitary Turkish Bell Pepper plant. The others are chillis.

The black pots in the photo above were originally marketed as "Florist's buckets" at Morrisons supermarket. I bought them in batches of 8 pots for 99p. A few minutes' work with a drill to put some drainage holes in makes them ideal for my needs.


"Ring of Fire" in Florists' bucket


I also have 3 pots (the green, lidded, one in my photos here) which I bought a few years ago as tomato pots. They proved too small for that purpose, but they are good for chillis. They have a removeable perforated internal base which stands up a couple of inches from the bottom of the pot, effectively creating a water reservoir, and they also have detachable covers to assist with minimising water-loss from evaporation. I am using 2 of them for the Challock Chillis I am trialling. I have planted one in that "Sylvagrow" peat-free compost, and one in John Innes No.2, so it will be interesting to see if they perform differently.


After my bad experiences with contaminated or just generally poor-quality multi-purpose compost, I am using John Innes No.2 for most of my chillis this year. It supposedly contains nutrients for at least 6 weeks, and I shall be feeding my plants with the usual "Tomorite" tomato-feed anyway, so I'm hoping for decent results. The John Innes No.2 is a mix of loam, peat and grit and it has superior drainage to most multi-purpose composts. Of course it costs a bit more, but it's probably going to be worth the extra expense.


Until now, the chilli plants have been in 6-inch pots, which are OK for a couple of weeks to perhaps a month, but after that time the plants are going to be too cramped in them. I find that the best stage for transplanting is when the plants are about 6 to 8 inches tall - maybe a little bigger in some cases. This one is about the right size:


"Purira"

Whereas this one is definitely too small.


"Scorpion"


Planting a tiny chilli into a big 10-inch pot seldom produces good results (It's almost as if they are intimidated by the size!), but an 8-inch plant seems ideal. I put a fairly thin layer of compost in the bottom of the big pot and then the plant goes in with as much of its rootball as possible intact. Hopefully the plant will be quite low down in the new pot and when you back-fill with compost it will be deeply buried. This will promote strong root growth, as well as making it more stable.


After re-potting I give the chillis a little drink of water to help them recover from the shock of transplanting, and then put them under cover in one of the plastic greenhouses where they will be nice and warm.


Over the next few days I will gradually acclimatise them to living permanently outdoors.


Now I have to go and buy some more compost - I have lots more chillis to pot-up!

Thursday, 26 May 2016

Lettuce

Lettuce is one of those plants that has sometimes had a bad press. It is often perceived as dull and boring, but it really isn't. There are loads of different varieties, with many different colours, shapes and textures to amuse the eye, and let us not forget that Lettuce is usually the heart of most good salads! Even if you didn't want to eat them, many Lettuces are hugely ornamental and look just as good as flowers in the garden border.


I have grown lots of different Lettuce varieties in my time, and as with other crops I have identified a few favourites that I grow again and again, but I'm always eager to try some new ones. Over the last couple of years I have exchanged seeds a couple of times with a friend called Dominka in the Czech Republic and the Lettuce seeds she has given me are amongst the best I have ever grown. They just seem to like the conditions in my garden. The ones she has sent me are Cervanek, Devin, Dubacek and Redin. Here are photos of those for you:

Cervanek

Devin

Dubacek

Redin

One of my favourite Lettuces is Fristina, a deeply-serrated green one. I think one of the reasons I like it is that it reminds me of Curly Endives (which I love, but struggle to grow in the Spring / Summer).

Fristina

This is Little Gem, one of the most widely-encountered Lettuces in our country. You see millions of them on sale in the supermarkets, but it's still a very popular one with home gardeners - me included.

Little Gem

Little Gem is a smallish Cos or Romaine type. Its outer leaves are usually discarded in favour of the crunchy inner ones. The specimen seen in my photo is an immature one, and the heart has not yet developed.

This next one is Tom Thumb, a very compact (small!) variety, well suited to small gardens like mine. It is one of those grown from seeds kindly sent to me for review by Marshalls. It is officially a Butterhead variety, but the heart is very dense, and the leaves are quite robust - almost like Little Gem, actually.

Tom Thumb

In the photo of Tom Thumb, above, you can also see a couple of seedlings of Ice Queen, which have been grown from seeds gifted to me by my chilli-growing friend Chris. I have yet to harvest any mature ones of this variety, but they look promising.

This one is "Yugoslavian Red", grown from seeds sent to me by another new friend - Elza, originally from Bosnia, but now living in the Netherlands. Again, I haven't had any mature ones yet, but it looks like a very handsome Lettuce.

Yugoslavian Red

If you want dramatic looks in your Lettuce, try this one - Amaze. It is a red Gem type, something like Little Gem. It has deep red outer leaves, but the inner ones are light green, verging on yellow.

Amaze

By the way, all the Lettuces pictured above are growing in my garden right now. Only a few of each or course. With Lettuce there is only so much you can eat, and it doesn't lend itself to preservation, so it makes sense to sow little and often. That way you always have some available, without having a glut.


I also want to make mention here of another favourite which I am currently not growing - Webbs Wonderful, a big Iceberg-type Lettuce. This one has a special significance for me, because it is the one that my Dad always liked to grow. Its size is a problem for me; with its outer leaves on it's about two feet across, so I can never squeeze many into my little plot.

Webb's Wonderful

Of course, the outer leaves are always removed, leaving the dense crunchy heart inside.


Webb's Wonderful

As you will have gathered, I like to grow plants from seeds given to me by friends, sometimes as part of an informal seed-swap. I'm not really sure why, but it's something to do with the "social" part of  using the Social Media, of which blogging is a significant element.

Wednesday, 25 May 2016

Re-potting Leeks

My Leek seedlings have been growing very slowly indeed, something which I attribute to two factors: poor compost and over-crowding.


The seedlings in two of the three pots seen in the photo above were sown on March 5th, and yet they are still tiny. The ones in the pot on the right were sown a month later, on April 5th, so it's not surprising that they are a lot smaller. The "Toledo" Leeks in the pot seen below are definitely suffering from lack of space.


So, I decided that re-potting was called for. I carefully tipped out the seedlings, complete with their compost, onto my potting-bench. As I suspected, the old compost was compacted, wet, clammy and "lifeless". (It was mostly that multi-purpose compost from Wickes). I separated the seedlings and carefully removed the old compost from around their roots, before re-potting them in fresh (and better) compost. This time I used some Levington's John Innes No.2 compost, which has a significant grit content, so it drains better.


I planted the Leek seedlings nice and deep, carefully pushing their roots well down into the planting-holes, and made sure there was about an inch between each one and the next. I found that the pot of "Toledo" seedlings had contained 23 plants, so I distributed them among two pots.


There were only 7 useable plants of "Apollo". For some reason (I think poor compost) many of the seeds I sowed didn't germinate, and several of those that did were really stunted and never grew properly at all. The 7 plants went into this nice tall green pot, recently released from tomato-growing duty, which will allow the Leeks to put down long roots.


There were 16 of the smaller "Winter Giant" seedlings. 11 went in one pot and 5 in another, seen at left in the photo below.


Right, so now I have 46 Leeks, which will be plenty for me. I will probably only have space to grow about 24. They are going to go in between my rows of Parsnips. Having been re-potted like this, I'm hoping they will buck their ideas up and be ready to go into their final positions by about the end of next month.