Tuesday 30 January 2018

Over the hump

If I had to describe in one word how my plot looks right now, the word I'd choose is "bleak".


It's almost colourless, and if it has any colour at all, that colour is grey. Very uninspiring. And it's still full of soggy leaves, though fortunately the wind has done me a favour and swept them up into piles - dropping me a heavy hint, I think!


The bulbs are beginning come up in the borders now, but they have a layer of leaves to push through before they reach the light..


Looking at a garden like this can be very depressing, and I can easily understand how someone less keen than me would just give up and conclude that gardening is a mug's game!

However, I've been through all this before, and I know that by the end of January we are "over the hump" in terms of the weather, and from now on the general trend is one of improvement - longer days and gradually increasing temperatures. Indeed, looking more closely, I can find lots of encouraging signs already. For instance, after a very long wait, the Purple Sprouting Broccoli (one of my favourite vegetables) in nearing maturity:

PSB "Red Spear"

I have one plant each of four different PSB varieties, which allows me to extend the cropping season to a couple of months at least.[Summer-maturing varieties are available too - I just haven't grown any.]

L to R: Rudolph, Red Arrow, Red spear, Early Purple Sprouting

The biggest of the four is "Rudolph" (at the left in the photo above), which is supposed to be the first to mature, though it seldom is. At present it has lots of shoots forming, but they are a long way off ready still.

Flower-shoots forming on PSB "Rudolph"

There are still quite a few Radicchio to be harvested. They have mostly been quite small this season, but I had lots of them so there has been no shortage of salad during the Winter.


The Endives are nearly finished though. I'm surprised they have lasted this long, because they are usually killed off by a severe frost - and we had a few of those.


Still on the salad front, I have two pots of over-Wintered Lamb's Lettuce / Corn Salad. The plants are looking pretty bedraggled, but they're definitely alive. In the hope that they will soon begin to put on some more growth I have tidied them up and moved them into two of the plastic mini-greenhouses, for a bit of extra protection. I don't know why I didn't think of this before, because those greenhouses have been vacant since the last of the chillis went to the compost-bin in early November!

Lamb's Lettuce - BEFORE tidying-up!

This is currently the most attractive of my salad plants - Watercress.


This particular Watercress has been grown from a few sprigs that I "foraged" from the nearby Basingstoke Canal. It is growing in very damp compost. We have already eaten some of it and I have also just planted-up another pot with a few sprigs taken from the first plant. As you can see from the photo, they currently have the luxury of a space in my big wooden coldframe - and seem to be making the most of the extra warmth that this provides.

I only have one pot of Leeks left, and I don't think they are going to grow much bigger, so I'm thinking they should be harvested within the next few days, even if they have to be "Baby Leeks" when presented in the kitchen.


Another member of the Allium family is beginning to put in an appearance now - some very welcome clumps of Chives are popping up in the Herb border. They grow pretty quickly once they get going, so it won't be long before we can snip a few.


In similar fashion, the potted bulbs I planted in the Autumn (Tulips and Daffodils) are growing rapidly, and I shall soon have to remove the wire grilles that I put over them to discourage the "nocturnal diggers".


There aren't many flowers to be seen in my garden at present, but that will soon change because not only will those bulbs be coming into flower, but so will the Hellebores:

Hellebore plant in bud

Hopefully there will be a better display of Hellebores this year, since I re-distributed quite a few self-sown seedlings last Spring. Hellebores self-seed very readily, and my stock of plants is therefore steadily increasing. It takes a long time for a Hellebore to produce flowers (usually at least 2 years after seed-germination - which can also take several months), so you have to be patient.

One tiny splash of colour is provided by this solitary Calendula flower, bravely blooming despite the adverse weather.

Calendula flower - one of "Flighty's Favourites"

It will be a while before any of the potted perennials come into flower, but at least many of them have been protected from the worst of the weather in my two coldframes.


I'm trying hard to resist the temptation to get on and sow seeds, because I know full well that (with a few exceptions like Broad Beans and onions) it's too early for that. Seeds sown in January and early February often end up weak and spindly because they don't get enough sunlight. It's usually better to wait a few weeks. Plants from seeds sown later are usually stronger, and usually catch up the ones sown very early, so most of my seed-sowing is done in April.

Right now my priority is on tidying-up the garden - removing old leaves, twigs and miscellaneous debris - and I really must empty my other compost-bin. I need the compost for the raised beds, and I need the space in the compost-bin for all those old leaves!

Sunday 28 January 2018

Seed-potatoes

Just for the record (mainly for my own benefit), this is a list of the potatoes I bought yesterday at the Hampshire Potato Day. (Skin colour is shown in brackets.)


First Early
Foremost  x 5 (White)
Annabelle x3 (Yellow)

Second Early
Juliette x 3 (Yellow)
Charlotte x 3 (Yellow)

Second Early / Early Maincrop
Sarpo Una x 5 (Pink)
Nicola x 3 (Yellow)

Maincrop
King Edward x 5 (White with red eyes)
Setanta x 5 (Red)
Maris Piper x 5 (White)
Desiree x 5 (Red)

This year I am going to be experimenting with growing Maincrop varieties, something I have not done before (with the exception of "Pink Fir Apple"). This is because I now have the use of a lot more space, at the new plot in Courtmoor Avenue. I would not have chosen "Foremost", which doesn't sound very good, but the owners of my new plot wanted me to grow them. They do have a reputation for good taste (the potatoes, I mean, not the plot-owners!), so that's a point in their favour, but their yield is described as Average and their disease-resistance is rated as "Low".

At the new plot I plan to plant three rows of potatoes, two of Maincrops and one with the First / Second Earlies. There are going to be 10 seed-tubers in each row. All the ones in my list shown as x5 are the ones for the Courtmoor plot.

Back in my own garden I will again be growing potatoes in containers, though rather fewer than before. They will all be First or Second Early varieties, the ones shown as x3 in the list. The reason why I have gone for 3 of each is that I intend to do a comparative trial, growing one pot of each with two seed-tubers in it, and one with a single seed-tuber. This is aimed at establishing whether planting two tubers does actually increase the overall yield or not.

Right now, my potatoes are sitting in a cool spare bedroom, ready to chit. I don't expect to be planting them for a few weeks. However...


As well as the potatoes I bought yesterday, I do also have a few tiny specimens that I rescued from the Courtmoor plot during the course of my ground-preparation work. I don't know if they will be any good (they are probably "Foremost" - see comments above), but I have set myself a mission to provide some continuity on the new plot, attempting to preserve as many as possible of the varieties that have been grown in that garden before, using self-saved seeds. So far I have Runner Beans, French Beans, Shallots and Potatoes (others may come to light). I don't know if any of them will be viable, but it will be fun finding out! Actually, some of them don't look too bad.


My intention with these "survivors" is to grow them in containers in my own garden, giving them as much TLC as possible, and then if they are any good I'll give some to my hosts at the Courtmoor plot, and keep some others as my breeding stock, so to speak. There's a long way to go before then though!

Friday 26 January 2018

Growing potatoes in containers


Most people think that growing potatoes needs a lot of space. It doesn’t. You can grow potatoes on a patio or balcony or in the smallest of gardens, if you use suitable containers. Potatoes are easy to grow, and deliver good value for space. Furthermore, there are few things in life more satisfying that digging-up a crop of lovely home-grown potatoes!


"Juliette"

Apart from the space factor, there are a number of advantages to growing potatoes in containers. For a start, you can position them wherever you want – for instance somewhere sheltered and unobtrusive until the shoots appear from below soil level, and then somewhere else in fuller sunlight when the foliage gets big and luxuriant, and finally back in the first location again once the foliage begins to die down. Growing in containers also aids crop-rotation too. Of course you can also grow potatoes very successfully in raised beds, but you won’t get the advantages I just mentioned. Harvesting the crop may also be more difficult in a raised bed if it contains other plants as well as your potatoes. Another disadvantage is that in a raised bed it may be difficult to ensure that you harvest ALL the potatoes. Any little “tiddlers” you leave behind may pop up next year in a place where you don’t want them, and can also harbour pests and diseases. With container-grown potatoes it is much easier to avoid these problems.

I wouldn’t want to give the impression that growing potatoes is guaranteed to be 100% successful, but I think most failures are due to insufficient care. Containers can be hard to maintain at the correct level of hydration, so need to be inspected often. The soil/compost in them needs to be kept moist (but not wet) all the time, so frequent watering is probably going to be necessary. If the soil becomes too wet the potatoes may rot, but if it’s too dry you will get a very small crop which will most likely fall victim to the common skin-disease called Scab. Small containers dry out quicker than large ones, and so do ones made of breathable materials (such as terracotta or wood). Plastic ones are better for moisture-retention. Even plastic ones will need holes for drainage though, to avoid waterlogging. After many years of experimentation, I have settled on a type of container which I consider to be ideal. It is made of tough black plastic and will probably last many years; it has carrying-handles for ease of movement; it has several drainage-slots; it is affordable (I paid about £2.50 each); and it has a nominal volume of 35 litres, which is just right to accommodate two seed-tubers of the Early varieties or one of a Maincrop variety.


So, having acquired some suitable containers, what next? Prepare your growing-medium. For convenience I’ll refer to this as “compost”, but it will probably be a mixture of compost (home-made or bought) and garden soil. I have found that potatoes do best in compost that has a high level of organic matter, which aids moisture-retention and lessens the risk of Scab. Some of the best potatoes I have ever grown were raised in composted stable manure!

Next, prepare your seed potato tubers – perhaps by chitting them, which will give you quicker results after planting. Chitting means leaving your seed tubers in a cool, light, frost-free location and allowing them to develop shoots or chits. These chits should ideally be short (an inch or two), and dark-coloured, not long pale and spindly. Opinions vary concerning the merits of chitting, but I do use this method – simply because it works for me. I also recognise that potatoes will grow quite successfully without going through this process. It just means that they will take longer to push through the compost after planting.


So, assuming your seed tubers are ready for planting...

Put a 2-inch (5cm) layer of compost into the bottom of the pot. Sprinkle on a generous handful of pelleted chicken manure or proprietary potato-food. Cover the fertiliser with another 2-inch layer of compost.

Place your seed potato tubers in the compost, with the “Rose” end (the one with the majority of the shoots) facing upwards. Settle them firmly but gently into the compost. If the compost is very dry, water it with a watering-can equipped with a fine rose, but don’t make the compost very wet. Cover the potatoes with compost to a depth of approximately 2 inches.


Place the containers in a sheltered spot (you may wish to cover them with wire mesh or something, to dissuade animals from digging in them!) and wait. Inspect the containers every couple of days.

Once you see the shoots emerging above the compost, cover them with another layer of compost. Keep repeating this until the top of the container is reached. You may need to start watering at this stage too.


Once the leaves begin to open out, most of the work has been done. From this point onward it’s just a case of keeping the containers properly hydrated, so you need to check this every few days. Be aware that potato plants can get quite big!


The foliage of potatoes can easily be damaged by frost, so if cold weather is forecast, it is a good idea to give your plants some protection – perhaps with horticultural fleece, or even some layers of newspaper. Mine have the luxury of some little plastic greenhouses, which have zip-fastened openings in the tops so that they can be opened or closed according to weather conditions.


First Early potatoes are normally ready within about 10 weeks from planting. Second Earlies normally take about 13 weeks, and Maincrops about 20 weeks.


Elapsed time is only ever a rough guide, so how do you know when the potatoes are ready for harvesting? One sign that viable tubers have formed is the appearance of flowers on the plants. This is not a foolproof indicator though, because not all varieties produce flowers. A better indication is that when the tubers are mature the foliage (sometimes called “haulm”) begins to go yellow / brown, flops over and dies down. It the foliage is still upright, then the plant is still growing. Some people like to leave their potatoes until the foliage has completely died down, to maximise yields, but I prefer to harvest a bit sooner so that the potatoes are only just mature, and hence not too densely-textured. This particularly applies to Early varieties, which are definitely best harvested young.


One of the benefits of growing potatoes in containers is that harvesting is incredibly easy: you just up-end the container and tip out the contents. I usually do this over an old groundsheet so that I can spread the compost around to help me find every last little potato.


You might be wondering what is a typical yield from a tub of potatoes. I find that I get something like 500 – 700g of new tubers from each seed tuber (I grow mostly Earlies), so if I plant two per tub that means I get about 1 to 1.4kgs per tub. Each seed tuber usually produces at least 10, sometimes as many as 25, new tubers, depending on variety. Some produce lots of little tubers, others make fewer but larger ones.
"Kestrel"


In my little garden I don’t grow enough potatoes to make long-term storage an issue, but if you do grow a lot and want to keep them, then the groundsheet will come in handy again – spread the harvested tubers on the groundsheet and place it in sunlight for a few hours until the potatoes have dried sufficiently to allow you to brush off any remaining compost. By this time the skins will have dried a bit too, which will help them to keep longer without becoming wrinkly. Then place the tubers in breathable containers (such as hessian / burlap sacks) and store them in a cool, dry dark place – hopefully out of reach of rodents!
"Red Duke of York"


I hope this little article has been of use to you, but if you have any questions about my growing-method, please get in touch and I’ll do my best to answer them. 

NOTE: A version of this article also appears on the website "Diary of a Brussels Kitchen Garden". If you don't already know this site, I strongly recommend that you take a look at it, because it contains a lot of very useful and interesting content aimed a gardening in small (and especially urban) spaces.

Tuesday 23 January 2018

Success with Parsnips (or not)

The Parsnip, like the proverbial Marmite, is a vegetable that people seem to either love or hate.


I'm in the former category. I have some reservations though: Parsnips "boiled to death" are horrible, and I can see why someone would say they didn't like Parsnips if that was the only way they had ever tried them. By contrast, Parsnips roasted in some lard until they are golden are amazingly good, and cooked as chips in our Actifry machine they are as the saying goes "To die for"!

Parsnip chips cooking in the Actifry

Of course they are even better if you grow them yourself, and cook them soon after harvesting.

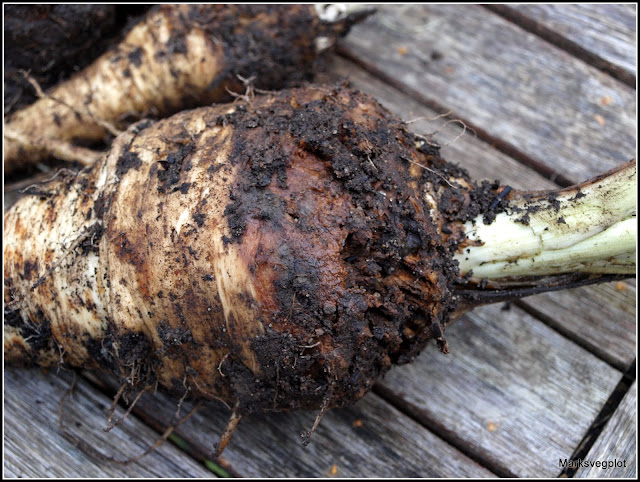
In my experience though, growing Parsnips is not as easy as it might be, and certainly not always successful. Over the years I have grown some shockingly-bad Parsnips... Sometimes they are "forked" like this one:


Sometimes they suffer from the dreaded canker disease:


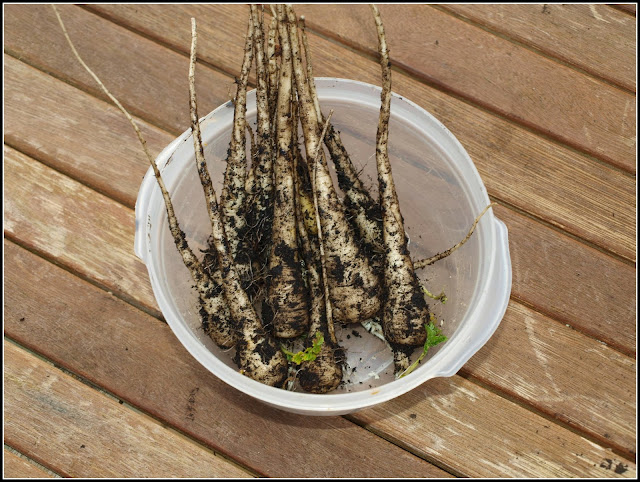
Sometimes they are just too darned small:


On the other hand, I have also managed to grow a fair few competent specimens:


So what is it that makes the difference between success and failure with Parsnips? Here are some tips that might help.

The first thing to note is that Parsnip seed is notoriously short-lived. Two-year-old seed will probably be OK, though at a reduced germination-rate, but if you want to maximise your chances of success, buy new seed every year.

Parsnip seed also takes a fair while to germinate (a month is not unusual), and it's pointless sowing it too early in the year, before the soil has warmed up. They need a temperature of about 12C / 52F to germinate. I live in Hampshire, in the South of the UK, and I normally sow mine under cloches in late March, but to be honest late April or early May would probably be better.

Parsnips don't seem to be fussy about soil conditions, and many people grow them very successfully on some pretty rough ground, but I grow mine in raised beds which have been intensively cultivated for years and in which the soil is very light and stone-free. Parsnips are quite prone to forking (i.e. developing multiple roots instead of just one), so anything you can do to reduce this will be welcome - for instance removing stones and adding sand to the soil, but not manuring it. Too much nitrogen (e.g. from fresh manure) prompts the plants to produce a lot of soft leaf and not so much root.

Parsnips are not generally well-suited for growing in containers, but if you want to have a try, I suggest you choose a short-rooted variety, such as "Guernsey Half-Long" or "White Gem". Many of the larger varieties produce roots that go down at least two feet, sometimes more.


Spacing is also fairly important. If your Parsnips are too crowded the roots will inevitably be small. Of course, that may be what you want, but most people prefer a smaller number of bigger roots, so I propose a spacing of no less than 6" / 15cm between plants. I have found that Parsnips don't like being transplanted, so it is better to sow directly into their final position, or into modules that can be planted-out without root-disturbance. A Parsnip seedling transplanted "bare-root" style seldom develops to a useable size, so it is a waste of time trying to fill any gaps in your rows. It's better to sow thickly and thin-out once you see how many germinate.

Once your plants have been thinned-out to your satisfaction, there is little else to do, except watch them grow. If the weather is very hot and dry, some watering may be necessary, but since Parsnips have such long roots they can reach a long way underground in their search for moisture. If you do end up watering, remember that an occasional good soaking is better than more frequent light sprinkling.

Your Parsnip plants will probably develop some pretty big leaves, but don't let that deceive you into thinking they are ready for harvesting. Parsnips are naturally biennial, which means they put on most of their growth in their first year, and store their energy in a swollen root which is used to produce a flower in the second year. We short-circuit their system by "stealing" the roots before they have a chance to flower. When the roots are ready for harvesting the leaves will have died down more-or-less completely. This is likely to be in late Autumn or early Winter. Tradition dictates that we should not harvest before the first frosts, since frosting helps to convert starch to sugar and makes for sweeter Parsnips. Over-Wintered Parsnips will begin to re-sprout in the early Spring and you need to use them ASAP if you see that happening.

Parsnips growing in a raised bed, protected by Enviromesh

Parsnips lend themselves to being picked on an "as required" basis, and unless you really need the space, it is best to leave them in the ground until you want to eat them, rather than lifting them all at once. Since the foliage dies down so completely, it might be a good idea to mark their location with a few sticks, especially if snow is expected.

Most of the Parsnip varieties I have grown claim to be "canker-free" or almost so, but I have not found that to be the case. Almost every year my Parsnips get canker to a certain degree. Usually this fungal disease is not too severe and causes only mild disfigurement. Unless you are growing the vegetables for showing, I think it is not something to worry about. If I knew what causes it, I'd tell you how to avoid it! The unsightly brown lesions are usually only skin-deep and are removed when peeling the vegetables for eating.

This level of canker-infestation is not unusual

Finally, a word about choice of varieties. There are plenty to choose from these days, and in the seed catalogues they all seem to be described as "the best ever". My own personal preference is for the old-fashioned ones (i.e. the ones that have stood the test of time!) like "Gladiator", "Hollow Crown" and "Tender and True". This is because although they may perhaps not be as sleek, white and good-looking as the modern F1 varieties, they generally have better taste - and after all, that's what most of us want from home-grown veg!

There's one other factor that I want to mention, which has a big influence on the quality of my Parsnips - Luck! (Actually, it's more likely the weather). I use more-or-less exactly the same methods each year, and sometimes I get poor Parsnips and sometimes I get great ones. I therefore wish you loads of luck with your Parsnip-growing ventures...


Friday 19 January 2018

What, where and why?

I have given this post the title I have because today I'm going to share with you some thoughts about what crops I'm going to grow this year, and specifically where and why.


The task of preparing my growing-plan is harder this year because I now have two areas to cultivate - my own garden and the new plot where I'm helping an elderly couple to keep their garden in good shape. Incidentally, the new plot is situated in a road called Courtmoor Avenue, so I shall probably use that name to refer to it.


This is me, digging. I'm getting lots of practice at this at present....


The Courtmoor plot is an unknown quantity, because I don't yet know very much about its soil quality, light levels, shelter from winds, ease (or difficulty) of watering, slug/snail population etc. The owners tell me that until a couple of years ago they used to get a trailer-load of manure delivered each year, so the soil ought to be pretty good. It certainly feels good - light and crumbly without being too dry. There are some quite big fruit trees in the garden (including a huge old Bramley apple), so shade could be a problem, but this is why I have chosen to cultivate the part furthest from the trees.


Courtmoor plot with large Apple trees - Bramley at Left. Notice position of green trug-tub.


Notice again the green trug-tub. The big Bramley tree is out-of-shot to the Left.


My own garden is of course much more familiar and I know exactly how it performs (I've lived here since 1991). It has its share of problems too - such as low levels of direct sunlight, a big tree in the neighbouring property which sucks out lots of moisture - and then there is the constant threat of damage by badgers and foxes, who often dig big holes if I let them! But its biggest advantage is that it's right outside my back door, meaning that I can tend to it whenever I like, at a moment's notice.


My own garden, with raised beds and open space for containers (e.g. for potatoes as seen here)


The Courtmoor plot is not far away (not much more than a quarter of a mile, I'd say), but going there will involve a conscious decision and a few minutes' walk, so it won't be like pottering around on my own property. I plan to spend about half a day per week there at present, possibly two half days at certain times of the year, such as during April and early May when lots of sowing and planting takes place.


My overall plan is this:- In the Courtmoor plot I'll grow low maintenance crops and ones that need more space, and in my own gardens I'll grow ones that require more attention, as well as ones that will do better in my raised beds - which are relatively easy to protect from animal and insect pests, using nets and mesh. I think it also makes sense to have the herbs and salad crops close to home, since these are things we often want on the spur of the moment.


So, here's the split then (first draft!)


Courtmoor plot:
Potatoes - including at least one Maincrop variety
Parsnips (very low maintenance)
Beetroot (ditto)
Leeks and possibly onions and/or shallots
Big brassicas - Brussels Sprouts and cabbages (will benefit from plenty of space)
Climbing beans (there is enough space for me to grow a few of several different varieties)
French beans (the plot-owners particularly like these)
Squashes (I have never found enough room or a suitable space in my own garden)
New Zealand Spinach (I've not tried this, but the plot-owners have made a special request for it)


My own garden:
Potatoes in containers - Early varieties. (Container-grown ones are easier to protect)
Salads, including at least lettuce, endive, radicchio and radishes
Herbs (often required in the kitchen at short notice)
Carrots (will need protection with Enviromesh - easier to provide in a raised bed)
Broad Beans (easier to support and protect in a raised bed)
Runner Beans (these need frequent picking during harvest period)
Purple Sprouting Broccoli (ditto)
Short-lived brassicas, e.g. Brokali and Calabrese
Tomatoes (high-maintenance and vulnerable. Will grow in containers as usual)
Chillis (ditto)
Asparagus & Rhubarb (perennials, already in permanent containers)


NB: These lists are not necessarily fixed! If you have any suggestions for a better distribution, please let me know.


By the way, I'm also thinking carefully about where to raise my young plants. In theory, many of them could be grown at the Courtmoor plot to save carting them to and fro, but I think I will probably raise them mainly in my own garden, where I will be able to supervise them more closely. Also, I already have all the necessary coldframes and mini-greenhouses at my own property.


A good selection of crop-protection 'hardware'.


Right, so those are the plans for now. Let's see how things actually turn out...

Tuesday 16 January 2018

Returning enthusiasm?

Hello, Dear Reader. Long time, no see!


Now that the days are lengthening again, I can feel my enthusiasm for gardening slowly returning. I'm fed up of looking out of the window and seeing bare trees and shrubs, empty raised-beds, and drifts of wet leaves that I should have cleared up in November. I want to be outside "doing stuff"!


Actually, despite not writing any blogposts since early December, I have not been idle. I have spent a fair bit of time preparing things up at the new plot I mentioned in my last post. For those of you who haven't seen that post, let me explain.... I have agreed to take over a portion of the garden belonging to some neighbours of a long-time friend. The elderly couple who own the property are no longer able to look after the garden and have called in help from other quarters. One chap cuts the grass; another prunes the tree and bushes, and I am now in charge of the veg-patch! They have said I can use as much or as little of the plot as I like, so I'm going to go easy to begin with and may expand later on. Fortunately, this new plot is only a few minutes' walk from my own house.


This is the plot, shortly after I started working on it.


Sorry about the poor photo quality - these were taken on my phone, on a cold December morning..


The bit I am going to use initially is the area on the right in the photo above. It is very roughly 5m x 20m.


You can see that I have already done a fair bit of digging - about half of the plot so far. The soil, which has been cultivated for decades, is lovely and light, with very few stones. The garden was in active use until very recently so has not had time to get really overgrown, and my digging is mainly aimed at removing a layer of grass and annual weeds. There are only a few perennial weeds - like dandelions and buttercups - but I notice a vigorous invasion of Couch Grass from the next-door garden, which is very dishevelled. I'll have to keep a watchful eye on that.


Since the photos above were taken, I have removed the enormous pile of weeds, prunings etc (which the owners had been intending to burn), and have dug a bit more, as well as removing last year's beanpoles. The beanpoles, I regret to say, were very old and rotten. They will not do for another year, so I intend to replace them with the 8-ft bamboo canes which I used to use at my own property until I acquired those Hazel poles last year.


Here's a view looking in the opposite direction, showing the bit still to be dug. There are some currant bushes along the fence at the Left, and a row of Raspberries in front of the shed. I may or may not take over the currants and berries, depending on how I fare with the rest of the plot. I intend to spend about half a day per week at the new plot, so I may not have the time to do everything I would like to do.


My initial plan for this plot involves growing some easy, low maintenance veg, such as potatoes, parsnips, beetroot and beans. The owners of the property have been repeatedly saving their own seeds of things like beans for many years and one of the first things I did was rescue some seeds from the last few remaining bean plants (French and Runner types). I don't know if they will be viable, because I only got them after the first frosts, but it's worth a try since their (un-named) ancestors have been grown in the very same garden since the late 1960s, so they are true Heritage Veg! Likewise, I saved a few shallots, which I intend to plant as soon as the weather conditions permit.


Meanwhile, back at Mark's Veg Plot....


Over the past couple of months I have done very little gardening. I just didn't feel inspired. Because of this, the plot is looking pretty tatty, and will require a fair bit of smartening-up. I have however continued to harvest a few veggies, like theses Parsnips, Carrots and Leeks:


Today I made a start on the tidying-up - I emptied one of my compost bins. This was necessarily the first step, since otherwise I would have had nowhere to put all the stuff I am going to clear up. Fortunately, it wasn't as bad a task as it might have been. Having been in the bin for the best part of 9 months, the material was a nice, fairly dry and crumbly texture, with only a very thin layer of unbroken-down stuff on the top.


For the time being I have put it into some big plastic pots (I bought several more of these in the Autumn).


The material from that one "Dalek-style" compost bin was enough to fill 8 of those pots. The others mostly still hold soil which I used last Summer / Autumn for second-crop veggies such as Leeks and French Beans. In a few weeks time I will mix the compost with the soil and re-distribute it, then I'll use it for growing my Early potatoes. The plan is to grow the Earlies in my home garden (in pots, of course) and to grow some Maincrop ones at the new plot. I'll also be growing at the new plot some potatoes of the variety "Foremost", a First Early variety which I know the owners of the property really like. I haven't specifically discussed this, but to me it makes sense to grow wherever possible types of veg and varieties that my hosts like, since I intend to share the proceeds with them. On the 27th / 28th January I will be visiting the Hampshire Potato Day as usual, to buy my seed potatoes - a few more than normal this year, of course.


I haven't sown any seeds yet, and it will probably be another month before I start my chillis (which are usually the first), even though I have my Growhouse in which to care for them. I'm also tempted to sow some onion seeds and maybe some early cabbages quite soon. To be honest, much depends on my level of enthusiasm. After a couple of months off, I'm not getting back into the swing of things just overnight, you know!


By the way, just in case you hadn't gathered this, in the last few months I have begun to take a much closer interest in another hobby, which is Fungi-spotting. If you follow me on Facebook or Twitter, you will see that I am forever posting photos of fungi - though you probably don't see all the zillions of other photos I post in two Facebook Groups that I have joined! You'll have to forgive me then if on this blog I make the occasional digression into the mycological world. To give you a flavour of this, here's a pic of some lovely Winter Chanterelles (Cantharellus Tubaeformis) which I picked some weeks ago...