Monday 30 September 2013

Harvest Monday - 30th September 2013

Well, September is just about finished, but my tomato harvest isn't!


The cucumbers are finally giving up. The plants look very tired. The leaves flop during the daytime, though they revive again overnight.


I hardly dare to think how many fruits they produced between them. It was a huge number. The ones being produced now are not prime specimens - mostly rather yellow and "weedy".


We have had so many cucumbers that Jane even made a batch of curried cucumber pickle this week, which I expect she will write about on her blog Onions and Paper.


This week I picked my pears. Actually, half of them picked themselves, in a manner of speaking. They fell off the tree, which I took to be a sign that they had reached maturity. It wasn't a very clever thing to do really, because two of them got bruised in their fall. Anyway, I picked all the others to save them from a similar fate:

"Conference" pears

It's not a lot of pears, is it? Still, it's better than no pears. The big one in the middle of the group is enormous. It weighs 280 grams. Pears like this are traditionally ripened indoors, so they have joined the multitude of tomatoes on the Dining-Room table.

A rather different crop that I picked this week was a couple of Brussels Tops (the ones I wrote about on Saturday). They are very much like Spring Greens, and they went very nicely with the venison we bought at the Farmers' Market on Saturday.


I have harvested my very last potatoes of the year - two pots of "Pink Fir Apple". At 1.6kgs, the yield was not bad, but several of the tubers were covered with scab. This makes them unsightly, but is not a major problem, since it is only skin-deep and can be removed by scrubbing the tubers before cooking. (Peeling PFA potatoes is not really possible, due to their very knobbly shape).


This week I'm not going to post a picture of Runner Beans, because I'm sure you are all bored of looking at Runner Beans. I have picked a few, though not many. I have also picked more chillis, and the basket of them drying in the airing-cupboard is gradually filling up.


My final harvest of the week is not one from my garden, but a wild one instead, from the local hedgerows: Sloes and Rosehips.


These have now gone into a batch of jelly, which I will write about soon.

That's it from me for this week. Why not visit Daphne's Dandelions to see what other people have been harvesting?

Saturday 28 September 2013

Brussels Sprouts - learning from a friend

I have only grown Brussels sprouts three times. The first time, many years ago, was a complete flop and I was discouraged, but last year I had another try and the results were a lot better. This year: Third Time Lucky maybe?


I am putting into practice a piece of advice given to me by my blogging friend David Offutt, who runs the website called The Gastronomic Gardener. He has told me that if you cut the tops and most of the leaves off the Brussels Sprouts plants they will put more energy into the sprouts themselves and thus produce a better crop. I thought this had to be worth a try.

I have only four plants. They are of the variety "Brilliant". For comparison purposes I decided to apply the "short back and sides" treatment to two of them, and leave the other two un-shorn. This is what they looked like just before their haircut:


I think you can easily see how the sprouts, clustered closely around the stem of the plant, might not get as much light as they would like:


The tops of the plants are very cabbage-like, and we always eat them. This year we will be eating some of them a bit earlier than usual!

Before

After

The bit we are going to eat

After the job was done, this is what the plants looked like:


You can see the sprouts more clearly here, and you will note that they are not yet very big. Hopefully they will get bigger in the next few weeks - especially since they will receive more light.


Naturally, the trimmings were not wasted. They went into the compost bin, where the worms will no doubt feast upon them.

Just one more thing to show you today. A "blown" sprout. By this term we mean a sprout that has developed very loosely, unlike the normal tightly-formed ones.


They are edible, but not very pleasant because they quickly go mushy when cooked. Fortunately I have
only found one such sprout on my plants. It joined the trimmed-off leaves in the compost...

I'll let you know how the comparitive trial goes.

Friday 27 September 2013

Spring Onion "Perverse"

No, of course that's not the name of a variety of Spring Onion - it just describes a characteristic of my current batch of these temperamental vegetables!


Earlier in the year I sowed a "large handful" of Spring Onion seeds in amongst my Carrots, in the hope that they would help deter the Carrot Root Fly. Hardly any of them germinated - I think it was five. When the last of the Carrots had been harvested, I decided use the black plastic boxes in which they had been grown to try a batch of Spring Onions for Autumn harvesting, or possibly for over-Wintering. I just chucked in all the Spring Onion seeds I had, some of which were "White Lisbon Winter Hardy", some of which were the ordinary "White Lisbon" (i.e. the Spring-sown ones), and some of which were "Ishikura". I think it would be fair to say that I had no high hopes of a big harvest! 

This time LOADS of them have germinated:


I have seen several people write about Spring Onions being unreliable these days - for example Sue at Green Lane Allotments , who earlier this year said "I don't know what has changed, but Spring Onions always were easy to grow until the last few years when they have been very reluctant to perform". Certainly this has also been my experience of late. In my garden they germinate very poorly and rarely grow well.


Well, the big question now is, will they develop to maturity? Just to demonstrate their independence from me they will probably do really well! Are they saying to themselves "Thank goodness we have this place to ourselves now. Those Carrot folks really are awful!" ?

Of course, just for spite I could completely ignore them, couldn't I ? I mean, without me to water them would they survive in that little container? Their container is only one of several, I must remind them, and who's to say which are my favourites...?


No, in all honesty I'm glad these onions have made their appearance, and I shall do my best to help them to maturity. And if they do, I'll have the last laugh! (Chomp, chomp...)

Thursday 26 September 2013

Poached chicken with Bulgur

Here's a delicious meal to make when you're not in a hurry - like on a Sunday, when you have a bit of leisure time. It's an easy enough recipe; it just can't be cooked quickly!

Start by putting a whole chicken in a very big pan, along with a couple of litres of water and some flavourings. I used a "bouqet garni" made of the green part of a Leek in which I wrapped a Bay leaf, a sprig of Thyme and three sprigs of Parsley, all tied up tightly wth a piece of string. As well as this I added a carrot chopped into large chunks, three whole Cloves and about 20 crushed Black Peppercorns.


Now, put the lid on, bring the water the boil and then turn the heat down very low - so that the water hardly moves. Just the occasional bubble is all you need. Cook for at least 2 hours. I gave it 3.

You will end up with meat that is incredibly tender, and just falling off the bones. When you are ready to serve, very carefully lift the chicken out of the pan into a serving dish (one which will retain the juices and not spill everything all over the worktop!) Since I was only serving two people I just used the breast portions, but of course if you are serving more people then distribute the meat however you see fit. Anything that is left over can be used later on - for instance in some soup.

To accompany the chicken I decided to serve some bulgur wheat, of which we always have a packet or two in the storecupboard. It is a very handy ingredient - easy to use in any quantity you want, and quick to prepare. About 20 minutes before dishing-up time I cooked the bulgur with hot stock ladled out of the pan in which the chicken was cooking. It is important to judge the correct amount of water / stock to use. You can either cover the bulgur grains completely with hot fluid and then pour off any excess when the grains have swollen, or you can use a measured quantity of fluid and let the grains absorb it all. I used the latter method.

For extra flavour and some different textures I included with the bulgur some dried raisins and some pistachio nuts, which I wanted to soften a little in the hot stock. Then, when the bulgur had absorbed all the stock I stirred into it a huge handful of finely-chopped Parsley. Bulgur and Parsley seem to have a natural affinity! Feeling the need to have some additional vegetables, I added to the chicken pan some sliced Leeks, putting them in for the last 30 minutes or so. (In retrospect I think I would have been better off cooking them separately, because they went very soft and lost all their colour).

The final element of my meal is home-made tomato sauce. Very simple, but very delicious. Roast about 500g of tomatoes in a a deep pan, with some crushed cloves of garlic. When the tomatoes have been reduced to a soft pulp, pass them through a mouli-legumes or blitz them in a food processor so that you end up with what is basically a juice. I prefer the mouli-legumes, because it removes the pips and most of the skins from the tomatoes. If you don't own one of these, put it on your Wishlist! It's a really effective kitchen gadget.

Mouli-legumes

Now put the juice into a saucepan with some salt and pepper and boil it, stirring frequently, until it reduces by 50% and thickens. Et voila - tomato sauce!

Time to put it all together. Bulgur on first, arranged to cover half the plate. Leeks next-door. Then the chicken. Pour the tomato sauce over the chicken and garnish with toasted almonds. (Did I mention toasting some Almonds? Toast some Almonds. Don't leave it till the last minute). This is what the finished dish looks like:


Apart from the Leeks, which would have been better replaced by some crisp Little Gem lettuce, I was really happy with this meal. Beautifully tender meat complemented by a number of other different tastes and textures - especially the really rich and flavourful tomato sauce and the crunchy Almonds. Jane said that she would have been happy with JUST the tomato sauce and Almonds - but I think she was lying!


Wednesday 25 September 2013

Late September Tomato report

My tomato crop this year has been very good - the best for many years. Of course this is mainly due to the absence of blight, which normally takes a significant toll, but the hot Summer must also have played its part. Over the last few weeks there has hardly been a meal eaten in our household that has not featured tomatoes in some shape or form!

"Maskotka"

Those "Maskotka" tomatoes are amazingly prolific. Whenever I think they must be just about finished they produce another flush of fruit, which seems well-nigh miraculous considering the tatty state of the plants.

Tomato (and cucumber) plants looking very tatty now!

I pick their fruit very under-ripe, and ripen them fully indoors. This is because the plants are very floppy and the fruit often touches the ground, tempting the slugs to pinch them. The slugs go for the ripest fruit, so I get in there before them.

Slug-damaged tomatoes

Here's a little tip if you are also suffering slug damage to your tomatoes: if they nibble some fruit, don't remove them. Leave them there, because the slugs will keep on nibbling the same fruit(s). If you remove the nibbled ones the slugs simply start nibbling another one.

At the other end of the scale from "Maskotka", in terms of size, are my "Ferline" ones, some of which are huge.

"Ferline" - plant keeling over under the weight of fruit

"Ferline" is a slow grower, but it's worth the wait. The longer growing time gives them time to develop a very fine flavour. The fruit of this type is very good for cooking with. These four beauties weighed-in at a total of 786 grams.

"Ferline"

Another really prolific tomato is "Sungold", which produces huge trusses of tiny golden-yellow fruits:

"Sungold"

This year I have only one "Sungold" plant, but it seems intent on out-doing all the other types. Although I did pinch out its growing tip weeks ago, its side-shoots decided to "reach for the skies" and the plant is now so tall that I cannot reach its top:

"Sungold" is the middle one of these 3 plants

Right up at the top, new flowers and little fruits are appearing.


I rather fear they might have left it too late!

Elsewhere, my two "Cherokee Purple" plants are about to deliver some more ripe fruit. There is a definite tinge of colour in these:

"Cherokee Purple"
These will be especially welcome, since I think this type is probably the best of all the ones I have in terms of visual appeal.

Monday 23 September 2013

Harvest Monday - 23 September 2013

My harvests this week were mostly of the same things I have harvested for the past 3 or 4 weeks - Runner beans, tomatoes, chillis, potatoes and cucumbers - (not that that's a bad thing), but I also harvested the last of my beetroot, which is. No more home-grown beetroot till next June :-(

20 September harvest

Beetroot "Boltardy" - the last of the year

The Runner Beans just keep on going. This batch I picked on Friday weighed just over 900g:

Runner Beans - "Scarlet Empire"

I don't generally weigh my harvests, but just for curiosity I did weigh some of the tomatoes seen here - the little "Maskotka" ones. This batch was 600g.


The potatoes this time were a mix of "Ratte" (the last ones of this type for the year) and "Pink Fir Apple":


What can I say about cucumbers that I haven't already said??? They have been hugely successful this year.


Just for the record: my cucumbers are all grown outside, without the aid of a greenhouse. The best of my two varieties is "Melen F1", but the other - "Iznik F1" is also not bad. 

I haven't mentioned chillis yet. This is because I'm picking them in ones and twos as they ripen. The smaller ones are going into the freezer for later use, and the larger ones are going into a basket in the airing-cupboard which is doing duty as a de-hydrator. When I have enough dry chillis I plan to grind them up to make my own paprika.

"NuMex Suave Orange" and "Cyclon"


Sunday 22 September 2013

Serendipity

I went out to the Garden Centre today, specifically to buy a pot in which to plant the Soleil d'Or daffodil bulbs I brought back from Scilly. I knew exactly what I wanted: a blue glazed pot; fairly big; fairly shallow. I even took a "minder" with me to the GC - Jane. Her job was to give me a second opinion on the suitability of the to-be-purchased pot (and to dissuade me from buying other stuff that I don't need). In one respect, success was achieved:


I'm very pleased with that. Just what I wanted. However...

I accidentally bought this too:

Echinacea "Little Magnus"

Let me say in my defence:
  • The plant was reduced in price by 50%
  • I have been wanting to buy an Echinacea for ages (the white one I bought the other day doesn't count!)
  • Jane should have dissuaded me
No, the truth of the matter is that I feel no guilt at all!  This plant will add some much-needed colour to my garden next year. And further to add to the serendipity aspect of all this, when I got home and started to plant the bulbs in the new blue pot I found that despite the label on the bag that clearly said "20 bulbs", there were in fact 35 bulbs in the bag, and there was no way all those were going to fit into the one pot! Now the sensible thing to have done would be to pop back to the Garden Centre and buy a couple MORE pots, but I thought that might be pushing my luck too far, so I contented myself with planting the excess bulbs in some spare plastic pots formerly used for growing spuds.

Hedgerow Jelly

I'm not sure whether there is an official recipe for Hedgerow Jelly. In my opinion, the essential criterion is that it must contain ingredients foraged from the hedgerows. I associate it with early Autumn, when the hedgerows round us are teeming with free fruit. Here in Hampshire, the weather this past Friday afternoon was glorious - blue sky, sunshine, temperature about 18C - ideal conditions for foraging! Within the space of an hour I had gathered this:


Well actually not ALL of that. The apples are Bramleys from a domestic garden, which were given to me by a friend. (Thanks, Rosemary!)

These are the fruits, in close-up. First, Blackberries:


Then Sloes:


Then Elderberries:


And not forgetting the Apples...


I had a total of about 1.75kg of Blackberries, Elderberries and Sloes, and I matched that with an equal quantity of Apples. After washing, the fruit all went into our big preserving-pan, along with a litre of water. It's important to put all parts of the apples in, including the skin, cores and pips, because these contribute high levels of pectin (which Blackberries lack). It is the pectin that makes the jelly set.


Then the fruit was simmered gently for about half an hour until very soft.


Next the fruit has to be strained to separate the juice from the pulp. Fortunately we have a purpose-made jelly-bag, but if you haven't got one of these you could use a piece of muslin. Now the difficult bit - finding a means of suspending the jelly-bag above a bowl in which to collect the juice. I excercised my ingenuity and tied some pieces of string to the loops on the jelly-bag and then hung the whole thing from the handles of the overhead cupboards in our Utility-Room, like this:


"Necessity is the Mother of Invention" they say...

After straining the fruit overnight, this is the juice I had collected. It was 1.25 litres.


The next stage of the proceedings was to return the juice to the (washed) pan and add sugar. You need 450g of sugar to 500ml of juice (or a pound of sugar to a pint of juice). Heat the pan gently, stirring constantly, to dissolve the sugar crystals.


Then bring the mixture to the boil and boil it hard for as long as it takes to reach "setting point". This depends on the fruit, but could be anything between 5 and 45 minutes! Definitely an area where judgement is required... If you need advice on this, I suggest consulting Mr.Google. More conveniently, I had Jane to guide me!


It is very important to have a BIG pan (such as a purpose-made preserving-pan) if you are intending to make jam or jelly, because when the sugar comes to the boil the mixture expands about 100% (imagine what happens when your pan of milk boils over. See what I mean? With sugar it would be a lot worse!).

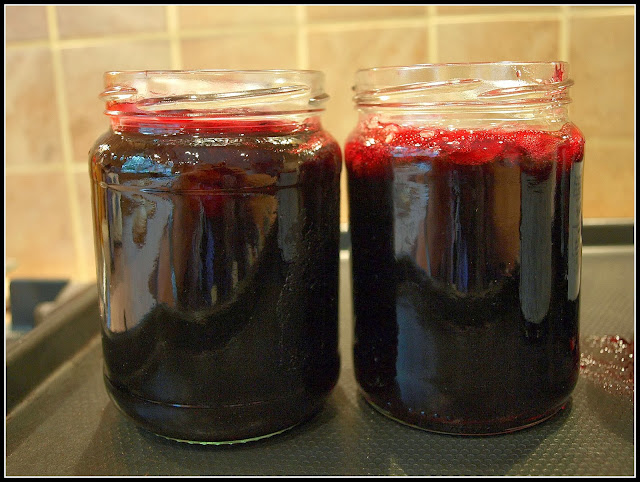
While the mixture is cooking, heat some jars in the oven so that you are not putting boiling-hot jelly into cold jars (which could cause them to crack). Heating the jars also sterilises them. Then, when the jelly has reached setting-point, let it cool slightly (only slightly; you don't want it to set just yet), and then pour it into the jars:


The final stage is to cover the tops with waxed-paper discs (you could use greaseproof paper, I suppose) and leave the jelly to cool. The waxed-paper discs help to prevent the jelly going mouldy during storage.

So there we are then. I now have five jars of beautiful dark, extremely tasty jelly. I'm tempted to describe it as "unctuous"!


Jelly like this is lovely to eat on toast, but is also a nice accompaniment to roast meat, especially game. I think I might just pop down to the butchers' and see if they have any pheasants...

Afterthought: poor old Jane will not be able to enjoy this jelly with me. Products that are 50% sugar are not good for diabetics! :-(  She took her revenge today, by eating Tuna-fish for lunch. Yuck!