Tuesday, 26 April 2016

What makes a good Tomato plant?

I have been growing Tomato plants for many years now, and the technique I use is basically the same every year, but still there are some years when I get good Tomato plants, and some when I get "Less good" Tomato plants. I'm not saying "Bad", because I have never had a complete disaster - it's just that some years are better than others. The biggest variable is of course the weather. Tomatoes like warm, sunny weather and if they get too little light or warmth they are liable to go leggy, in other words thin and drawn, aka "etiolated" like this:


 Having said that, if a young Tomato seedling is subjected to very high temperatures (say 30C+) for any length of time it can easily die. This is why whenever I put mine into the plastic greenhouses I watch the weather very carefully, and often leave the flaps open.


Tomatoes that have been grown well are usually what I would call "stocky" - not too tall and not too thin - and will have fresh-looking dark-coloured leaves. This one looks OK:


If the leaves are very pale, or have a dull matt look, then the plant is probably not healthy, and may be suffering from mineral deficiency, something often associated with poor compost. [Google "chlorosis" for further info]. Lots of the mass-produced composts available these days are basically rubbish (literally), and contain very few nutrients, and those can be exhausted in a matter of days. This year I sowed my Tomatoes in John Innes No.1 mix, rather than multi-purpose compost, and I'm very happy with the result. This type of compost is formulated specifically for seed-sowing of for very young plants. When I re-pot my seedlings into bigger pots (soon!), I will use John Innes No.2 mix.


My Tomato seeds were sown this year on 24th March, and spent their first few days ensconced in plastic bags in the airing-cupboard. Once they germinated I transferred them to the Growlight House (which provides lots of light but very little extra heat), where they lived for about 10 days. By this time they were about two or three inches tall, and had their first pair of proper leaves. At this stage I began to give the plants as much natural daylight as possible, initially on a windowsill, but then in the little plastic greenhouses. (See my April Hokey Cokey post). The gradual acclimatisation to outdoor conditions is paying off, because the plants now look really good:


"Grushkova"

The seedlings are sturdy, and brightly-coloured. Just what I want.


"Grushkova"


The only trouble is, the weather has taken a definite turn for the worse, with a succession of dull, windy, cold days and night-time temperatures hovering around zero or just above. I have had to keep the Tomatoes (and their Chilli friends) indoors all the time, and they won't like that.


You will have noticed that my Tomatoes are at present in those Elmlea pots. I like these because they are tall and thin, which has two advantages: first, it allows the seedlings to produce long roots; and second, it allows me to squeeze more pots into the Growlight House! Before many days have passed, I will move the plants into bigger (5-inch / 13cm) pots, in which I will grow them on for another couple of (possibly 3 or 4 ) weeks until the weather improves enough for them to go into their final homes, which will be these 35cm (13.8 inch) square planters.


Having gradually built up my collection, I now have 12 of these big planters (officially called "balconnieres", made by Stewart), along with four more of a similar but not so ritzy design, so I am going to be able to grow 16 decent-sized Tomato plants this year. Whether I will be able to resist the temptation to grow some more in less suitable containers remains to be seen!


Monday, 25 April 2016

Cabbages and Leeks

My Cabbages have all been planted now.


It's never going to be a massive crop - there are only 12 plants! However, with two each of six different varieties, the plan is that they mature in succession, providing a harvest over a long period. Two of them are a red variety called "Ruby Perfection", and (assuming they make it to maturity) they will probably end up being pickled.


As you can see, the individual plants are protected against Cabbage Root Fly by home-made cardboard collars, but the whole bed is also covered with netting to protect against birds and animals - specifically badgers. Surprisingly, my garden suffers very little damage from birds, even though Wood Pigeons are always present in abundance. I bribe them to stay away from the brassicas by putting out stale bread for them to eat.


In due course I am going to put three Brussels Sprout plants in the same bed as the Cabbages, in the centre, between the two rows. The Sprouts are still very tiny though and they must wait a while before transplanting.


Brussels Sprout "Napoleon"

Brussels Sprout "Bosworth"

Talking of being tiny, my "Toledo" Leeks are that too:


It will be a while before any of those are ready for transplanting! I also have some "Apollo" Leeks but for some reason they have developed very poorly indeed:


Both types of Leek were sown at the same time, in the same way, in the same compost, but "Apollo" has just not done much at all. Some of the seedlings never even straightened up.

My Reserves are these - a small batch of "Winter Giant", sown much later than the other two varieties.


My plan is to plant a few of each type of Leek, again so that they will hopefully develop at different rates, thereby extending the harvest period for me.

Sunday, 24 April 2016

Broad Beans and Radishes

As you know, space in my garden is strictly limited, so I have to think carefully about getting the maximum yield from it. I often use the technique called "inter-planting", aka "under-cropping". This simply means planting two (or more) crops in more or less the same place, at the same time. My Broad Beans and Radishes are an example of this approach.


In the same raised bed I have two rows of Broad Bean (each of 12 plants) and three rows of Radishes.


If you are wondering why the middle row of Radishes is offset to one side, it's because they were sown underneath two tunnel cloches, side by side, and the exact centre was occupied by the legs of the cloches!


My Broad Beans are of three varieties. In one row I have six each of "Masterpiece Longpod" and "De Monica", both of which are relatively tall:


The other row comprises 12 plants of "Robin Hood", which is a much more compact variety.


The Broad Beans will take much longer to mature than the Radishes, so the plan is that the Radishes will have been harvested before the BBs block out all their light. Right now the Radishes are showing little sign of swelling up, so they had better get a move on.


Despite having been under cloches for about their first three weeks, the Radishes have been growing slowly because of the cold weather. There is no immediate prospect of a warm spell, so I think it will be another three weeks or so before I can expect any harvests from them. I just hope that they don't turn out to be woody. Radishes are best when they are grown quickly in warm moist soil. In such conditions you can sometimes get a harvest about a month after sowing.


In another raised bed I have sown some more Radishes - three short rows, under one of the tunnel cloches:


The middle part of the centre row looks a bit thin, and some of the seedlings are displaced, so I suspect that despite my attempts to deter them (note stick at right of photo), an animal of some sort - probably a cat in this case - has got in and had a dig around. Even so, there's enough there to give a decent harvest in due course.

Saturday, 23 April 2016

Wild Garlic Pesto

In my garden I have a small (but spreading!) patch of Wild Garlic. It's now in its third year and big enough for me to feel justified in taking a small harvest from it.


This stuff is pretty powerful, and a little bit provides a lot of flavour. Jane is not keen on it - she finds it too harsh - so I decided I would make something with it that could be kept separate and eaten just by me - Wild Garlic Pesto.


This is what you need: a large handful of Wild Garlic, some pine-nuts (about 30g), some Parmesan cheese (about 35g) and about two tablespoons of Olive oil. [None of the quantities are critical.]


The method is simplicity itself - put all ingredients in a food-processor and blend for about a minute, or until the desired consistency is achieved. This is the end result:


As I said, a little of this goes a long way, so I transferred mine to an ice-cube tray and froze it, so that I will be able to use it one cube at a time if I want.


Here's one idea: A thick slice of sourdough bread, toasted on one side, then the other side spread with some of the Wild Garlic pesto and topped with sliced tomato and cheese. Grill for a minute or two, until the cheese melts. Does that sound OK?


Friday, 22 April 2016

"Earthing-up". Is it worth doing?

For many years now I have grown potatoes in containers. I have described in an earlier post the method I use, so I'm not planning to reiterate that. What I want to discuss today is the idea that the "earthing-up" procedure (aka "hilling") that I and most other gardeners have been using all these years is unnecessary. Let's see what you think...


Traditionally, one puts the seed tubers into a pot which has only a shallow layer of compost in it.


Then as the potato plants grow, you add more compost - probably on at least two occasions - gradually burying the shoots, until the top of the pot is reached.


Allegedly, earthing-up potatoes will increase the length of the underground stems that will bear the new tubers. Researching this, I found the following statement on a website called Wikihow: "Earthing-up potatoes is an important part of the growing process. It involves drawing mounds of soil up around the plant to prevent new tubers from growing and turning green and poisonous. Also many times more potatoes will form from the buried stems. It also helps to prevent blight infection." I'm not sure I agree with all that!


The Royal Horticultural Society (RHS) says this: "Small crops of potatoes can also be grown in large, deep containers, and this is a good way of getting an early batch of new potatoes. Line the bottom 15cm (6in) of the container with potting compost and plant the seed potato just below this. As the new stems start growing, keep adding compost until the container is full. Earthing-up protects newly emerging foliage from frost damage . It also protects developing new potatoes from light. Light turns tubers green and green potatoes are poisonous."


I have seen a few articles recently suggesting that this procedure is in any case just too laborious to bother with. Apparently "studies show" that yields are just as good if you simply bury the seed tubers to a depth of 5 or 6 inches in a pot that is already full of compost - just like planting a bulb. I accept that this is indeed simpler and therefore easier, but I haven't seen any real evidence about yields. When sowing seeds or planting bulbs we are always told not to plant them too deep, because if a seed / bulb has a long journey to make its way to the surface it may use too much of its stored energy, and thus produce a weaker plant.

I am the ultimate sceptic when it comes to challenging tried-and-tested gardening techniques (I know - you'll be saying "Oh, he's just an old dinosaur, set in his ways..."), and I can't help noticing that this new advice comes mostly from Seed Merchants who have a vested interest in selling more potato tubers. Could it be that they are aiming to de-mystify the whole issue, trying to get new gardeners, often youngsters who are cash-rich but time-poor, to try growing potatoes for themselves? Maybe they are. And maybe they're not. I reckon it's worth carrying out a comparative trial. I can't do it this year, because I have already planted all of my potatoes, but I plan to give it a go next year.


What does anyone else think? Is anyone going to do a comparative trial THIS year?

Thursday, 21 April 2016

Parsnips make their appearance

This year I am growing two varieties of Parsnip - "Duchess" and "Tender and True". I very seldom grow only one variety of any crop, simply because I like to hedge my bets. Sometimes one variety will do very well whilst another is poor. I thought until a day or two ago that this would be the situation this year with my Parsnips. I sowed them both on March 18th, which was a warmish, still day, so I was able to sow the seeds very precisely. If you know what Parsnip seeds look like you will know what I mean when I say that it is best to sow them on a still day. They have "sails" which are intended to help them spread far and wide, and this they do very effectively, if you let them!


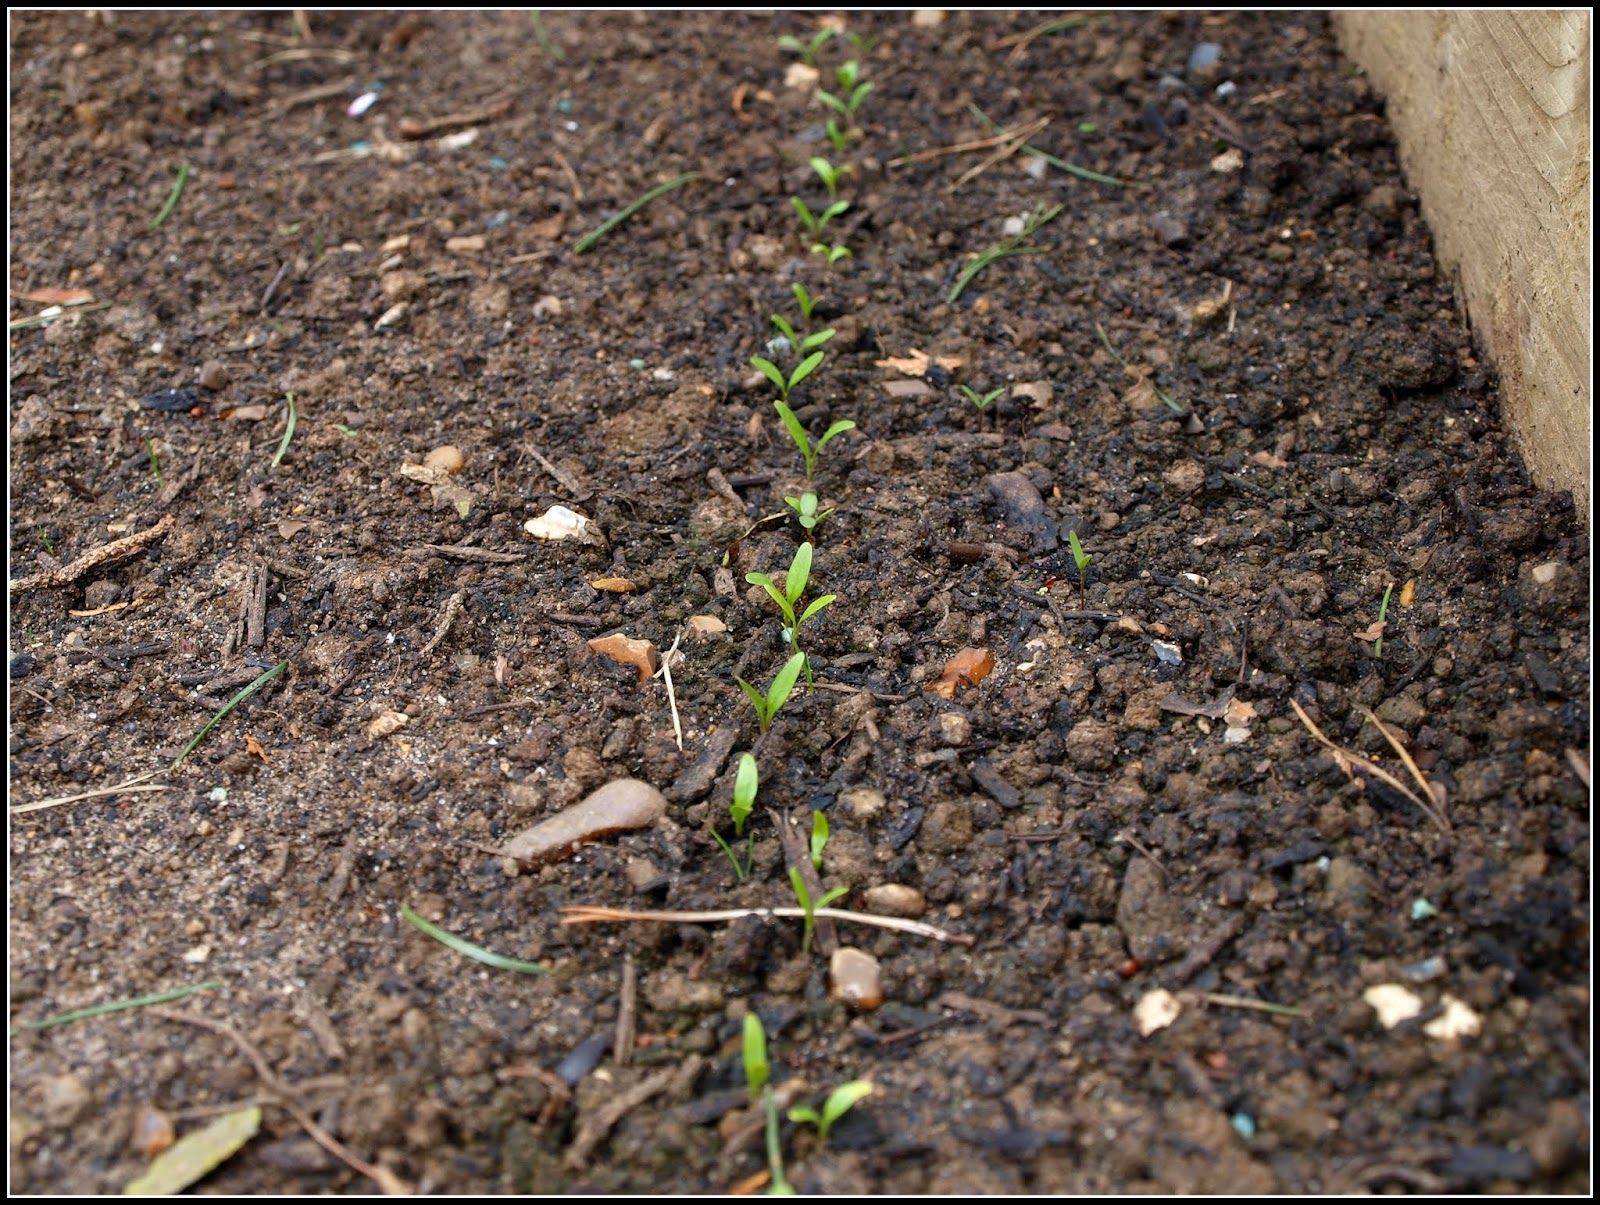
Parsnips seeds often take a fair while to germinate (three weeks is about normal), but after a month had passed with no sign of any Parsnips appearing I was beginning to get worried. There comes that stage when you begin to contemplate re-sowing... However, early last week the "Tender and True" Parsnips appeared very suddenly, almost all of them simultaneously:


I am very pleased with the germination rate. It looks like more than 90%. This is a sure sign of fresh seeds. Parsnip seeds lose their viability very quickly, and although I have occasionally taken a chance and sown seeds from a part-used pack from the year before, it is usually best to sow seeds from a new pack - ones that will have been harvested the previous year.


The "Duchess" seeds were slower to germinate. In fact I was beginning to worry that they might be a complete washout. Every day I would scan the raised bed very carefully for any signs of life (usually several times a day!) Luckily, ten days after the appearance of the other variety, I can now see a few of the "Duchess" ones peeping through. You have to look very closely, but they are definitely there:


I think perhaps one of the reasons why the Parsnips have taken a long time to come through is that the soil in their bed had formed a "hard cap". The bed is one of the new ones I built a couple of months ago, and it contains a high proportion of that Norfolk loam I bought. Whilst the loam is good in some respects (for instance it's weed-free and stone-free), it does pack down very densely. It is going to need quite a lot of organic matter added to it. Germinating seeds may find it hard to penetrate the hard crust that forms on the top of the soil, where it meets the air. Now that I am aware of this I am taking care to water seed-drills very frequently in order to soften the soil. Over the next few days I expect lots more of the Parsnips to show through.


Although I sowed the Parsnips pretty densely, once the seedlings get a bit bigger I will be thinning them out to leave space for the roots to swell. I normally allow about 3 or 4 inches between plants. If they are too crowded you end up with just leaves and no roots. I also plan to plant some Leeks in between the rows of Parsnips. I'm not 100% convinced this is a good idea. If I had more space I wouldn't do it, but I'm trying to get the maximum yield possible from my space. I may decide to grow the Leeks only to the "Baby Leek" stage. It really depends how much foliage the Parsnips produce. it might turn out like this...


Parsnips - photo from August 2014


I don't think any Leeks would survive in amongst that!

Wednesday, 20 April 2016

National Beanpole Week

Last week was National Beanpole Week. I'm not a great fan of the "National xxxx Week" concept, but if you are going to have such a thing it is good to see one being run at an appropriate time (unlike some I could mention...). Mid-April is the time when most veg-gardeners start putting up frames and support-mechanisms of one sort or another for their climbing beans, so National Beanpole Week will conveniently remind us to get on with the job.


Currently there seems to be a surge of interest in the old-fashioned ("retro") style of beanpole, usually made from coppiced Hazel. I would love to have a set of these poles. They are made from renewable resources, grown locally, which is good because it avoids all the negative aspects of importing bamboo canes from the Far East. Furthermore the rough surface of the bark on them makes it much easier for bean plants to grip them and grow upwards more efficiently. Unfortunately they are not as easy to get as I would like. If I had a van or a car with a roof-rack it would be OK, because there are a few places where I could probably get them, but I don't know of anywhere that would deliver them - certainly not without a hefty fee.


I went to my local Garden Centre to see if they had Hazel beanpoles, because it is only about a mile away and at a pinch I could probably walk home with a bundle of beanpoles over my shoulder, but they didn't have any. What they did have is these:


They are made of Willow. Strange, I though Willow was noted for its flexibility? Furthermore, despite being described specifically as "Classic runner bean supports", they are only 1.8 metres (5 ft 11in) tall. I don't think that is enough for Runner Beans. I currently use 8-ft poles).


This is my usual setup, made from fifteen 8-foot bamboo canes.


Look at the economics of this. 10 x 6ft Willow poles cost £9.99, and 10 x 6ft Bamboo poles which must be shipped in from the Far East cost £4.99 - half the price! That's the problem isn't it? We all want the bargain, but there are costs other than monetary ones to be considered. What about the environmental impact of shipping the goods? How much does a bamboo-grower or -worker in the Far East earn for their efforts? How much forest is felled to make way for plantations of Bamboo? And so on... Actually, I must point out that it doesn't say on the Gardman packaging where the Willow is grown. I'm presuming it is in Europe, possibly the UK, but I may be wrong.


following on from National Beanpole Week, I would like to give a plug to the concept of Coppicing in general. In case you don't know what this is, I'll briefly explain. Hazel trees are cut down almost to the ground, like this:


The severe pruning causes the trees to produce a multitude of slender straight new stems, which grow up quickly and can be "harvested" to make beanpoles after about three years, at which point the whole process begins again.


The Hazel poles can be used for other purposes too of course, such as making hurdles, stakes, fences etc. This website gives more information about the subject, along with details of some producers: http://coppice-products.co.uk/


P.S. I have been in touch with Gardman UK and they tell me that their Willow comes from China. Arrrgggh! So much for the environment-friendly option.