Monday, 20 April 2020

White Sourdough loaf recipe

There has been a huge surge in the popularity of home baking during the coronavirus lockdown. Shops everywhere have run out of flour! I have been talking about bread-making with several of my social media friends and some of them have asked me which recipe I use for making sourdough bread. The answer to this is "my own recipe, but adapted from one I learned on a course at Bread Ahead a couple of years ago". I thought it might be nice to share this recipe with you, so here goes... (Sorry about the lack of photos covering the middle section, but I hadn't thought of writing this post at that point.)

[If you would like a copy of the recipe in Word format, without the photos, drop me a line at mwillis@ntlworld.com and I'll email it to you.]


White Sourdough Bread Recipe

(Makes one loaf – nominally 600g)

Stage1 – make a Rye Starter (most people will already have this or an equivalent)

Day 1. Put 50g Rye flour in a suitable lidded container, add 50g cold water, stir thoroughly, cover loosely (e.g. lid half open), set aside at room temperature.

Day 2. Add another 50g Rye flour and another 50g water. Mix and store as before.

Days 3, 4, 5, 6. Repeat procedure described above. By Day 6 the starter should be bubbly and should smell pleasantly beery. If so, it’s ready to use. If not, repeat the procedure as required.

Stage 2 – make a Stiff Starter or a Poolish.

[A Poolish is basically a sloppy version of the Stiff Starter, and uses a higher proportion of water.]

My Poolish is in the square plastic container in the foreground.

Begin with a lively Rye Starter. If your starter is not lively, refresh it at least 8 hours (or up to 24) in advance, by discarding about a third of what you have and replacing it with new Rye flour and water in equal proportions.

To make a Stiff Starter, in a suitable lidded container thoroughly combine 90g Strong (or Extra Strong) White Bread Flour with 45g Rye Starter and 45g cold water. It should produce a stiff paste.

To make a Poolish (I use this method), thoroughly combine 60g Strong White Bread Flour, 60g Rye starter and 60g water. It should produce a fairly loose paste. You can make it sloppier if you like, by adding more water, but just remember to add less water when you come to make the dough.

Set your Stiff Starter or Poolish aside for 12 – 24 hours, until it becomes nice and bubbly. If it becomes TOO bubbly, you can slow it down by putting it in the fridge for a few hours, until you are ready to use it.

Stage 3 – Make your dough.

Put 490g Strong or Extra Strong White Bread Flour in a large bowl.

Add 10g salt.

Add your Poolish or Stiff Starter. (Although you will have started with 180g of ingredients, it is likely that despite your best efforts you will leave some behind in its container, so let’s say you have 175g or thereabouts!)

Add 320g cold water

Mix thoroughly, using your hands, until there is no dry flour left in the bowl. Add more water in SMALL quantities as required, but don’t use more than 350g in total or your dough will be too sloppy.

When the dough begins to come together, tip it out of the bowl onto your worksurface. Most authorities say “a lightly-floured worksurface”, but I knead my dough on the kitchen worktop without using flour because the worktop seems to have very good non-stick properties!

Knead the dough vigorously for 10 minutes, using the “stretch and tear” method it you can. This involves pushing the dough away from you very firmly with the ball of your hand and then when it begins to tear, bringing it back towards you in a sort of folding action. The result is to stretch the glutens in the flour, giving the dough strength and structure. After 10 minutes of this you will be tired but you should have a nice smooth, elastic dough.

Form the dough into a rough ball and put it into a clean bowl. Cover it tightly with a plastic showercap or similar. [Warning: if you use a fabric cover, make sure it is wetted and remains moist. Otherwise your dough may form a hard crust, which is undesirable at this stage.)

Place the bowl in the fridge for 12 – 24 hours. This will be the “First Proving”.

Stage 4 – refresh and shape the dough.

Remove the dough from the fridge and leave it for half an hour to warm up.

Tip / scrape the dough out onto your worksurface (see above concerning flouring).

Flatten the dough roughly and then do a “Stretch and Fold”. This means pulling the dough out from the centre and then folding it back in. After each such action, turn the dough through 90 degrees and repeat (4 such actions equate to one Stretch and Fold). This gives the dough extra strength – it’s a bit like building up muscles through exercising!

Shape the dough into a rough ball and either return it to the bowl and cover it as before, OR leave the dough on the worksurface but cover it with the inverted bowl.

Leave it for half an hour and then do another Stretch and Fold. Form it into a rough ball.

Cover the dough as before, and leave it for 10 – 15 minutes.

Generously dust your Banneton (or proving-basket) with flour. I use a mixture of Extra Strong White Bread flour and Rice Flour. The different (rather grainy) texture of the Rice Flour helps to prevent the dough sticking to the Banneton.

Uncover the dough and shape it. A good technique here involves using your hand with palms uppermost and sliding them almost underneath the ball of dough, whilst constantly rotating the dough until you are happy with the shape. The upper surface of the dough should be smooth and any irregularities will have been pushed underneath.

Gently move your dough into the Banneton and cover as before, preferably with a plastic shower-cap or equivalent.

Place the dough in the fridge for 8 – 12 hours. This is the “Second Proving”.

Note, if the dough is not rising very much, it may be a good idea to give it a few hours at room temperature. However, I recommend that it should always spend its last 1 – 2 hours in the fridge, which will help it to firm-up, which in turn will make it easier to tip out of the Banneton.

Stage 5 – Final shaping and baking.

Pre-heat the oven to 240C – which is about the maximum to which a normal domestic fan-oven will go.

Some people would at this stage put in the oven a pizza-stone or an upturned baking-tray. I use a purpose-made baking “cloche”, which is like a pottery pizza-stone but with a domed cover. It keeps in the steam and helps the dough to rise whilst assisting the formation of a nice crispy crust. The same effect can be achieved by using a cast-iron Dutch Oven. If using any of these items, put them in the oven as soon as you switch it on.

Coat a baker’s Peel with about 20g coarse polenta. The polenta acts like tiny marbles and will help the dough to slip off the peel at the desired moment. If you don’t have a Peel, use an upturned flat baking-tray.

The Peel, coated with polenta

Take your dough out of the fridge “at the last minute” so that it is still as firm as possible.

Upturn the Banneton over the Peel and tap sharply. The dough should drop out.

Using a VERY sharp knife or preferably a dedicated “Lame” (basically an old-fashioned razor-blade fixed in a handle for safety), slash the top of your dough at least once, very deeply. This will allow steam to escape during baking, thus avoiding uneven and unsightly cracking of the crust. If you want, you can spend some time making additional fancy slash-patterns, but this is for purely aesthetic purposes!

Dough after tipping-out from the Banneton, showing long deep slash in the top surface

Using the palms-uppermost technique described above, give your dough a final shaping.

If you are not using a cloche, open the oven and give it a few squirts of water from a spray bottle. This will create steam which will help with the texture of the bread’s crust. If using a cloche or Dutch Oven, omit this stage, just remove its lid.

As quickly as possible, slide the dough off the Peel onto the base of your cloche, Dutch Oven, or pizza-stone, replace the cloche / Dutch Oven lid if relevant and close the oven door.

Bake at 240C for 35 minutes.

Remove the lid of the cloche / Dutch Oven and turn the oven temperature down to 200C (180C fan).

Bake for a further 15 – 20 minutes. During this time the crust will colour-up. If it is going too brown for your liking, turn the oven temperature down a little or cover the loaf with a piece of foil.

Test to see if the loaf is fully baked by lifting it in an oven-glove or tea-towel and tapping it sharply on the underside. If it is cooked you will hear a hollow sound. If not, it will make a dull thud!

When fully baked, remove the loaf from the oven and allow it to cool on a wire cooling-rack.

The finished loaf. Despite the deep slash, the crust of this one still cracked!

In my opinion, the bread is best eaten when just ever so slightly warm, served with lashings of salted butter!
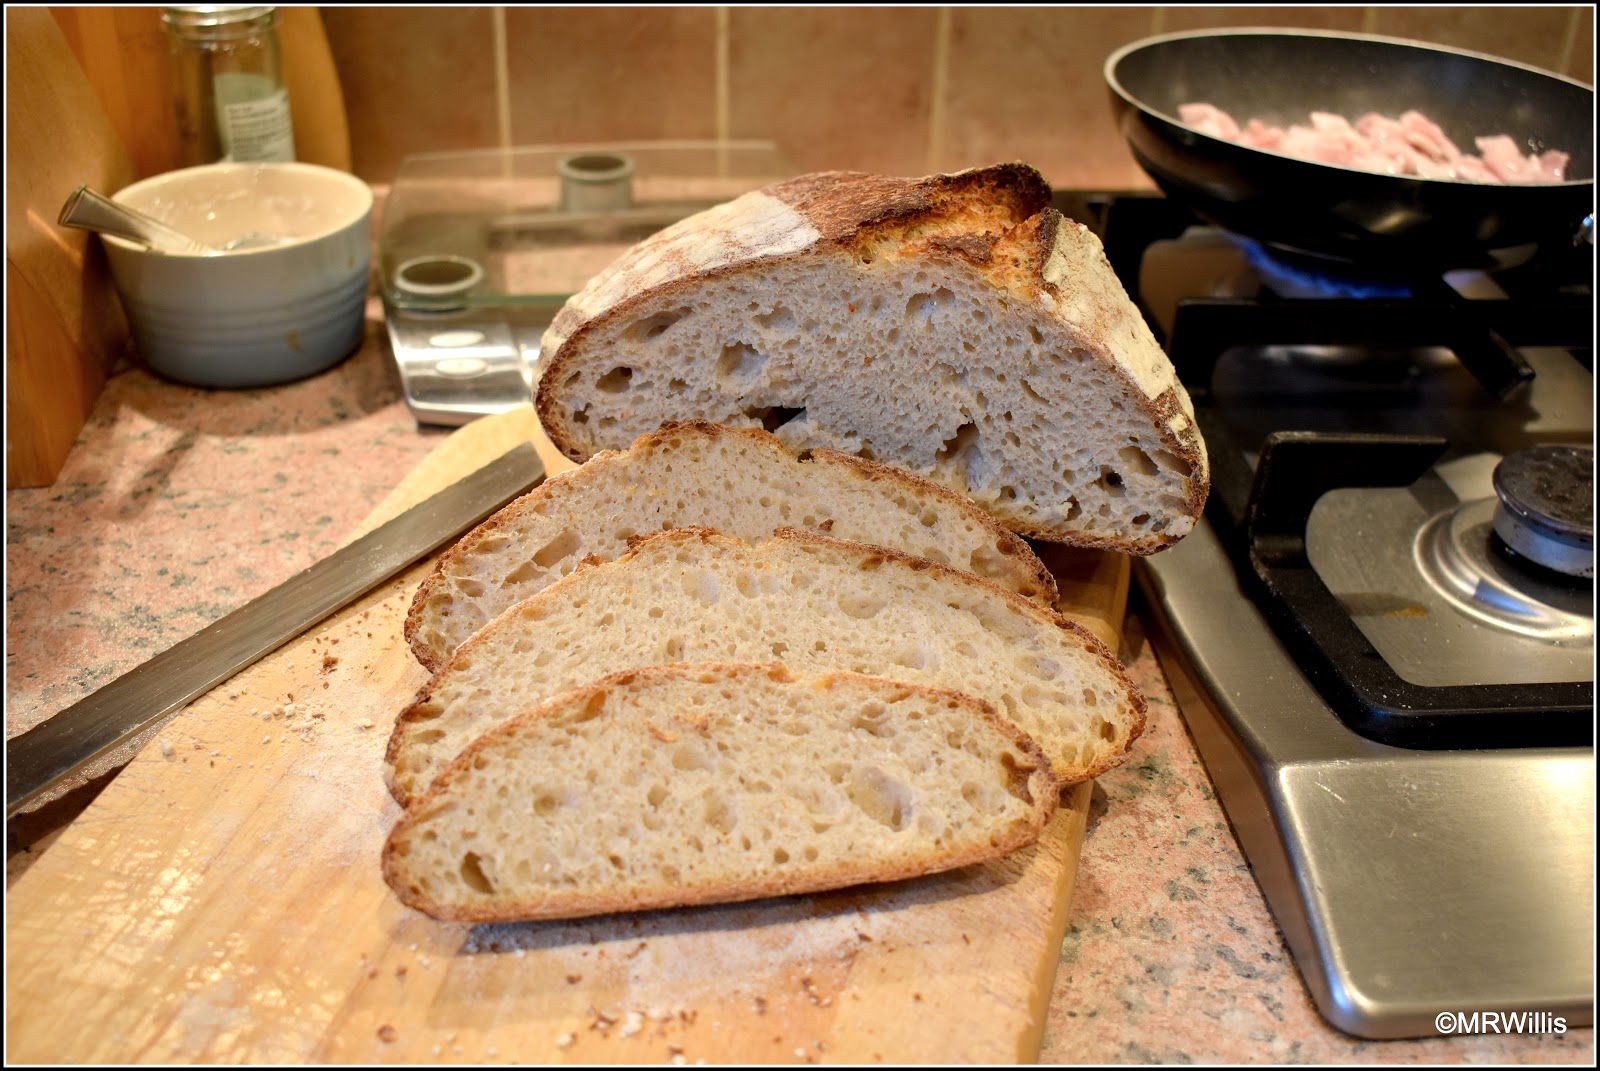
This texture is ideal for me - lots of air-bubbles but not huge ones!

This sort of bread keeps best if wrapped in a cloth or clean tea-towel.

Sunday, 19 April 2020

Prime sowing time

For me, the month of April is prime time for sowing seeds and raising young plants. March is too soon - usually too cold and windy, often wet. May is too late for many things - they won't have a long enough season to reach maturity. Of course these are generalisations, and you have to use your instinct and experience to judge when is the best time to sow or plant. Experience tells me that it is probably best not to sow seeds for squashes or cucumbers before the start of May; otherwise I'll have to expend a lot of time, energy and ingenuity in keeping them from getting frosted or battered to death by hail. Likewise, beans (especially French beans) are very susceptible to frost damage and it makes sense to delay sowing them until the risk of frost has passed or is at least very low.

Kohlrabi "Kolibri F1"

Some of my seeds (e.g. carrots and parsnips) are sown directly into the raised beds, but I also like to raise a lot of my plants in small pots or modules, and transplant them later on. This means that I can protect them more easily from adverse weather. As I write this, my garden is full of little plants in pots, and naturally this means I can get them indoors or under cover if I need to do so.


I've written recently about my chillis and tomatoes, but in addition to those I have lots of other plants coming along too, such as Broccoli, Cabbage, Brussels Sprouts, Kohlrabi, Rocket, Lettuce and Beetroot.

Rocket

Beetroot "Crosby's Egyptian"

Lettuce "Lobjoit's Green Cos" and "Saxo"

This year I'm making a special effort to keep my garden colourful, so I have sown seeds for Lupins, Calendulas, Marigolds and two types of Sunflower. The Marigold seeds are ones I saved from some plants I bought last year from a local Garden Centre. They were amazingly good and lasted ages, so I felt that I just had to save seeds from them (and they produced loads!). Unfortunately the germination rate of the saved seeds has been very poor - so far I only have three new plants!

Marigold seedling

The Calendula seeds were self-saved too, taken from plants originally grown from "Flighty's Favourites" seeds kindly given to me by Mike Rogers who writes the blog Flighty's Plot.


Sunflowers "Sunspot" and "Red Sun"

You'll notice that there are one or two blank spaces amongst the seedlings (see photo of sunflowers, above, for example). It's never guaranteed that all the seeds you sow will germinate, so it makes sense to sow a few more than you think you'll need. Giving away spare plants is easy enough, and in current lockdown circumstances I suspect that more people than ever will be grateful to accept any spares that you offer.

Here's a different type of seed-sowing - the "broadcast" method. I'm trying to establish a permanent supply or Parsley (a herb of which we use a lot). Alongside a fence and underneath some small fruit trees I have lots of Parsley plants, some of which are from last year, and some of those were in turn grown from plants sown the previous year. The idea is to have so many plants that I can afford to let some of them run to seed, and drop their seeds into the soil where they lie dormant until conditions are right for the next generation. You'll recall no doubt that Parsley is a biennial, i.e. it grows and is cropped in its first year and forms flowers (and therefore seeds) in its second year, so many of the plants in this photo are old ones.


I'll confess that I was a bit impatient this year. I couldn't see any Parsley germinating, so I threw down about half a packet of new seeds, simply scattered in amongst the old plants without covering them with soil or anything - this is called "broadcast sowing" I believe. Now of course I have hundreds of tiny Parsley seedlings, and I can't tell if they are self-sown ones or ones resulting from my broadcasting!

Parsley seedlings

Conditions are good just now for sowing and growing. We had a few hours of decent rain on Friday, so the soil is moist but not wet, and now we have sunshine and a gentle breeze so the little plants are well happy!

Thursday, 16 April 2020

Potting-on tomato plants

My little tomato plants have recently been spending time in the garden getting acclimatised to outdoor conditions. Their colour looks better now (darker) and their stems are beginning to get sturdier.


It's time to move them to bigger pots (5" ones) because they are beginning to outgrow the little 3" ones.

Comparison of tomato plants in 5" and 3" pots

I think it is important to do this so-called "potting-on" at the right time, because if the plants remain in small pots for too long their roots can become overcrowded, which in turn adversely affects their development. On the Down side though is the fact that once they go into the bigger pots it becomes much more difficult to protect them (or bring them indoors) if the weather turns cold again, which is entirely possible. Frost in the first half of May is not uncommon here.

There's not a lot for me to say about the actual mechanics of potting-on. I think perhaps the best advice I can give is to water the plants an hour or so before doing the job, so that their compost is thoroughly moist. Then when you are ready you can turn each little pot upside down and give it a sharp tap, which will hopefully release the plant and its compost all together. If you can keep the rootball intact this will be much less stressful for the plant.

When the young plants are in their new homes it may be advantageous to water them again, to help settle them in. Also, place them in a shady position for a few hours to help them recover from "transplant shock". Don't forget to label them!


The potting-on task gives me another opportunity to select the best plants, and weed-out any that are not up to scratch. As it happens, this year ALL my plants are good enough to keep, but I only potted-on 30 of them - simply for space reasons. That's the number that I can fit into the gravel-trays which I use for moving the pots around the garden. Once I'm satisfied that the ones I transplanted are happily settled in their new pots, I'll give the remaining plants away.

In the black pots are Mint cuttings.

Eventually I plan to have 12 "big" tomato plants, grown as tall cordons, which I will grow in 35-litre pots, and 8 (possibly 10) bush-type ones, which will be grown in smaller containers. I say "possibly 10" because when a couple of the Maskotkas failed to germinate I sowed some more, and these are presently a long way behind in terms of development. By the time they are big enough to be useful they may find that all the available space has been used!

Monday, 13 April 2020

Hardening-off chillis and tomatoes

For the last ten days or so we had have glorious weather - sunny most of the day, and unusually warm - so I have introduced my young chilli and tomato plants to the Great Outdoors a bit earlier than I had expected to do.


This is probably the most risky time of the young plants' life. If they are put outside when it is too cold they will suffer a severe growth-check, and may die, but if they are exposed to extreme heat or too much bright sunshine too early, they may get scorched and lose some of their leaves - of perhaps get completely "fried"!  Because I'm aware of this, I took my plants outside for their first taste of fresh air on a day when it was relatively dull, and only left them out for a couple of hours. Since then I have left them out for progressively longer periods, and have had them in the full sun for only part of the day. I'm still bringing them indoors at night-time though. Once the night-time temperatures are reliably in the 8/9/10C range, I'll be happy to leave them out for the full 24 hours, though I'll probably have them in the coldframe for the first few nights. [I'm sure most of you will know this, but gardeners call the procedure I have described "hardening-off".]


This year my chilli plants are looking particularly good. I said that this time last year too, but soon afterwards I re-potted the plants into bigger pots, and used some commercial compost which turned out to be contaminated with the awful aminopyralid weedkiller that has plagued my gardening efforts so badly for the last several years, and the plants suffered terribly. This year I will be using the same compost for potting-on as I have been using since the seeds were sown. This is partly due to the difficulties of buying compost of any sort during the Covid-19 lockdown, but not entirely so. This time I am using the SylvaGrow growing medium, for a variety of reasons: it is peat-free and thus better for the planet; it was good value (3 x 50L bags for £16 at my local garden centre before the lockdown started); and it's not made by Westland or Levington! These two companies (and Corteva, manufacturer of the evil weedkiller) have been the chief culprits in the contaminated compost saga, and have been largely dismissive when I have contacted them to discuss the issue, as I have done several times now. I also have to say that the Health and Safety Executive, who are responsible for policing this issue, have also been conspicuously ineffectual. They make the right noises when you contact them, then do nothing!


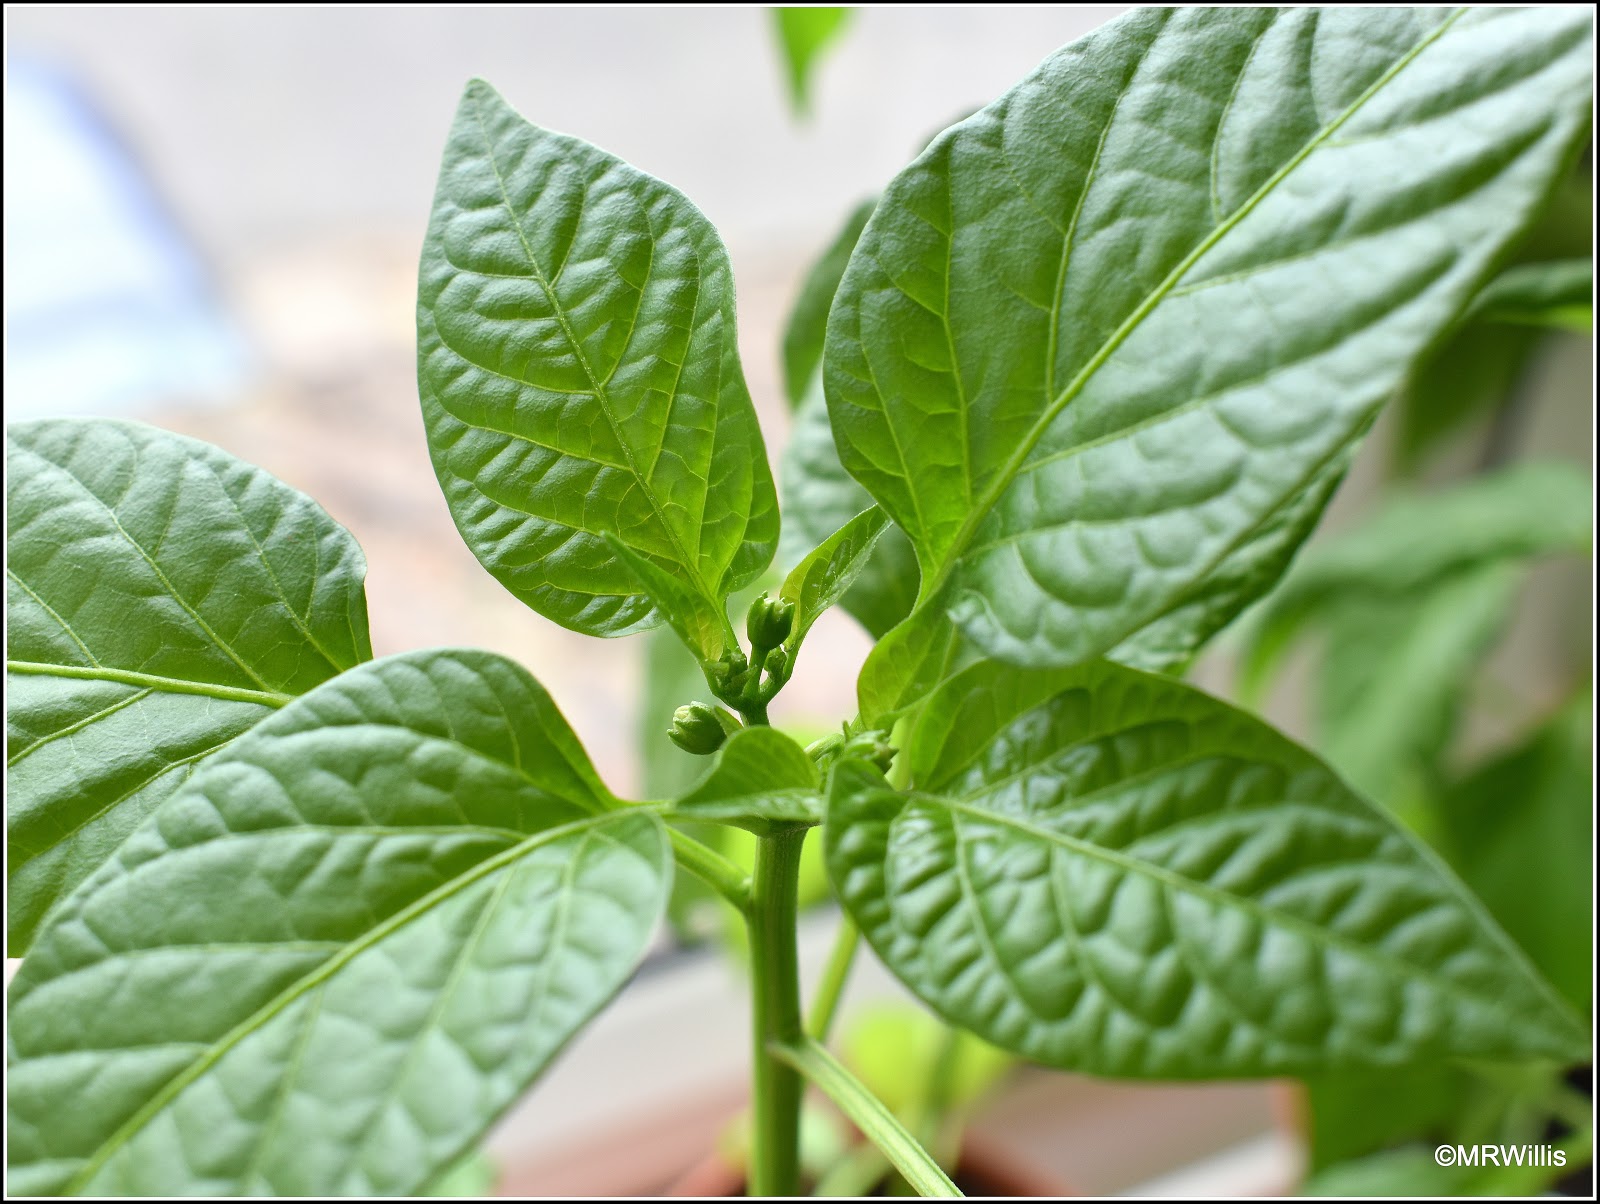
Another reason why my chillis are looking healthier than usual this year is that they have not been infested with aphids. I attribute this to the fact that this time I did not over-winter any of my plants from last year. I have now decided that bringing mature chilli plants back indoors is a bad idea, because I'm sure this is where all the aphids come from. Even if the plants have no visible aphids on them, I reckon there will usually be aphid eggs lurking on them or in their soil somewhere. This year's chillis, untroubled by aphids, are growing rapidly and already producing flowers - and I think, some fruits:


My tomatoes are a couple of weeks behind the chillis in terms of development, simply because I don't sow them until the chillis are ready to vacate the Growlight House in which they are kept in their early days. To be honest, I think they look quite pale and they are a little "leggier" than I would like. This may be a consequence of the compost / growing-medium, which may possibly not be ideally suited for raising plants from seed. They are definitely OK though, and I'm not unduly worried about them.


I'm being very careful to avoid stressing them too much by not taking them outside unless the conditions are just right. It's hard to believe we are still only in Mid-April; the weather makes it seem more like late June!

Friday, 10 April 2020

Sowing carrots and parsnips

For the last couple of weeks I've been toying with the idea of getting my carrot seeds sown, but I have delayed for two reasons: first, because the bed in which I wanted to sow them was still occupied by the last of my over-wintered salads (endives and chicories), and second because the weather has been too dry and too cold. I know from experience that carrots seeds can be very reluctant to germinate if their soil is not moist enough. Both of these obstacles have now been removed. I harvested the salads, washed them and put them in Stayfresh bags in the fridge, where they will last for up to 10 days. And then on Sunday night we had our first significant rain for ages - enough to wet the soil quite nicely - and it happened in the night too!

Curly Endive, harvested 05 April

So, on Monday the task was done. I used my normal technique, which involves raking the soil to a fine tilth and then making the required number of shallow drills by just pressing the handle of my rake into the soft soil (fortunately the rake head can be detached from the handle).


I've mentioned previously that my plan was originally to have one bed each for carrots and parsnips, but I adjusted that plan because of the need to grow all sorts of other things to get us through a possible shortage of fresh vegetables caused by the current pandemic. I made four drills - three for the relatively quick-maturing carrots and one for the slower parsnips.

I have chosen three quite different types of carrot. I have one row with a mix of "Harlequin" (multi-coloured) boosted with some "Purple Sun" (purple, obviously!). Then I have one row of the medium-sized "Nantes", and finally one row of the big maincrop variety "Autumn King". Hopefully they will mature at different times and keep us supplied for several months. The single row of parsnips is sown with "White Gem". I'm really hoping for success with these, because last year I had a complete washout with parsnips. None of them even germinated, despite my having done two sowings.

Before sowing I water down the length of the drill, using a watering-can, to ensure that the seeds sit on moist soil. I sow by hand, trying to space the seeds fairly thinly though I accept that I will need to do some thinning-out later on. Then the seeds are covered with a layer of dry soil and patted down to ensure good contact between seed and soil. Then I apply the protection... A bed like this, newly raked, is in grave danger of being dug up by our local badgers and/or foxes unless protected, and the Blackbirds would have a field day! So I construct a frame of aluminium rods joined together with some of the Build-a-Balls.


Once the frame is in place I drape a net over it. This net has a mesh of about 5mm square, so it won't keep Carrot Root Fly out, but it's easy to see through when I'm checking for germination. When the seeds germinate I will replace it with fine-gauge Enviromesh.


The weather forecast for the next 10 days shows a lot of sunshine, temperatures warm for this time of year, but very little rain. I can see that shall have to water those seeds a few times, otherwise they won't germinate!

Monday, 6 April 2020

Pots and poles

In the light of the coronavirus pandemic, it has never been as important as now to grow your own veg. We don't have a shortage of vegetables just now (though going out to buy them comes with a degree of risk), but there's a very strong possibility of a shortage in a few months' time, because probably fewer of them are being sown / grown due to labour shortages, and the same shortage will most likely come into play at harvest time. Of course the UK's problems will be exacerbated by the Brexit situation, since many of our fruit and veg-farmers have been relying until recently on seasonal labour from the EU. My goodness, what a mess!

Still, I can't personally influence any of that, so I'll concentrate on doing what I can influence - trying to squeeze as much veg as possible out of my garden. To that end, I have put in place the wherewithal to grow some more beans. Last year I had some success with growing Borlotti in a re-purposed plastic crate, so this year I'm using the same technique, but smartened-up a bit. I have recently bought some more big plastic pots from LBS Horticultural, including a couple of 60-litre ones.

4 x 35L (Left) and 2 x 60L (Right)
One of the 60-litre pots is going to be used for growing gherkins, but the other is going to host the Borlotti. I have installed it at the bottom of the garden, filled it with soil (I can't spare any compost just now), and fitted it with four tall Hazel bean-poles.


The Hazel rods are some of that batch of 30 that I bought last year from a local "Coppicer and hurdle-maker". I had originally intended to use them for supporting Tomatoes in the 35L pots, but they proved too unwieldy for that purpose (they are mostly about 6' 6" tall and quite thick). However, they make really good bean-poles. I'm sure that bean plants find them easier to grip than the smooth bamboo poles that most people use.

I shall be sowing the Borlotti seeds in the middle of April, with a view to planting them in that pot in early May. Because Borlotti are not frost-hardy, I'll sow them in pots so that I can keep them under cover when necessary, since we usually get some very cold (possibly frosty) nights at this time of year.

Moving on from the Borlotti... After planting-up my main patch of Broad Beans, I had several spares, which in normal circumstances might have been given away or composted. This year I feel I need to use them, so a short distance from the "Borlotti-pot" I have done this:


In front of the log-pile (insect refuge) I have put a line of poles, and planted 8 Broad Beans at their feet.  The beans are "Imperial Green Longpod" ones.


Before I finish today I just want to make mention of some other plants that are growing in that corner of my garden, using this photo to help me:


In front of the big black pot, marked with a short cane, you might just be able to see the first shoots of the Horseradish poking through the soil. At bottom right of the picture are some leaves of Comfrey (which will in due course be used for making plant-food), and then in the distance (at the foot of the poles) is a clump of Good King Henry. Here's a closer view.


Good King Henry is a herb that is often advocated for use in lieu of Spinach, eaten raw when very young, and cooked when older. I have had this plant in my garden for many years (it self-seeds very readily), and did try eating it when it was new to me. However, we found it to be almost tasteless and not very appealing to eat. In current circumstances I feel I should perhaps nurture this clump rather than dig it up, because who knows when we might be glad of ANY fresh veg, tasteless or otherwise - I'm assuming it has some nutritional value!

Thursday, 2 April 2020

Maintaining the old routines

Despite having written the other day that I have made one or two little changes to my gardening plans because of the Covid-19 pandemic, I'm still trying to keep as closely as possible to my normal routine. There's no point in panicking, and I know that if I just keep doing what I've always done, I'll get veg at the end of it!

This week I have picked more Purple Sprouting Broccoli, which I always consider to be the last of the previous year's crops. This is "Red Arrow".


Since my wife Jane is not keen on this vegetable, I have scaled-back my production of it, and this time I only had two plants. Nevertheless it has reached the point where the spears are in danger of going "over" (long, thin and stringy) before I can eat them, so I have picked all those that are ready, and I'll keep them in the fridge in one of those green plastic "Stayfresh" bags. I find that stored like this it keeps fresh for at least a week, possibly longer.


Looking forward to the 2020 crops, I have been bringing on my tomatoes and chillis in the same way as normal. After germination in the airing-cupboard they spend a few days in the Growlight House, and then get moved to the windowsills. The chillis have reached the windowsill stage now.


The plants are looking nice and strong this year, and so far none of them have had any aphids. I think this is because I haven't over-Wintered any chilli plants indoors this year. I'm sure that in the past the aphids and/or aphid eggs have originated in the old plants.

Some of this year's plants are already producing flowers. I know that some people advocate removing any flowers that appear before a plant is quite big, because leaving them might weaken the plant. I think since I'm not aiming to produce any exhibition-quality plants I'll just leave Nature to take its course.


The tomatoes are a couple of weeks behind the chillis, because I don't sow them until the chillis are ready to come out from under the lights, but already I'm giving them an occasional outing to the windowsills to gradually accustom them to natural light.


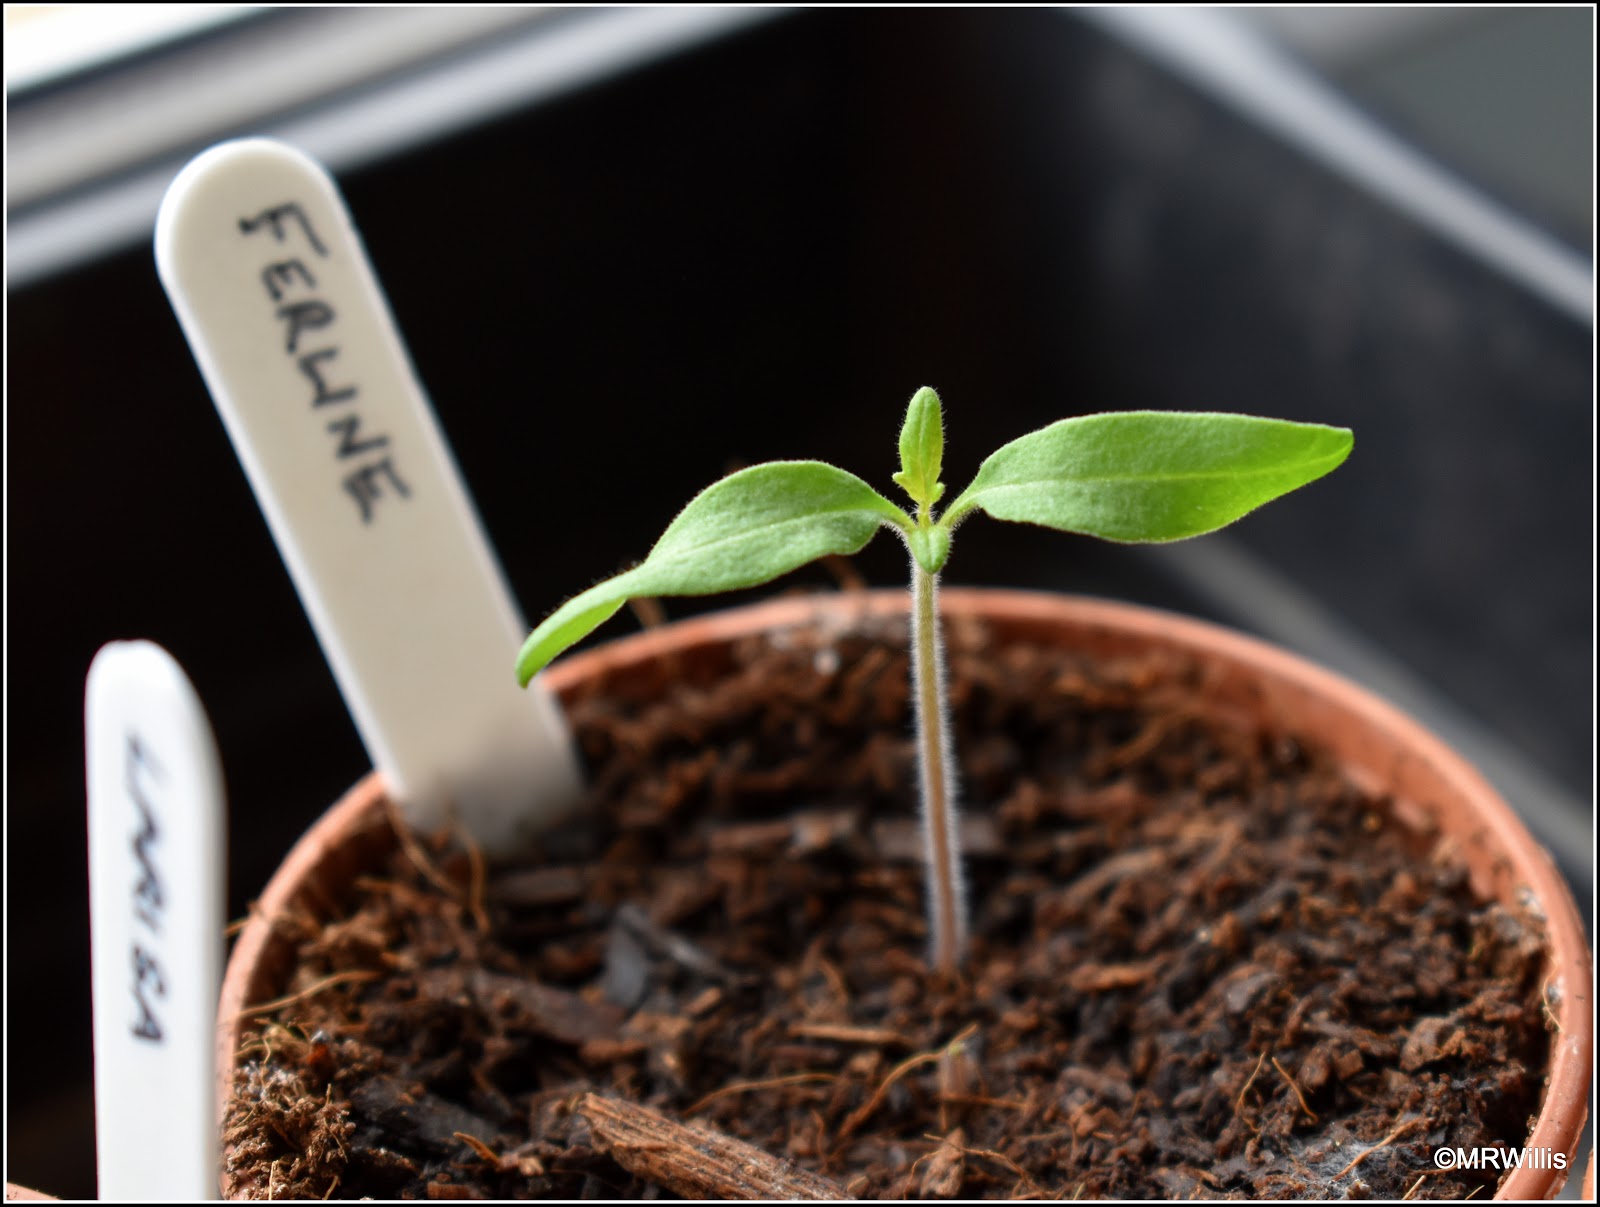
You can see that they are still pretty small, but already they are forming their first proper leaves.


I had pretty good rates of germination with my tomatoes this time, and I have recently had to do a cull - removing duplicate seedlings from the pots. Frustratingly, the only pots not to produce any germinated seeds have been two of my "Maskotkas". This is disappointing because "Maskotka" is one of my long-time favourites and I usually grow at least four plants of it. I do still have four, because I sowed six, but I would have liked to have had a couple of spares.


In other news, I have finished planting all my potatoes now. I have 12 pots of them, planted 2 to a 35-litre pot. Each pot is protected from the elements (particularly frost) - some more comprehensively than others!


That's two of the low type "Seedling Greenhouses", each covering 4 pots; three of the upright type 2-Tier mini-greenhouses, each with one pot; and tail-end Charlie there has to make do with a bell cloche!