Tuesday, 8 November 2016

Camargue rice with Squash and Brussels Sprouts

This is a recipe that I have concocted myself, with inspiration from Yotam Ottlenghi, whose TV series "Ottolenghi's Mediterranean Feast" we have recently been watching. Ottolenghi seems to have the knack of combining ingredients that might at first sound like strange partners, but making them work well together. In my recipe I have put together the sweet taste and soft texture of Butternut Squash with the firmer texture and slightly sharp taste of the Brussels Sprout. In true Ottolenghi style, my dish does have a meat element, but it is not the chief attraction...


This dish pairs chicken breast beaten flat into "Escalopes" (so that it cooks very quickly), with nutty Red Camargue rice, and Butternut Squash and Brussels Sprouts that have both been cooked until tender then slightly caramelized. It is garnished with toasted Pine-nuts and a drizzle of Pomegranate Molasses.

Stage 1 - preparation.
Slice 2 chicken breasts horizontally or butterfly them, then beat them flat with a meat-mallet.
Marinate the chicken with crushed garlic, lemon juice, dried Oregano and freshly milled black pepper.


Peel and cut into 2cm chunks approx. 200g of Butternut Squash.
Remove outer leaves from 10 or 12 Brussels sprouts (approx. 150g).
Toast 25g Pine-nuts in a dry frying-pan, being careful not to let them scorch.


Stage 2 - cook the rice and vegetables
Most recipes for Red Camargue rice use one of two methods. The first one cooks the rice like risotto - initially softening the rice in butter or oil for a few minutes, than progressively adding small amounts of hot stock, and allowing the rice to absorb it slowly. The second method puts the rice into three times its volume of water, and cooks it gently until it is tender (about 45 minutes), accepting that it may be necessary to drain off excess water, using a colander or sieve. I used the former method, because I wanted the rice to have a relatively wet texture, but I think either method would work OK here. Use about 65g dry rice per person. Camargue rice seems to cook very slowly (on the packet mine says 45 mins, but it needed more), so allow plenty of time.


Boil the Brussels Sprouts and Butternut Squash in salted water until tender but still with a bit of "bite" in them. Drain well. Cut the Brussels Sprouts in half. Whilst still warm, fry them and the squash briefly in a hot frying-pan with some butter so that they take on a little colour at the edges without getting very blackened.


In a large bowl, gently combine the cooked rice and vegetables, trying not to break up the Squash too much. Keep warm.


Stage 3 - cook the chicken
[This stage should ideally commence before Stage 2 is finished, but will only take a maximum of 5 minutes.]
Remove most of the marinade from the chicken pieces - especially any large lumps of raw garlic - and pat dry with kitchen paper.
Fry the chicken in a lightly-oiled frying-pan over a high heat, until just golden at the edges. Alternatively lightly oil the chicken and cook it in a griddle-pan. It is important not to cook the chicken for too long, otherwise it will go dry.


Stage 4 - serve
Place suitable portions of chicken and the rice dish side-by-side on individual plates. Garnish with the Pine-nuts and a drizzle of Pomegranate Molasses. Serve.


And the verdict...? I loved this combination, particularly the firm nutty texture of the rice, enhanced by the Pine-nuts, against the soft texture of the squash. The chicken came out well too, the marination worked a treat. On the down side, Jane was not so keen on the inclusion of the Brussels Sprouts - she would have preferred them plain boiled and served on the side.

Monday, 7 November 2016

Harvest Monday - 7th November 2016

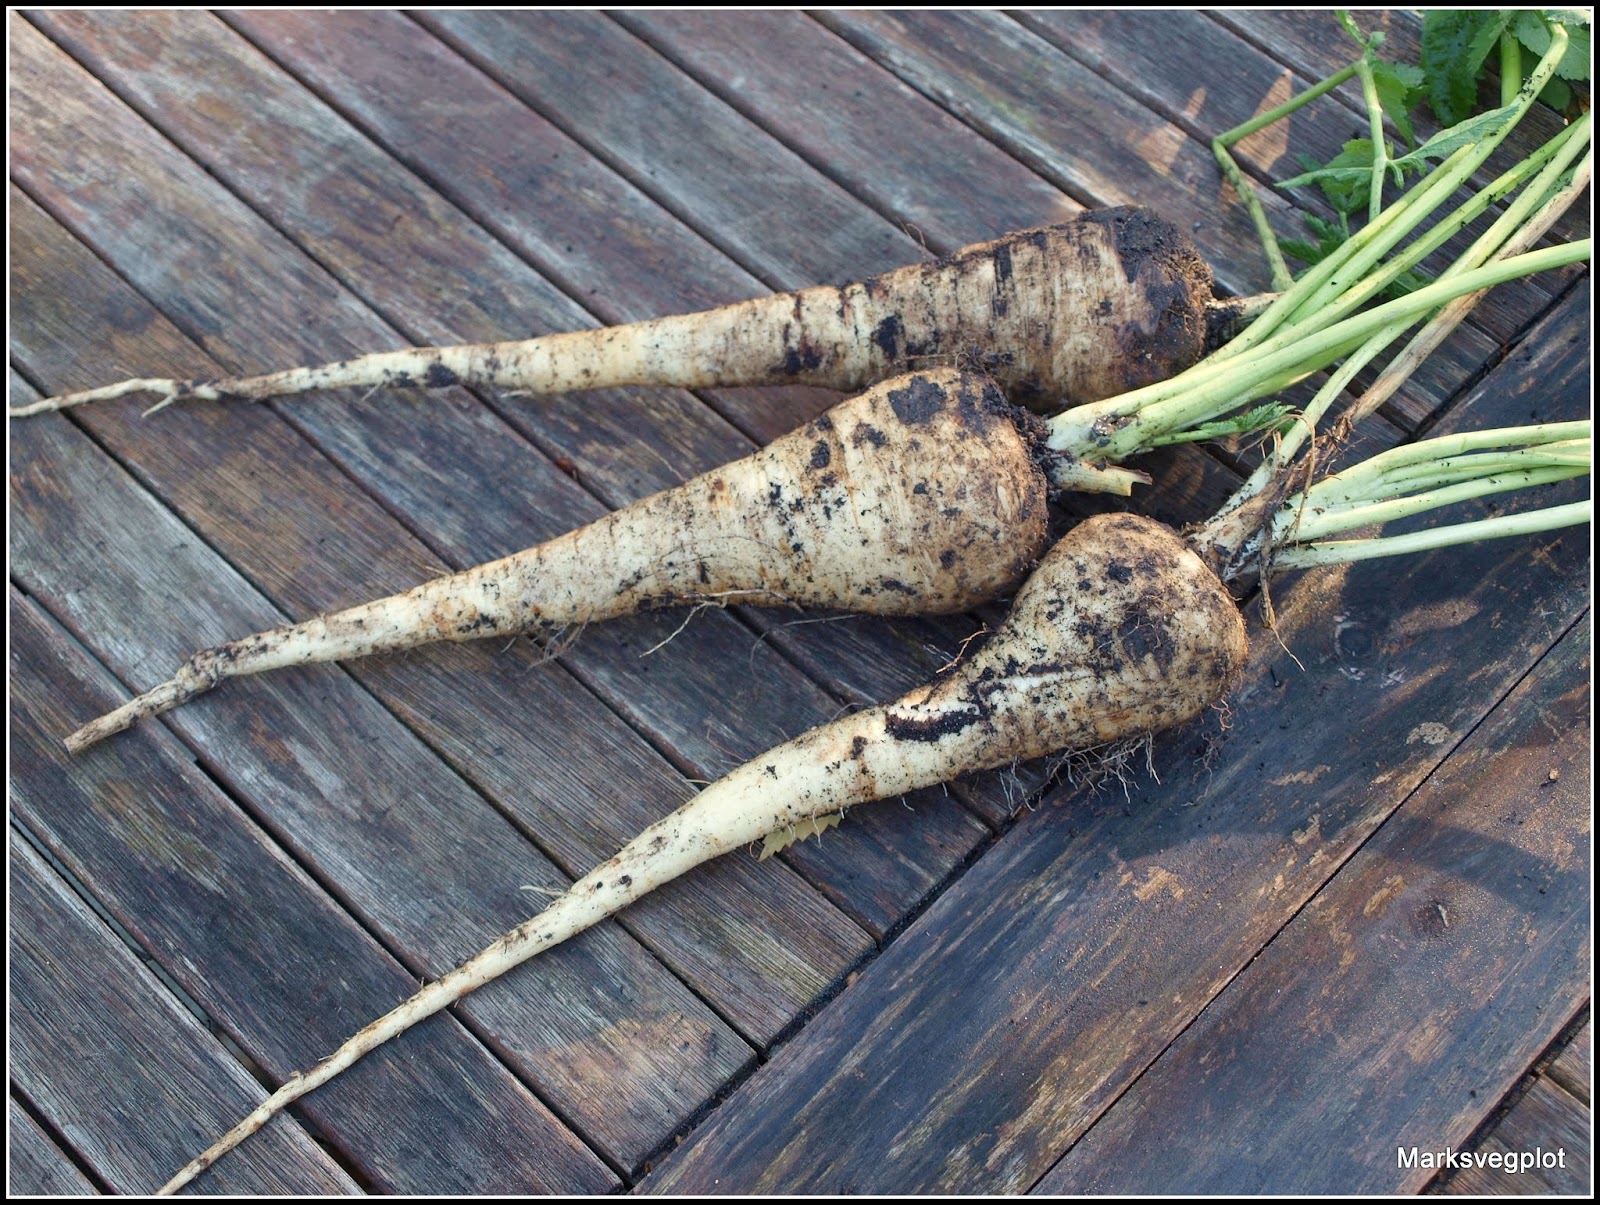
Yay! We have had our first frost(s), so I feel justified in digging-up the first of my Parsnips:

Parsnips "Duchess"

I'm pleased with this trio. Nice and long and regular, without any forks. Let's hope the rest are like this too! One of the three has a bit of canker damage around the crown, but probably nine-tenths of it will be useable.


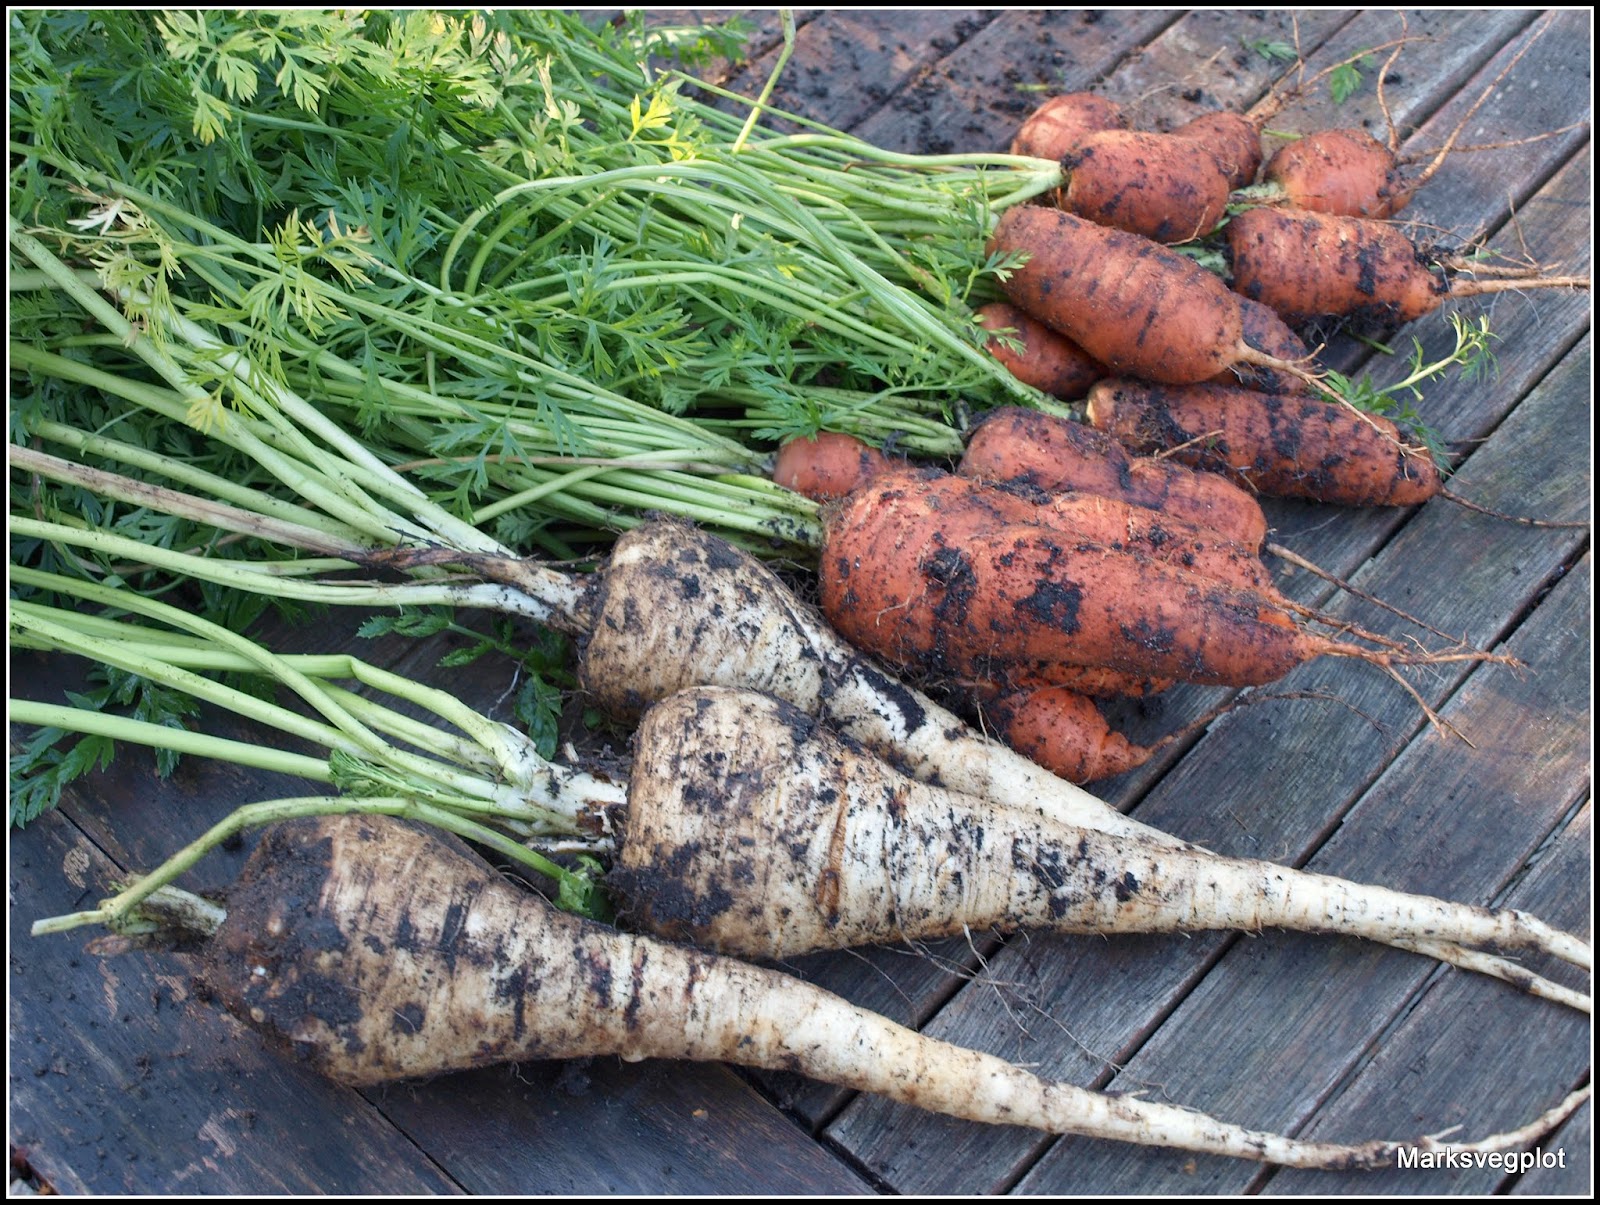
My carrots are beginning to be a bit thin on the ground now, but one more batch was added to the tally this week. As usual they are a mixed bunch - some big, some small, some regular, some "wonky".


This year I have had a much higher than normal proportion of short stumpy ones (mostly of the "Norwich" variety). I wonder why this has been, because the bed in why they have been growing seems to me to be ideal - deep, sandy, stoneless, fertile, etc...


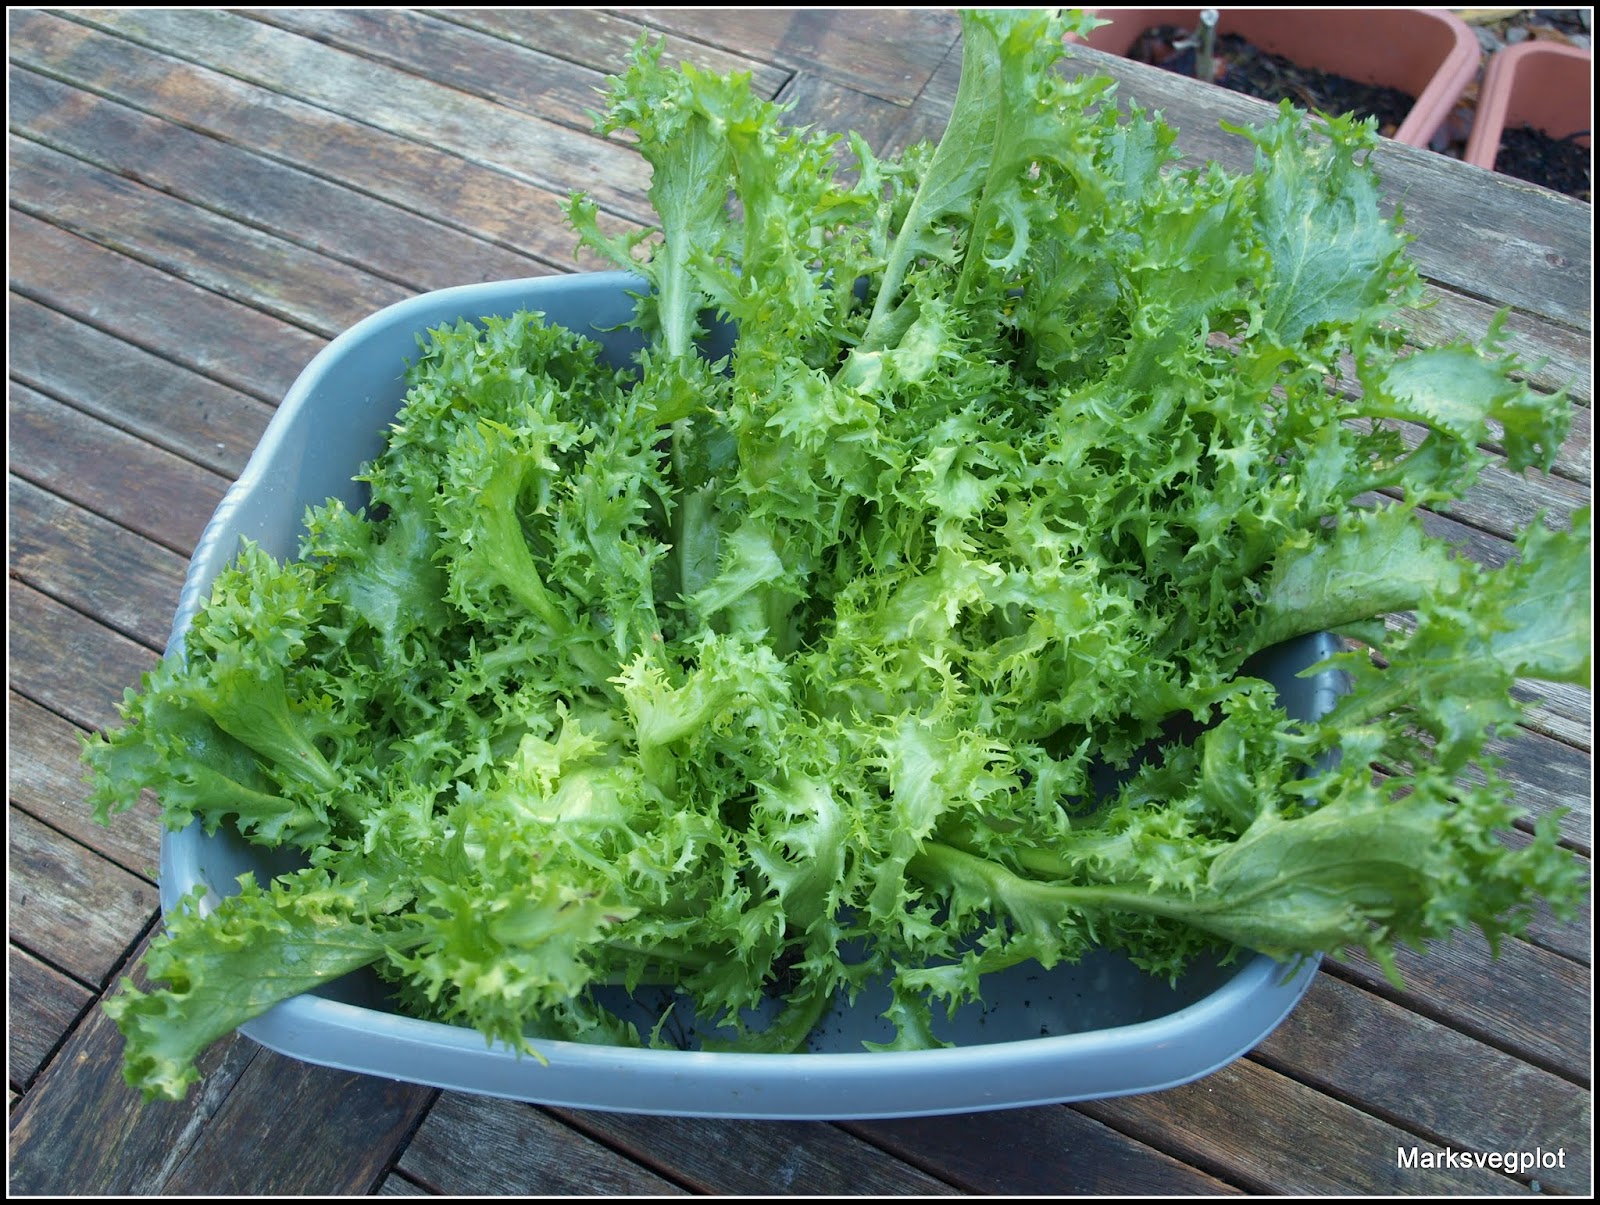
I cut two of my endives as well.


Although they are not fully blanched, there were several reasons why I wanted to pick them: firstly, I have lots of endives growing, so if I leave them all until they are 100% ready, I'll have a glut. Also, with the weather having turned a lot colder I don't want to lose them to frost. Most importantly though, I wanted some endive to accompany a rack of lamb that we ate yesterday. One of our favourite food combinations is rack of lamb, Gratin Dauphinois and endive with a nice tangy French dressing.


Though not illustrated here, my harvest this week included another picking of Lettuce - four little ones of different types, which together made enough salad for two meals. Last but not least, more chillis are continuing to ripen, though at this stage of the year I don't think you need to see yet more photos of chillis!

I'm linking this post to Harvest Monday, hosted as ever by Dave at Our Happy Acres, so please drop by there and see who else is still bringing in harvests.

Sunday, 6 November 2016

Vegetarian chilli with polenta

As most you know, Jane and I are not vegetarians, but we do love our veggies and quite often eat meat-free meals. This post is about one of those.


Having had a lot of red meat recently, and with a kitchen brimming with pulses and other good things, it seemed appropriate to make something from store-cupboard ingredients. I decided on "Vegetarian Chilli with Polenta". This is a dish which has everything going for it. It is easy to make, inexpensive, tasty, nourishing and well-balanced.


This is how to do it...


First make some "hard" (i.e. set) polenta.
Line a deep dish or baking-tin with clingfilm.
Bring 1 litre of water to the boil in a large (preferably non-stick) pan, and slowly pour into it 170g of instant polenta, stirring constantly with a wooden spoon.
When all the polenta is incorporated, cook it for however long it says on the pack - usually just 3 to 5 minutes. By this time the polenta will be the texture of fairly sloppy mashed potato, and just beginning to come away from the sides of the pan.
Now add 25g butter and 25g grated Parmesan cheese. Stir thoroughly to incorporate the new ingredients.
Tip the polenta into the dish or baking-tin, and spread it out roughly.
Allow to cool for 30 minutes, then place in fridge to solidify. (Allow 4 hours at least).
Shortly before cooking-time, cut the set polenta into conveniently-sized pieces.


To make the Vegetarian Chilli.
Heat oven to 120C
Peel and chop one large onion, they fry it gently until translucent.
Peel and crush 2 cloves of Garlic and fry with the onions - just make sure it doesn't burn!
When onions are ready, tip into their pan one 400g tin of chopped tomatoes, approx. 100g cooked Black Beans* (or Red Kidney Beans) and 100g cooked Sweet Corn (I used frozen corn).
Add 1 tsp dried Oregano, 1 tsp chilli powder (adjust according to preference) and half tsp ground Cumin. I also added 1 tsp of my home-made harissa!
Add a splash of water and mix all ingredients thoroughly.
Cook in oven for 75 minutes. Ensure the dish is piping hot before serving. [Note: You are not really cooking the ingredients, simply heating them, so timing is not critical here.]


* I used 100g of dried Black Beans, soaked for two hours, and then cooked until tender with two Chipotle chillis in the same pan to add some flavour. You could of course use a can of beans...


Cook the polenta.
Heat about 2 tbsp. vegetable oil in a frying-pan
Slowly slide the polenta pieces into the hot oil, avoiding splashes!
Fry until golden and slightly crispy, turning carefully once or twice, using a fish-slice or spatula. [Allow approx. 10 minutes.]


Serve.
Spoon the Vegetarian Chilli onto plates and place the polenta pieces nearby. I made the mistake of placing the chilli on top of the polenta, which caused it to go soft quite quickly.
Top with grated cheese - such as an extra-mature Cheddar - and a wedge of fresh Lime.
A good accompaniment for this dish would be a salsa like "Pico de Gallo", although I served a tomato and red onion salad dressed with red wine vinegar.


Saturday, 5 November 2016

Successes and failures with second-cropping

Earlier this year I used the big plastic containers in which my potatoes had been grown to try to get a second crop from them. As each one became free (I harvested the potatoes as and when required), I sowed something different in each pot. Some of them have done OK, others not - hence the title of this post.

In two of the containers I sowed Dwarf French Beans. One had "Berggoud" (yellow), and one had "Processor" (green). They were sown on August 3rd.


These were the most successful part of the experiment, delivering a modest but quick-maturing crop. The last beans were picked about a week ago.


I would definitely recommend beans like this as a second crop, mainly because of the short time they require to go from sowing to maturity. Having said that, this year September and October were very mild and in a cooler year the beans might not do so well - and they are definitely not frost-hardy.

Another pot has Leeks in it. Admittedly they were not grown in it from seed. They had been started off in a small pot prior to planting in the big container when it became free. Nonetheless they seem to be doing OK.


They are not huge, are they? Still, they are better than the ones I have in the raised beds, which (having been totally shaded by bigger plants) are pathetically small. Given another couple of months, I think they will be all right.

This is not too bad either:


It's an "Endeavour" Brokali plant, sown on 22nd June. It looks a bit ratty at present, though strong enough. It will probably come to maturity early in the New Year. I'm not sure it is good use of space though - one single plant is never going to give me much of a crop!

Less good are these - Beetroot "Cylindra", sown on July 20th.


They have never really got going at all, and I don't think they will ever produce any edible roots. The best I can hope for is some little leaves to use in salads. I think they were just sown too late. Not recommended as a late crop.

These are carrots - "Chantenay", sown on 7th July.


If I had not been idle, these might have been OK, but I'm afraid I never got round to thinning them. As it stands, they are far too crowded, and will almost certainly not produce any roots. Are carrot tops any good as a salad ingredient???

So, some successes, but some failures too. Just one other thing to point out: growing things in containers does at least give you the opportunity to move them around. My four remaining black plastic tubs are now in the place where until just a few days ago the chillis used to live.


In this location they will get the greatest amount of light possible (not much at present!). I think that in their original positions they just didn't get enough direct sunshine.

Friday, 4 November 2016

Boletus Edulis - the Cep

Out walking yesterday I spotted a nice specimen of Boletus Edulis, the Cep / Penny Bun, probably the most sought-after of all wild mushrooms, and of course I couldn't resist bringing it home to eat!


This particular specimen measured 11cm tall and weighed 120g.


Unfortunately I could only find the one example, but it will keep for a few days, by which time it may well be joined by some other fungi!


The Boletus fungi are popularly reckoned to be the best for eating. Fortunately they can easily be recognised by the absence of gill on the undersides of their caps. They have pores instead. Even if a fungus looks like a Bolete, if it has gills it is not a Bolete. I recently found this simple explanation of the difference between gills, pores and teeth, which you might be interested to read: Gills, Pores or Teeth.


The brown cap of this type of mushroom gives rise to the name "Penny Bun", because it is said to resemble a (rather burnt!) bread bun - presumably the type that used to be sold for a penny.


One of the most evident identification features of the Boletus Edulis is the reticulation on the stem. Something is "reticulate" when it has a network of raised ridges that create a net-like pattern, like the stem of this mushroom, seen below:


Boletus Edulis grows on soil beneath trees, notably beech and birch, and less commonly oaks as well as pines, spruces and occasionally other conifers, but never in open grassland. I'm not saying where I found my specimen, (except that it's within walking distance of my house!) but suffice it to say that it was in long grass at the edge of a piece of woodland containing Birch, Oak and Pine trees.


While I was out walking yesterday, I also took photos of two other types of fungus, one of which I have yet to identify. This one, growing on the stump of a fallen Willow tree, may possibly be a type of Armillaria (Honey Fungus).


Nearby, on another very dead tree-stump I saw this:


I'm fairly sure this is Candlesnuff Fungus, Xylaria Hypoxylon, which is apparently most in evidence in Autumn and Winter. Here's a close-up.


Those last 3 photos were taken on my phone camera. I don't always take my "proper" camera when I go out, but I seldom leave home without my phone, and it is so convenient to have such a compact device that can take some pretty competent pictures. The only trouble is that I can't really hold the device steady enough to get photos that are fully in focus!

Thursday, 3 November 2016

Hedgehogs

Many of my readers follow me on Twitter and Facebook too, so they will have noticed that I'm getting very interested in fungi these days. Around where we live there are several patches of woodland that are particularly well endowed with fungi. Even a novice amateur like me can easily spot 20 different species in an afternoon, whilst an experienced fungi expert would probably find 100!

Autumn is a very good time for fungi. The bits of the fungi we call the "mushrooms" are actually the fruiting bodies of much larger organisms, which are mostly hidden underground. Just like traditional fruits (e.g. apples and pears) many fungi produce the mushrooms at intervals of approximately a year. You won't find a lot of fungi in Spring, but you can find loads of them in Autumn. This year seems to have been a very good year for mushrooms, probably on account of the mild but fairly dry weather.

Yesterday I went on a fungi hunt in a place that I hadn't visited before, and I found a lot of lovely mushrooms. My knowledge of fungi is increasing rapidly and I am now able to confidently identify several edible species, so I came home with a big bag (250g) of these:


They are Hydnum repandum, the Hedgehog Mushroom, aka "Pied de Mouton" (Sheep's Foot), so called because of the shape of its cap.


The Hedgehog name comes from the fact that the undersides of the caps are covered with spines, instead of gills or pores.


The (soft) spines are a unique feature. There is no other fungus in the UK that has this feature, which makes this one of the easiest fungi to identify with certainty. One of my favourite resources for fungus-identification is a website called Wild Food UK, and they have a page giving their Top Ten safest wild mushrooms for novice foragers. They list the Hedgehog Mushroom as 10 / 10 for safety of identification and 9 / 10 for culinary value, which makes it a winner in my book.


I also found a good specimen of the Brown Birch Bolete, another type which I think I can confidently identify these days.


This is a mushroom that has a lot of similarity with the Boletus Edulis (Cep, Penny Bun), and is very firm and "meaty". That single specimen weighed 115g.


I did bring home another Bolete of some sort, in order to try to identify it. It may possibly be an Orange Birch Bolete.


I am not sure of the identity of this mushroom, so there is no way I would eat it. This is advice which all sources give - unless you are really sure what a mushroom is, don't eat it.


Well anyway, the long and short of it is that the Hedgehog Mushrooms and the Brown Birch Bolete went into our dinner last night. The dish I made was intended to be a beef and Guinness casserole, but it ended up being a Mushroom and Guinness casserole with beef - and I only used half of the Hedgehogs!


Since I'm on the subject of fungi today, I'm going to include in my post some photos of other fungi I saw yesterday...


I emphasise that these photos show only some of the fungi I saw yesterday. This is why the study of this subject is so fascinating - there are literally thousands of different types to find, many of them incredibly beautiful, in a weird and wonderful way! Expect to see more coverage of this subject here on my blog...