Friday, 15 March 2019

Scarlet Elfcups

Many people think that fungi only appear in late Summer / early Autumn, but having now been seriously interested in fungi for over four years, I can tell you that this is definitely not the case. There are fungi to be seen in every month of the year - just different ones. Right now Scarlet Elfcups (Sarcoscypha coccinea and austriaca) are definitely in season.


In a local woodland area that I know well, there is a patch of these. Fortunately (for me) they are in a fairly well-hidden location where not many people go. To be fair, these fungi are not big and you do have to look quite carefully to see them, but once you know what you're looking for there are quite a lot of them.


The patch I have been observing this year is about 25 or 30 metres away from where I saw similar fungi this time last year, but curiously this year there are none at all in in that place.

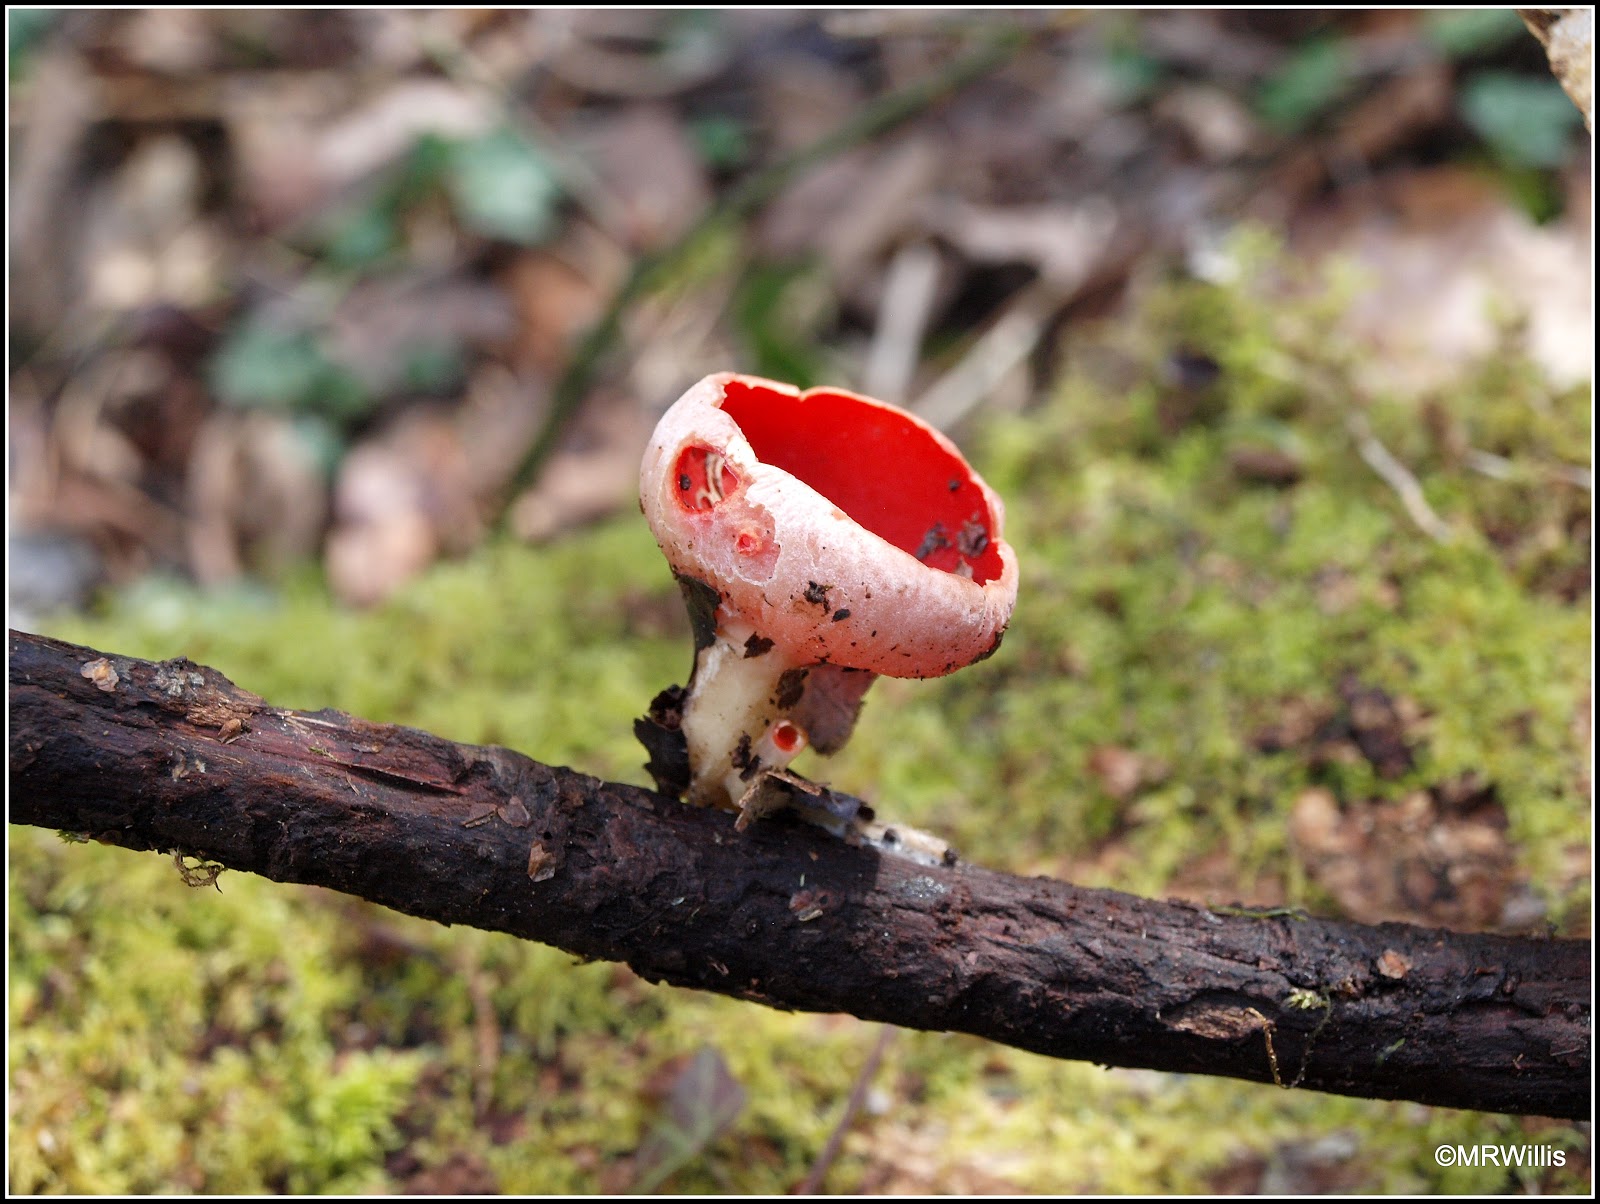
Scarlet Elfcups grow on old (often mossy) twigs and branches in amongst the leaf-litter of the woodland floor. Damp conditions are preferred.

Scarlet Elfcup growing on a twig - showing the characteristic goblet shape

This year I first spotted Scarlet Elfcups at the end of January, at which time they were mostly very small, like these:


Now, several weeks later, they have grown much bigger. Here my little plastic soldier "Woody" (35mm tall) helps me demonstrate their size:


This type of fungus is reportedly edible, though by all accounts pretty tasteless and rubbery, so I think "non-poisonous" might be a better description. Some people use them (raw) to decorate salads - often ones comprised mainly of foraged wild ingredients - but I'm not tempted to try them. I'm always wary of eating any fungi raw, because in so many cases they are toxic unless well cooked. I would also advise careful cleaning / washing before consumption. My next photo (enlarged) shows a colony of aphids inhabiting the rim of a Scarlet Elfcup:


Still, I think they are very attractive to look at, so for the time being I shall just continue to admire them!


Tuesday, 12 March 2019

Product review: Growseed chilli-growing kit

It's not very often that I review products on my blog, because all too often the suppliers are only interested in 100% positive reviews (even if they are not justified) but in this case I think you'll understand why I am making an exception - this is a chilli-growing kit. How could I resist?

Gerry from Growseed has kindly sent me a free sample of one of their new range of products, featuring simple kits with everything you need to get started on growing one of three types of vegetable - chillis, sweet peppers and tomatoes. I think this type of product will be most suitable for less-experienced gardeners, and children with adult supervision.


As seen in the photo above, the kit comes inside a black plastic seed-tray and is held together with a sleeve identifying the product. Unpacked, it looks like this...


There is an 18 x 23 cm seed tray with a clear plastic propagator-style lid; two small bags of soil enriched with blood fish and bone fertiliser; three different packs of seed (several variants are available, but mine were Jalapeno, Demon Red and Cayenne Long Slim), and three plastic labels. Due to difficulties with printers, the Review products do not have this, but the general-release item will also include a card with instructions for use.

The seeds themselves are sealed in foil packs, so should keep fresh for quite a while if unopened. The packs do not have any growing instructions on them, but I'm sure that will be covered in the instruction leaflet mentioned above. It's already a month past the time when I usually sow my chilli seeds, but I'm going to sow some of these ones straight away to see how they do.


Actually, one of the things I like least about the kit is the labels. I think white ones would be better, so that what you write on them would be more visible!

The lidded seed-tray / mini-propagator is quite flimsy, but I think well-suited to a Starter kit like this. The more experienced gardener would probably choose something more durable.


I have four grandchildren, and I reckon that at least three of them (excluding the youngest, who is only 3) would be very pleased to receive a kit like this as a gift from a gardening grandparent - though probably they would prefer the Tomato kit to the Chilli one.

Of course it needs to be emphasised that these kits only cover the initial stages of growing a chilli or a tomato. The pricking-out, potting-up, staking etc come later on, and the kits don't cover those. A child or novice gardener might not be aware of this!

These products, with full descriptions and instructions for their use are available via Growseed's website HERE . The price is £2.99 plus £1.00 postage on orders less than £10.

Saturday, 9 March 2019

It's PSB time again!

Purple Sprouting Broccoli (PSB) is one of my favourite vegetables. I grow some every year.


This is not a crop that will appeal to impatient gardeners who want "instant gratification"! It takes approximately 10 months to grow (depending on the variety). I usually sow mine in May or June and harvest it the following March / April. I always say that it's worth the wait though, because it is a vegetable that deteriorates rapidly after picking, and shop-bought PSB is usually a disappointment.

Last year we had a bit of a glut of PSB, so this time I have been a bit more restrained and only grown three plants - one each of three different varieties, in order to extend the cropping season.


The one that is going to be ready first is "Rudolph".


The spears are still a little on the small side, so I plan to leave them another week or ten days before harvesting any.


Coming along after that is "Red Arrow".


And finally there is "Early Purple Sprouting". It's ironic that one with a name like that should be the last to mature! This variety has a big central main head. You can see it in this next photo, although it is still greenish-yellow and hasn't yet turned purple.


These days you can get varieties of PSB that mature in Summer or early Autumn, but I don't go for these. The real reason is lack of space. There are so many vegetables that I want to grow in the warmer months that it doesn't seem justifiable for me to plant Summer PSB, since the more traditional over-Wintering types can make use of space which otherwise might be unused, at a time when there are fewer options to choose from.

Having said that PSB takes a long time to grow, which might sound like a criticism, I feel that in its defence I should add that once established it needs very little care, which many will see as a big advantage. I always tie mine to wooden stakes to support them against Winter gales, helping them to avoid root-rock, but with only three plants to worry about that's a 5-minute job. As Winter draws to a close and cropping-time approaches, I give my PSB plants a top-dressing of general-purpose fertiliser (Growmore, in fact), which gives them a boost at the most vital point of their lives. Not long to wait now...


Wednesday, 6 March 2019

The importance of labelling

As I mentioned the other day, I recently sowed two trays of onion seeds. They were of two different types. One was "Ailsa Craig", a brown type, and the other was "Long Red Florence" (a red type, obviously!). Unfortunately I made a real rookie error: I forgot to label them. Actually, to be honest, I didn't forget, I just didn't bother. I thought it didn't really matter, because they would both be treated in the same way, and once they got to the transplanting stage it would be obvious which was which. However...

One lot has germinated very well:


I sowed a "pinch" of seed (about 5 or 6) in each module, and they seem to have all come up.


This is the other tray:


One solitary seed, in one of the 15 modules has germinated (dare I say "...so far"?)


I suppose they may still appear, since it is only ten days since I sowed them, but I'm not very optimistic. The really annoying thing is that if I knew which variety was which, I could get a second batch sown before it's too late. I rather suspect that the No Shows are the Long Red Florence, because they were seeds from 2017, whereas the Ailsa Craig ones were from 2018. This would be a big shame, because I am very fond of the long red ones, which make a really great salad ingredient.

And all because of the absence of one of these...


Seriously, labels like this cost only pennies (mine were 50 for £1 in Wilkinson's) but they can save a lot of heartache. I know you may say "But they're plastic, and plastic is bad", but my response is that plastic labels are very durable and can be made to last for many years. I clean mine with White Spirit and an old Brillo pad, and reuse them several times, so I consider their use to be justified.

Sunday, 3 March 2019

Nurturing my Chilli babies!

Everyone who follows Mark's Veg Plot knows that I love my chillis! Every year I grow lots of them. Usually I start with good intentions - you know, "This time I'll only have 6 or 7 plants" - but I seldom manage to limit myself to less than 20. This year I have sowed 22 pots, each with 2 seeds in. Some of my favourites (Aji Limon, Aji Benito, Hungarian Hot Wax) are duplicated so that I can be fairly sure of having at least one of those, but I'm conscious that germination rates for chillis can be quite low, and since some of my seeds are a few years old, I'm unlikely to achieve a 100% result. Perhaps I should also mention that I have six over-wintering plants too, some of which may survive.


I try to improve the chances of germination by keeping the pots inside plastic propagators, which serve to maintain a high level of humidity. And since my propagators are unheated, they live temporarily in the airing-cupboard which is always warmer than anywhere else in the house.

Propagators in the airing-cupboard.

I check at least twice a day (usually more often) to see if any of the seeds have germinated, and if they have, I move the pot(s) in question into the light of my trusty Garland "Growlight House".


With chillis it is hard to predict how long germination will take. This year my first ones popped up on the fifth day after sowing, and now after two weeks have elapsed at least one seed has germinated in 10 of the 22 pots. Some varieties of chilli can take a long time to germinate, and I never give up hope before at least a month has passed.

Newly-germinated chillis are very delicate and need to be protected from extreme conditions. They particularly dislike big fluctuations of temperature. They are also very likely to become etiolated (aka "leggy") if they don't get enough light. The oft-recommended sunny windowsill is seldom enough. This is where my Growlight House comes in. It's not designed to provide heat, but chillis seem happy enough with the ambient temperature in my house which is usually about 20C, and its main purpose is to reliably provide suitable levels of light. You might like to see this little trick that I use to maximise the light.


It's a piece of double-sided shiny insulation/packaging material, draped over the Growlight House so that it reflects the light from the strip lights in the roof section. The lights do also give off some heat, and this material helps to retain that too.


I use a simple timer device to keep the lights on for 14 hours a day.


Every day I check the levels of moisture in the little pots, and add water if necessary. I also use the spray bottle seen above to spray the plants and pots with warm water in order to increase humidity.


As you can see, in some cases both seeds in a pot will germinate. In theory, I pinch-out the weaker of the two seedlings, leaving the stronger one to grow on without disturbance, but in practice I often keep both and transplant them to new (individual) pots when they are big enough to survive this. The first of mine won't be ready for this to happen for perhaps another week. Still, everything seems to be going according to plan so far. Let's hope there are no major delays, because in about three or four weeks time I will be needing the Growlight House for the same procedure, but involving Tomatoes instead of Chillis.

Thursday, 28 February 2019

Preparing potatoes for planting

We recently had a spell of several sunny and unusually warm days. Record-breaking weather, in fact. It was hard to believe it's still only February. However, without wishing to be unduly pessimistic, we may not have seen the end of Winter just yet. It could easily turn once more to snow and heavy frosts before Spring puts in its true appearance. I have seen people writing about planting all sorts of things in the gardens already, including the notoriously frost-tender potato. I'm not tempted to join in just yet, and I'm not planning to plant any potatoes for a couple more weeks - and then only under cover.

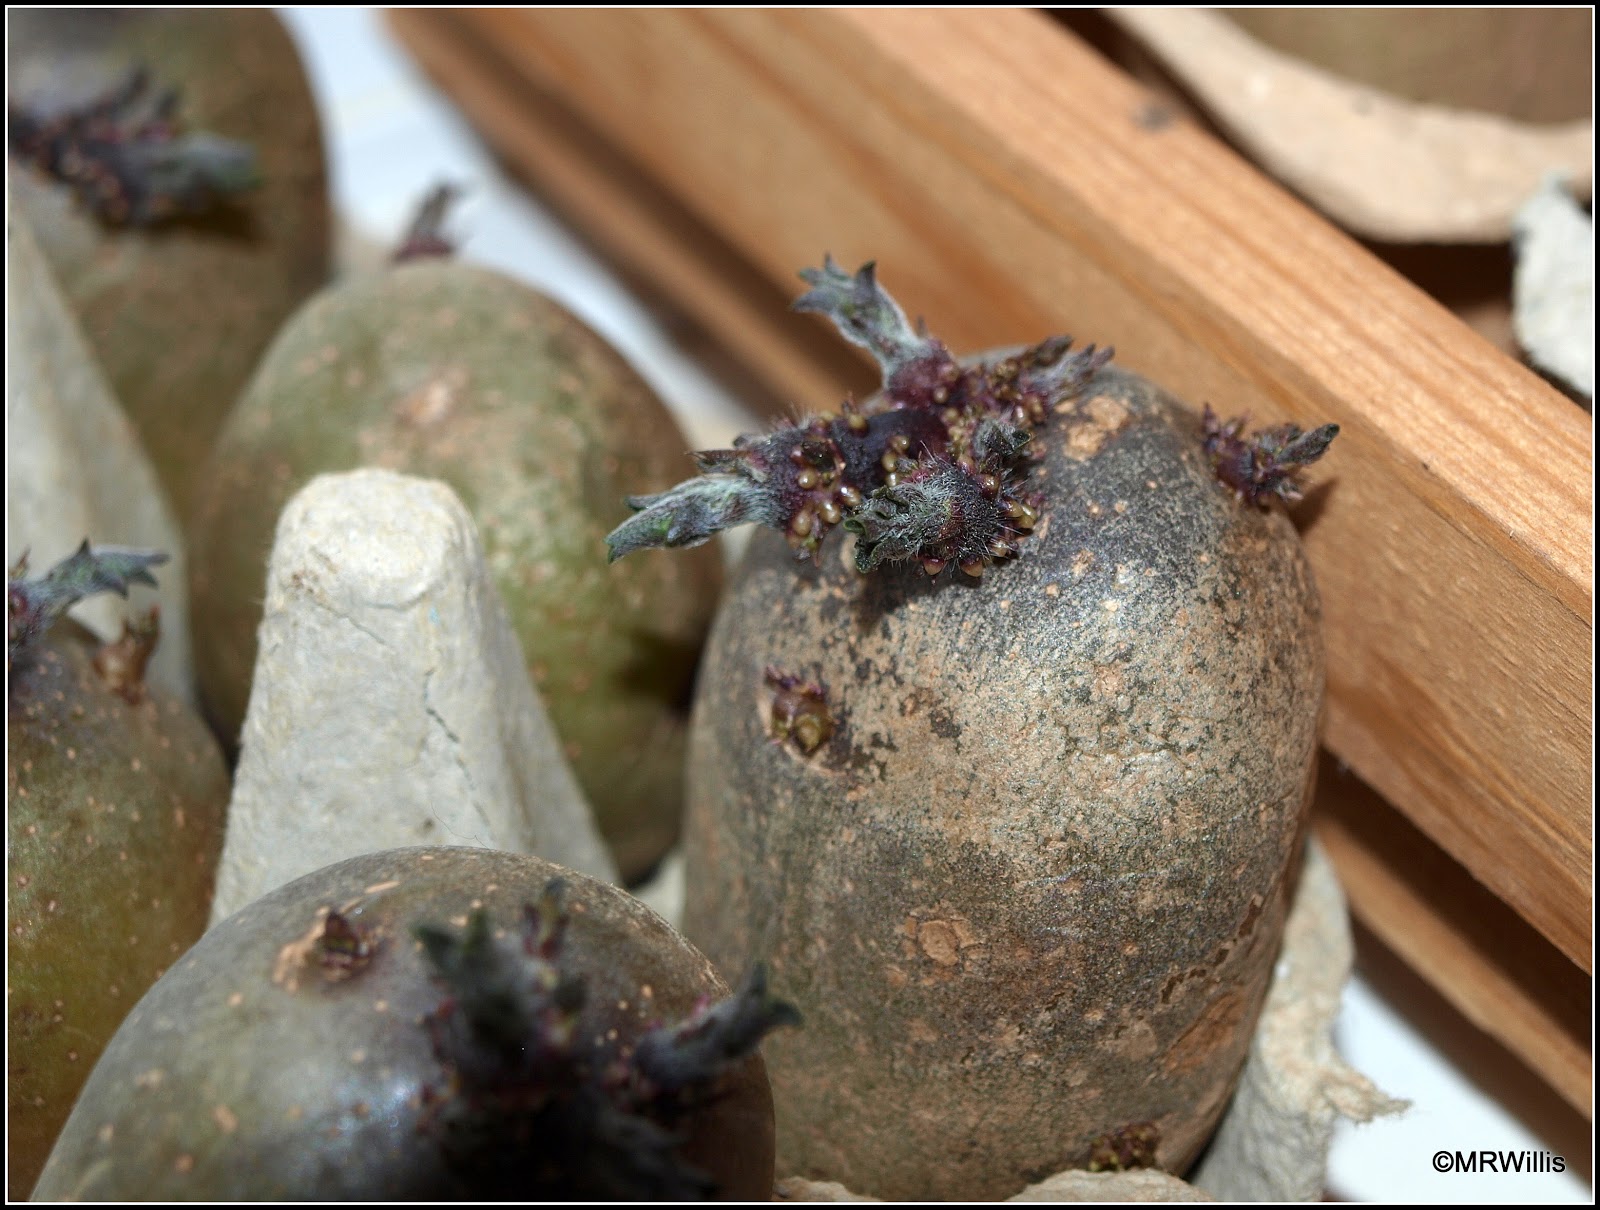
At present, my seed potatoes are happily chitting away in egg-boxes on the windowsill of a cool spare bedroom.


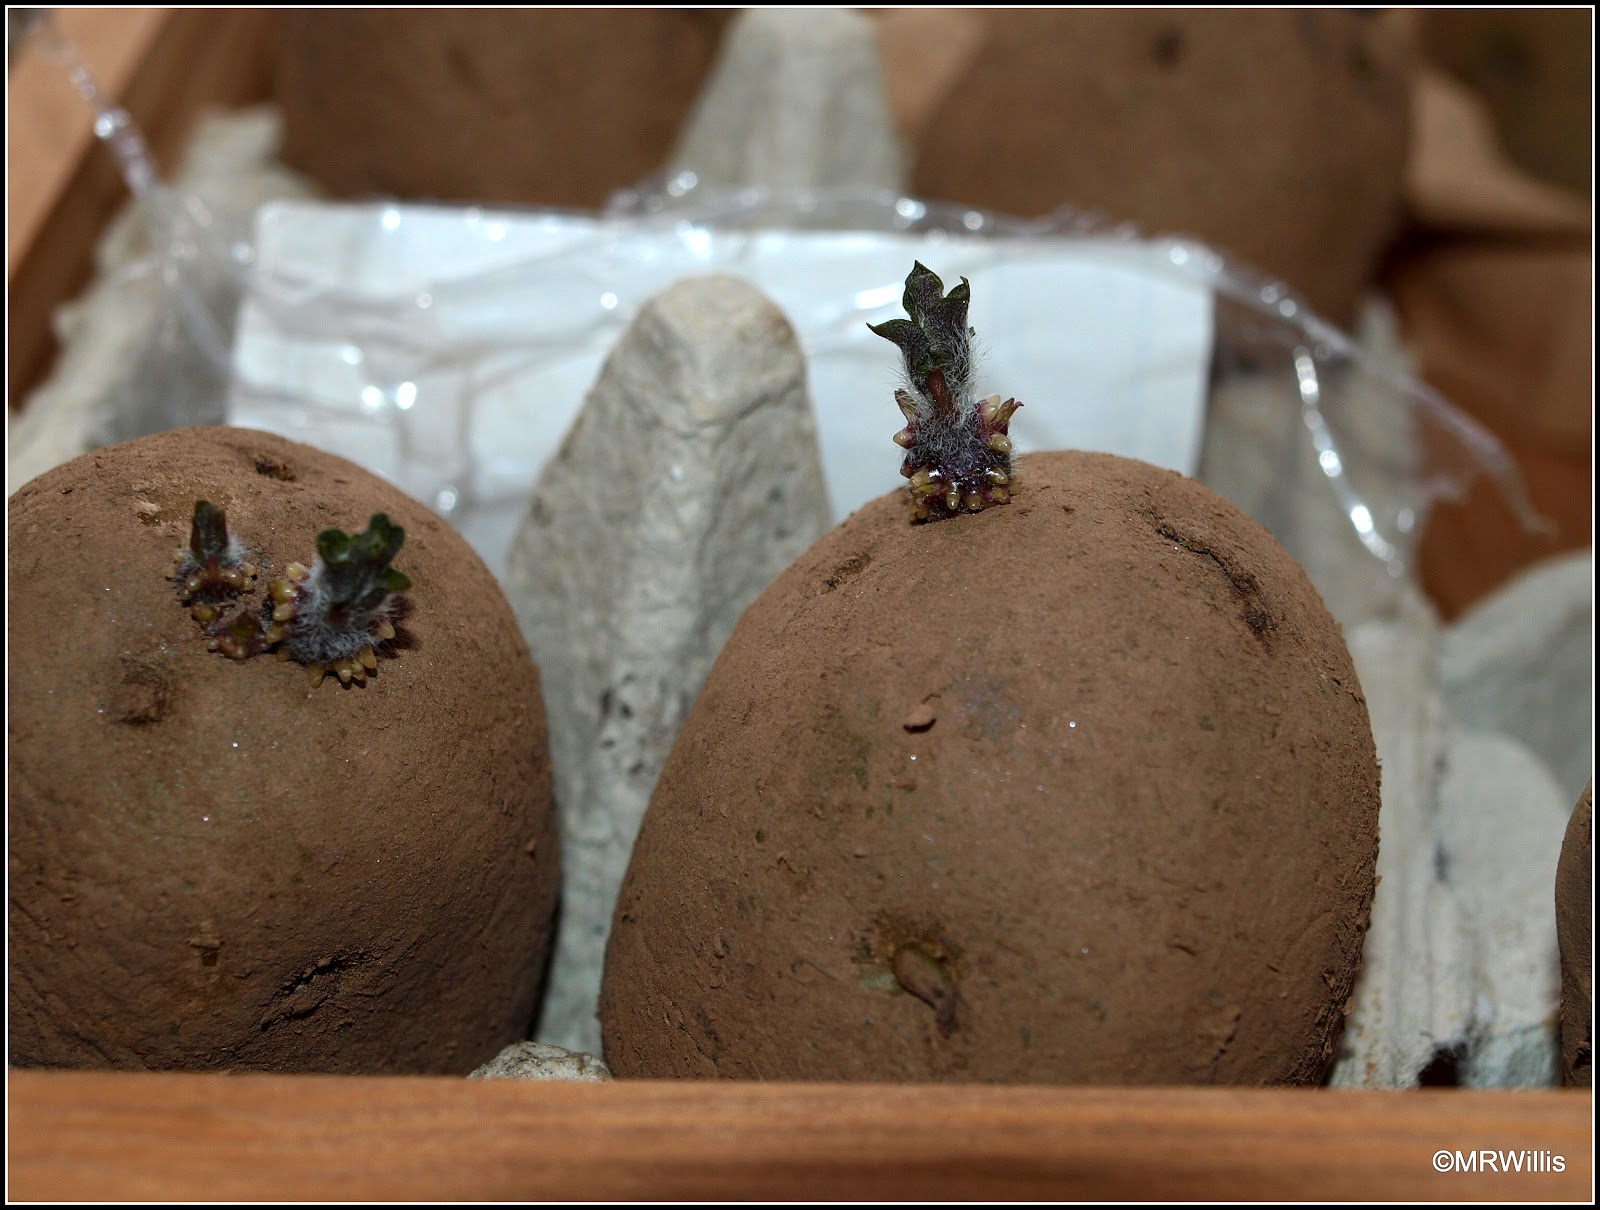
Most of the new shoots (aka "chits") on a seed potato tuber appear at the so-called Rose end - the end of the tuber most distant from the point where it was attached to its parent plant. The egg-boxes serve to keep the potatoes upright with the Rose end uppermost, allowing the chits to develop unimpeded.


This is what a good chit looks like. Short and stout, not thin and leggy, and also a dark colour, not pale.


To achieve this you need to give them plenty of light and not too much warmth. The temperature in that spare bedroom of ours (with the radiator turned off) is about 15C most of the time.

The tubers in this next photo are some of the "Foremost" ones that I have saved from plants I grew last year, and originally from the Courtmoor plot that I was looking after. They look very vigorous, don't they?


For the record, this is the list of the potato varieties I am going to grow this year:-

First Early
Foremost (Up to 10, depending on space available)
Annabelle (4)
Lady Christl (2)

Second Early
Charlotte (4)
Nicola (4)
Belle de Fontenay (4)

Maincrop
Highland Burgundy Red (2)

As you can see, I don't go in much for Maincrop varieties (The "Highland Burgundy Red" ones are just for a bit of something different). This is because I want my potatoes to be harvested early in the year, before blight becomes a problem.

As usual, I will be growing my potatoes in big plastic tubs, protected for their first few weeks by min-greenhouses like this...


More on this at a later date...

Sunday, 24 February 2019

Thinking of making a comeback

My blog has been dormant over the Winter months. Let's just call it hibernating. To be honest, my gardening "mojo" took a big hit in the Autumn. I was discouraged by the rather meagre harvests from that Courtmoor Avenue plot that I was looking after - and it took such a lot of effort too! I also felt that I didn't get much encouragement (and very little in the way of thanks) from the owners, so I "gave my notice" at Christmas-time. I left the plot in better condition than that in which I took it on, so my conscience is clear. This year my efforts will once again be concentrated solely on my own home garden.

The Courtmoor Avenue plot, a few days before Christmas 2018.

I also have to admit that my ever-increasing interest in fungi-spotting has also taken up a lot of my time, to the detriment of my gardening efforts, though to be fair there was not a lot that needed to be done in my garden these last three or four months.

Flammulina velutipes - Velvet Shanks

Now, with the Winter hopefully ending, I find my enthusiasm for gardening returning once more. Whether or not my blog will be resurrected in the same way remains to be seen, but at present my intention is to write a few posts (at longer intervals than previously), and see how it goes. So today, I offer an Update, a Situation Report...

My gardening year began at the end of January as it usually does, when I attended the Hampshire Potato Day event and bought my seed potatoes. This year I will revert to growing potatoes only in containers, and I will grow mostly First Earlies and Second Earlies. Ten days ago I sowed my chilli seeds. I habitually do this on or about Valentine's Day, a date that's easy to remember, and produces decent chilli plants for me year on year. I have also sown Broad Beans (in individual small pots, protected from the mice by clear plastic propagator-lids), and two types of Onions, sowing a pinch of seeds in each of 30 modules. I'll separate the plants when they are big enough to handle.

One of the biggest jobs of the gardening year for me is the emptying of the compost bins. It's hard work and can be very messy, so it's a job that sometimes gets put off and put off. The recent spell of warm sunny weather finally prompted me to get on with the task, and I'm pleased to report that all my raised beds have been topped-up with a very thick layer of rich organic matter. The birds will have a chance to peck this over before I need to sow or plant anything.


I have also reserved quite a lot of the compost for my potatoes, storing it in the big plastic tubs in which the spuds will be grown. I'll not be planting any potatoes for another 2 or 3 weeks at least, and then only if the weather doesn't go cold again.


Back in October I planted some garlic - "Mikulov Wight" - kindly supplied FOC for review purposes by Gerry from Growseed. This has grown steadily over the Winter and is looking quite promising. I covered the tubs with metal grilles (shelves from the mini-greenhouses) to stop foxes digging in them, and this seems to have been successful.


My Endives survived the Winter too. This was never intended; they were supposed to have been eaten during the Autumn, but I sowed them later than I should have done, and the Summer drought meant they grew a lot slower than usual (it's a miracle they didn't bolt!). Still, protected from frosts by my long cloches (and in the severest weather, by a couple of layers of fleece too) they look all right, even if not very big. Now that we have had some sunny and warm days I expect them to do one of two things: put on a growth spurt, or bolt. Hmmm, I wonder which it will be...


Surprisingly, I also have three Beetroot that might finally come to something:


They were sown in one of the big plastic tubs, as a follow-on crop after potatoes, but like the Endives, they never really got going - until now. Even if (as seems likely) the roots prove to be tough and woody, at least the plants are producing some new leaves, which can make a nice salad ingredient.

Another vegetable that I grew in the big tubs was Kaibroc, which produced a very creditable harvest over a very long season. It just seemed to keep on developing another batch of shoots every few weeks, and one pot with two plants in it never officially finished cropping. Now, the two very hacked-about plants have finally managed to set some flowers. I'm leaving these as a little snack for some of the early bees.

Left: Beetroot. Right Front: Kaibroc. Right Rear: Watercress.

So what now? I know this is tempting Fate, but this year I plan to be a bit more conservative with what I grow. I'm going to concentrate on staples like Runner Beans, Carrots, Chillis and Tomatoes, and try to resist growing any "Funnies". If all the dire warnings about shortages of fruit and veg after Brexit come true, I may end up being more than usually glad of the harvests from my garden!