Friday, 7 December 2012

Turnips "Boulangere"

In our household whenever turnips are mentioned for some reason we seem to end up talking about Baldrick from "Blackadder". Do you remember the episode in which Blackadder's very straight-laced relatives come to visit and Baldrick serves them with a rather rudely-shaped root vegetable...?

Turnips are not a vegetable very much favoured in England. They are often confined in a derogatory way to the same category as parsnips and brussels sprouts - the vegetables that "everyone" hates. Not me. I like turnips, and if treated properly they are a very nice addition to the repertoire. For the last couple of weeks we have been getting a few of the purple-topped type in our weekly veg-box. We used some of them to make Turnips Boulangere - literally "Baker's Turnips"  - cooked slowly in stock.


We peeled and  sliced five smallish turnips and layered them in a Pyrex dish with a similarly peeled and sliced onion, and added about 500ml of vegetable stock and a good seasoning of salt and pepper. A few knobs of butter will help the top layer to brown-up, and add a generally savoury taste to the stock.


We then cooked the dish in a moderate oven (approx 160C) for about an hour and a half. And the end result looked like this:


Crispy on the top; soft and unctuous inside. Here's a tip: squashing the veggies down with the back of a spoon, about 10 minutes before the end of the cooking time, allows the buttery juice to cover the top layer and helps it to go brown without burning.

We were struck by just how sweet these turnips were, and this sweetness was accentuated by the other veg we served at the same time; roasted carrots, potatoes and a home-grown parsnip. I should perhaps also mention that all this lot was accompanying a roast chicken - and real gravy made with the meat juices. Jane really is the queen of gravy!


Meanwhile, in the garden....


The "Golden Ball" turnips in that plastic box are growing agonisingly slowly in the cold weather (getting literally frozen most nights at present), but I hope they will soon be of a useable size. I have promised myself to sow some a bit earlier next year!

Thursday, 6 December 2012

Before and After

Plants look different according to the weather and light conditions, don't they? What I have for you today is some "contrasts".

These Strawberry plants in their Autumn colours were photographed mid-afternoon on a sunny November day - in other words, just before it went dark! (It gets dark here at about four-o-clock these days).

I'm particularly proud of this next photo. I really like the contrast of the deep russet leaves with the murky black background.


Here are the same Strawberry plants a couple of days later, mid-morning, after a sharp frost.


This is a close-up of the fruits. I somehow don't think they will ever make it to maturity!


This is one of my Curly Endives in the bright sunshine (with a bit of Parsley muscling-in on the shot).


Here's the same Endive on a frosty morning last weekend, with its leaves outlined in ice crystals.


The Cavolo Nero is interesting in any conditions:  above zero...


or below zero...


Like many other bloggers I know, I tend to treat my photographs as a pictorial garden diary. This is one of the reasons I take so many photos. It helps me to gauge progress, especially in relation to a similar crop in a previous year. In addition to the photos I also keep a simple list of sowing dates. I keep meaning to enhance this with the addition of harvesting dates  - but I never seem to get round to it, because there is always something more interesting (or more urgent) to do!

Wednesday, 5 December 2012

Frozen veg

After all the rain we have had recently, it was almost a relief to get some frost. You wouldn't describe it as a Big Freeze, but we have certainly had temperatures a few degrees below zero.

The crisp, bright weather conditions are great for photography!

Cavolo Nero

Cavolo Nero
 
Parsley

Brussels Sprout

Bay

Parsnip

Parsnip

"Golden Ball" Turnips

Broccoli

 Well, they may look impressive, but they're not doing much growing at present - they are just "frozen in time"...


Tuesday, 4 December 2012

Pruning Dogwoods

I decided last weekend that my collection of Cornus (Dogwood) shrubs needed tidying up.I pruned them all very hard in the Spring and during the Summer they put on a lot of new growth, but much of it was very higgledy-piggledy, growing in all sorts of silly directions (mostly downwards!), and the border was looking a right mess.


I'll show you a couple of close-ups of the "Before" situation.  Exhibit 'A'...


Exhibit 'B'...


A lot of the droopy, downward-growing shoots had touched the soil and begun to root. Presumably this is one of the Dogwood's normal methods of propagation.

Ready-rooted cuttings!
Using my heavy-duty loppers for the big bits and my secateurs for the smaller ones, I removed all the stray branches, leaving only the best of the upward-pointing ones. This meant removing about two thirds of everything! This is Exhibit 'A' in its "After" state. Much neater, I think you'll agree.


Likewise, Exhibit 'B' after its operation:


I think that what this will do is allow the shrubs to put most of their energy into a smaller number of better branches. This should hopefully pay dividends in the Spring when new growth begins to appear once more.

Only a very small number of the cuttings I planted in the Spring had taken root - which is just as well I suppose, since I do already have plenty of Dogwoods!

Spring-planted cutting now rooted
 My Cornus Alba "Kesselringii" - the one with the very dark-coloured stems - got a bit of a tidy-up too, but it is already quite a nice shape, with lots of upward-pointing stems.


So now the shrub border is looking a lot neater. You won't be able to make this out in my photo, but there are actually six different Dogwood varieties in that bed, and another elsewhere.


I have the following varieties:-
1. Cornus Alba "Kesselringii"  - very dark, almost black, stems, bronzey-green leaves
2. Cornus Alba "Aurea" - red stems, yellowy-green leaves (Exhibit 'B' above)
3. Cornus Alba "Gouchaultii" - red stems, variegated green-and-cream leaves
4. Cornus Sericea "Cardinal" - red, orange and yellow stems, plain green leaves
5. Cornus Alba unknown - greenish-yellow stems, green leaves (Exhibit 'A' above)
6 Cornus Alba unknown (nicknamed "Milton Keynesii") - red stems, green leaves
7. Cornus Sanguinea "Midwinter Fire" - red/orange/yellow stems, golden leaves

You might think that caring for Dogwoods seems like a lot of trouble, but I disagree: a few hours of pruning each year, and you are rewarded with THIS:-

"Midwinter Fire" in November

and THIS:-

"Milton Keynesii" (a nickname only, please note)

Monday, 3 December 2012

Harvest Monday - 3 December

Despite having written last week that I was unlikely to be participating in Harvest Monday for a while, I just couldn't resist...

Apart from the usual supply of fresh herbs, my harvest this week consisted solely of this trio of Parsnips:


They are of the variety "Panache". Not prize-winners for the showbench, but good healthy specimens nonetheless, and even sweeter than they would otherwise have been after our first really hard frosts of the Winter. [Freezing is supposed to help convert starch into sugar.]

No, not an igloo, but a frozen bell-cloche

My Parsnips formed one of the ingredients for the very warming and belly-filling  "Five-a-Day Gratin" which I made on Friday.

Sunday, 2 December 2012

Radicchio salad

Just recently we have been eating a lot of Radicchio, because the ones in my garden have been maturing. You can tell when they are ready to harvest when the big outer leaves go brown and shrivel up (or slimy if the weather is wet), leaving behind the tight, red heart. I have posted several photos of Radicchio, but to be honest they all look much the same, so I thought this time I would show you some Radicchio actually being used in the kitchen.

So here we are then - some of my Radicchio combined with beetroot, tomatoes and red onions to make a "Red Salad". Lots of nice colour, taste and texture.


To accompany the salad, Jane made our favourite one of our favourite salad dressings, which is a mustard vinaigrette enhanced with cream and Blue Cheese (in this case Danish Blue). It comes out pretty thick - more like a sauce than a dressing, but we like it that way. The trouble is, it doesn't look very elegant!


Just take it from me that it tastes a lot better than it looks, and it goes brilliantly with the Radicchio.

I also want to show you what I did with those chillis I wrote about on Friday. I made them into Chilli oil. I just boiled them up in some plain vegetable oil for a few minutes and then left them to infuse, before decanting the oil into a bottle. Actually, I must admit that I added to them one of the Scotch Bonnet chillis that had been hanging around in the fridge for a while (just to use it up, you understand...), which certainly pepped-up this oil a fair bit!


Because it is so hot, we will use this oil a few drops at a time, drizzled into a soup maybe, not in big spoonfuls for frying with.

Saturday, 1 December 2012

Five-a-Day Gratin

This post is aimed at all those gardeners and allottment-holders who currently have lots of lovely Winter veg available and are looking for inspiration about how to cook them. I love vegetables and I never have any trouble with eating my recommended five portions a day, but I know that not everyone is of the same opinion, so I have put this dish together to inspire any doubters. How could anyone resist something as yummy as my Five-a-Day Gratin???

Here are my five: Butternut Squash, Celeriac, Turnips, Parsnips and Potatoes. Actually, I'll let you into a little secret: I included some onions and garlic too! [P.S. an informed source (Jane) tells me that potatoes don't count, so we're back to 5 after all...]


Unfortunately the Parsnips were the only home-grown element of this dish, although the rest of the veg was from our weekly Abel and Cole veg-box, which I have no hesitation in recommending. The quality of their veg is always A1.


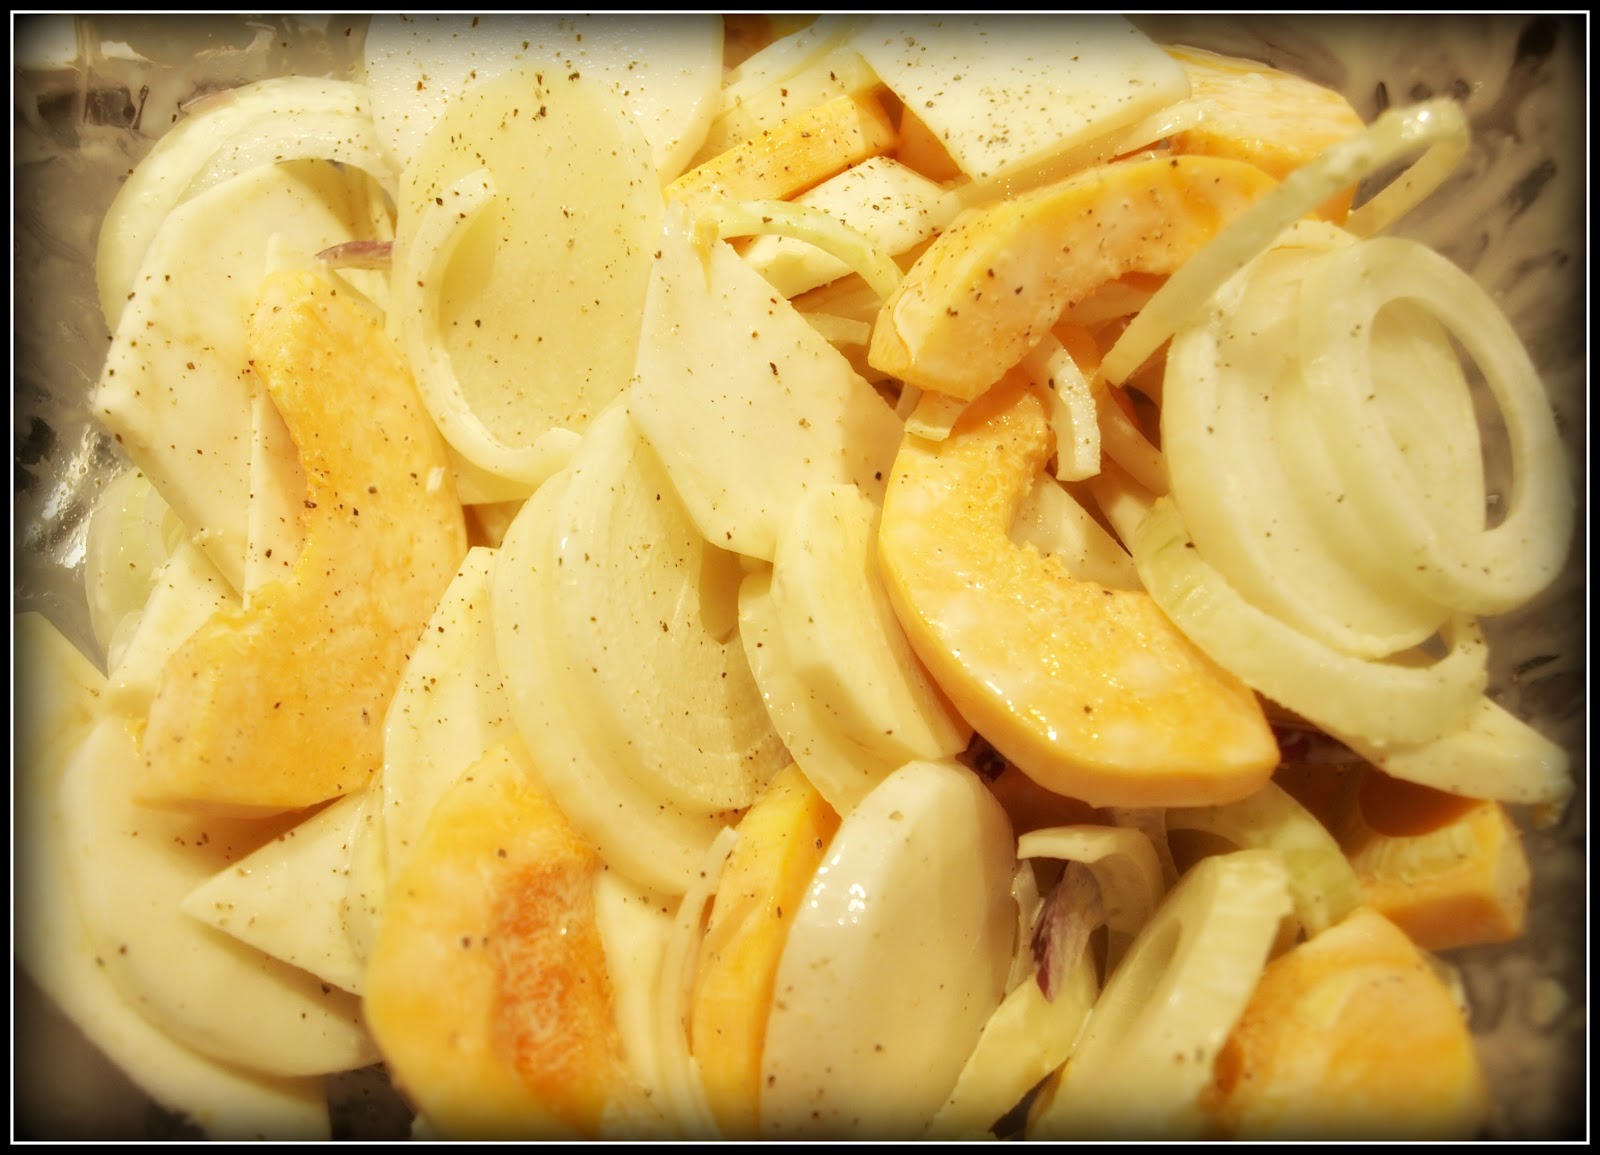
The first step in my recipe is to peel the veg and slice it thinly. Then put it into a big mixing-bowl with some crushed garlic, a 240ml tub of cream (we use Elmlea Light cream substitute), and some salt and pepper. Gently mix it all up with your hands, so that every piece of veg is coated with the cream.


Next step: tip the veg into a suitable (deep) ovenproof dish, press them down firmly and top with a neater layer of sliced potato dotted with small pieces of butter.


Then bake in the oven at 160C, for approx an hour or until a knife passes through the veg easily. If the top layer of potato hasn't gone golden brown by then, whack the oven temperature up to maximum for a few minutes.

This is the end result:


I served my gratin alongside lamb leg steaks with a savoury sauce made with shallots, Bovril and balsamic vinegar, but to be honest the veg was the star of the show and the meat was somewhat overshadowed.


OK, so what do you think? Are you going to knuckle-down and eat your five a day, or what???