I have decided to give blogging a rest for a while. I am at a point where I feel that I have very little new to say.
I have also recently become very absorbed with studying and photographing fungi, which has led me to take a bit less interest in my veg-garden. However, there is news on the veg-garden front too...
I am going to be doing some gardening on behalf of an elderly couple (neighbours of a friend) who have a big garden but can no longer manage to look after it. Rather than let it "revert to nature" they have offered it to me to use, either in its entirety or in part. Luckily, the property is only about half a mile from our house, so within easy walking distance. The veg-garden is weedy, but not what I'd call overgrown, so it should be relatively easy to knock it back into shape again. Furthermore, the present incumbents have been cultivating it since the 1960s, so the soil should be pretty good. This sounds like a much better arrangement for me than taking on an allotment!
Despite putting my blog into suspension for a while, I still intend to be active on the Social Media, so if you are interested you can follow me on Twitter ( @Marksvegplot ) and/or on Facebook (where I use my real name).
With a bit of luck, my enthusiasm for blogging will return before too long, and I'll be able to write about how I get on with this new plot, but for the time being, "Au Revoir", and thanks for following!

Wednesday, 25 October 2017
Friday, 20 October 2017
Update on the PSB
This year's Purple Sprouting Broccoli plants are looking good. There were not so many Cabbage White butterflies around this year, and in any case my PSB was covered with anti-insect netting, so it has been protected from caterpillars. The mesh is not fine enough to exclude aphids, but luckily there have been very few of those too, so the PSB foliage is nice and clean. All good on the bugs front then!

I have been very careful to water my plants well, because I know that the raised beds dry out rapidly. I have also given the PSB an occasional feed of general-purpose liquid plant food, and they look strong and healthy now.

I have four plants this year, one each of "Rudolph", "Red Arrow", "Red Spear" and "Early Purple Sprouting". In the photo below they are in that order, Left to Right.

You can see that they vary quite a lot in terms of height and density of foliage. The short "Early Purple Sprouting" one would be the most suitable for growing on an exposed site because it would be less vulnerable to wind damage. My little garden is fully enclosed on all sides, but it still suffers from the wind. The first time I grew this veg, all my plants were laid low in a gale, but I learned the lesson and these days I always stake the plants, securing them to stout wooden posts with a few turns of soft string in at least two places - more if the plants get very tall.

"Rudolph" is supposed to be the first of my four varieties to reach maturity, theoretically producing spears around Christmas-time, but I find that it doesn't normally achieve that. February is more likely. The other varieties will hopefully mature at different times, giving me steady pickings throughout the Spring rather than a glut.
Tuesday, 17 October 2017
Bye Bye Beans!
Well, I have definitely picked my last Runner Beans of the year!

I always like to take my Runner Bean plants down before the onset of really "Autumny" weather. It's a nasty job to do in cold, wet conditions.
It's surprising how much foliage can be produced by 12 Runner Bean plants. A row of them like this has a lot of wind-resistance, and is very vulnerable to collapse in strong winds, so although we were never forecast to be very much affected by the long-anticipated ex-hurricane Ophelia, Sunday morning seemed like a good time to get this job done.

Stripping away the leaves and vines with my secateurs, it was inevitable that I would find a few pods that I had missed earlier. There were a few very old ones that had already dried out, and a few immature ones that would have had no chance of growing to a decent size. At this time of year even the small ones are usually tough and flaccid - not nice for eating. The big ones I kept for drying, and the small ones went in the compost-bin.

Here in the UK not many people grow Runner Beans for the actual beans; they grow them for the young pods. However, the beans are very nice and dry well for Winter storage. They make a nice Chilli con Carne...
This is the support-frame, with the foliage removed. Those are 9-foot poles. Luckily I was able to stand on the edge of the raised bed so that I could reach up to the top.

Here are the poles, cleaned-off and bundled-up for storage in the garage until next year.

If you are wondering about the pots, they contain Daffodil and Tulip bulbs. I have protected them with wire grilles (aka shelves from my mini-greenhouses), weighed down with stones, to stop the foxes digging them up.
This is one of the benefits of the job - it produces lots of material for the compost bins.

I find that Runner Bean plants make very good compost material, because they are a good mix of soft (leaves) and hard (stems). My only problem is that the compost-bins are already nearly full - and soon I'll have a garden full of Maple-tree leaves to cope with too!
Anyway, the task is complete now.

I'll leave the raised bed empty for a while, and let the birds rummage in it for grubs. It will be the first bed to be planted-up next Spring. Gosh, Spring. Doesn't that seem like a long way off?
Sunday, 15 October 2017
Finger carrots
These are Finger carrots. Guess where the name comes from?

Yep, they're called Finger carrots because they look like fingers. Doh!
These ones of mine are of the variety "Amsterdam Forcing 3". It's a variety specially bred for growing long and thin. As I mentioned the other day, they have been grown as a follow-on crop in the 35-litre plastic containers which formerly held new potatoes. Two pots were sown on July 6th and the third was sown on July 29th.

I think I sowed the carrots a bit too thickly, and didn't thin them, so many of them are thus too weak and weedy to produce anything useable, but by picking carefully I'll be able to muster a worthwhile number from my 3 pots. Look at these beauties:
I terms of aftercare, I did practically nothing to them - just watered them occasionally. I think if I had grown them earlier in the year I would have covered them with Enviromesh, like my maincrop carrots, but sowing later has avoided the Fly.

Washing them shows that although they have green shoulders that will need to be removed before cooking, there is no slug or Carrot Root Fly damage at all - despite having been grown without protection of any sort.

Carrots like these are a special delicacy - tender and sweet - best served fairly plain (possibly raw) and definitely not thrown into a stock or casserole! They don't need to be peeled either, just lightly scrubbed to remove the soil from them.

This first batch was served boiled and then tossed in melted butter and sprinkled with chopped Parsley. I think if I had a lot of them I would put them in a bowl on the kitchen worktop, for snacking on, but I know they wouldn't last long in our household!

Yep, they're called Finger carrots because they look like fingers. Doh!
These ones of mine are of the variety "Amsterdam Forcing 3". It's a variety specially bred for growing long and thin. As I mentioned the other day, they have been grown as a follow-on crop in the 35-litre plastic containers which formerly held new potatoes. Two pots were sown on July 6th and the third was sown on July 29th.

I think I sowed the carrots a bit too thickly, and didn't thin them, so many of them are thus too weak and weedy to produce anything useable, but by picking carefully I'll be able to muster a worthwhile number from my 3 pots. Look at these beauties:
 |
| Keys for scale purposes |
I terms of aftercare, I did practically nothing to them - just watered them occasionally. I think if I had grown them earlier in the year I would have covered them with Enviromesh, like my maincrop carrots, but sowing later has avoided the Fly.

Washing them shows that although they have green shoulders that will need to be removed before cooking, there is no slug or Carrot Root Fly damage at all - despite having been grown without protection of any sort.

Carrots like these are a special delicacy - tender and sweet - best served fairly plain (possibly raw) and definitely not thrown into a stock or casserole! They don't need to be peeled either, just lightly scrubbed to remove the soil from them.

This first batch was served boiled and then tossed in melted butter and sprinkled with chopped Parsley. I think if I had a lot of them I would put them in a bowl on the kitchen worktop, for snacking on, but I know they wouldn't last long in our household!
Saturday, 14 October 2017
Is your blog being copied illegally?
A few days ago I was contacted by Alexandra Campbell, author of the blog "The middle-sized garden", asking if I was aware that my blog was being "scraped". This is the term which is used to mean that someone is stealing material from a blog or website, and publishing it on their own blog or website. The thieves often change some of the wording of the material in an attempt to cover their tracks, or to try to avoid accusations of plagiarism. This is what has happened to me. Some of my articles have been published on a website about healthy living. They have been partially and very crudely re-worded, but there is not a shadow of doubt that they are originally my work. Even the photos still show my "Marksvegplot" watermark!
Alexandra has put together a very comprehensive and clearly laid out article about this subject, and what you can do to avoid it and /or recover from it. I think all bloggers should read her article, so here's another link to it: Is someone stealing your blog and what to do about it.
The offending website shows a contact email address, which I have used to send them a message asking for my material to be deleted, but I have had no reply (hardly surprising, in my opinion). I have also posted into the Comments section of a couple of the reproduced blogposts, but since comments are moderated, the guilty party can just choose not to publish them. At least they will now be aware that I have found out about their misdemeanours!
Following Alexandra's advice, I looked up which organisation is hosting the website to which I have referred. It is PDR (Public Domain Registry). They have a Complaints page on their website, which I have used to flag-up the scraping. Hopefully they will investigate and eventually make the offenders take down the illegitimate content. I would stress here that is it not just me that is affected - several others are, and between us Alexandra and I know many of them so we have been passing information around between us. We reckon that if PDR get several complaints about the same website, all at once, they are more likely to act.
In the meantime, maybe it is time to use Google Alerts to set up some regular searches and notifications of terms I frequently use on my blog, just to see where else they appear...
Thursday, 12 October 2017
The Chilli harvest
Late September to early October is when most of my chillis are harvested. Many fruits are of course produced much earlier than this, but I always get a rush of ripe fruit just as the weather turns colder. (Ironically, this weekend temperatures in the low 20s C are forecast, which is unusually warm!). I think the plants know that this is their last chance to set fruit, before the frost kills them off.
Today then, I have picked another batch of ripe fruit:

In the basket are some each of "Aji Limon", "Ring of Fire", "Aji Benito", "Challock Chilli" and "Hungarian, long thin, red".
The "Challock Chilli" ones are the dark brown-coloured ones.

Some of you may recall that I helped their breeder, Stephen Shirley from Victoriana Nursery Gardens, to test them. After further refinements this chilli has now been stabilised and formally recognised as a breed called "Fat Bird". I saw some of them at the Challock Chilli Fest last weekend, and was interested to see that the new breed produces fruits that are much redder than the early prototypes.
With today's harvest added-in, my stash of fresh chillis now looks like this:

I already have a similar quantity in the freezer - the ones that escaped being made into Sweet Chilli Sauce etc!
Over the last few days I have been preparing some of my plants for over-Wintering, by pruning them very hard and re-potting them into fresh compost, prior to bringing them into the warm. The fresh compost will help to minimise the number of "little beasties" that come into the house with the plants. (I'm realistic enough to know that at least some will evade my scrutiny). This year I'm only going to try to keep a small number of plants (maybe 6 or 7), and I'm choosing the rarer and slower-growing ones, like my "Cozumel" and "Panama 6" plants. This way I should be able to keep them in better condition. I'll be using these "self-watering kits" to keep them optimally hydrated:

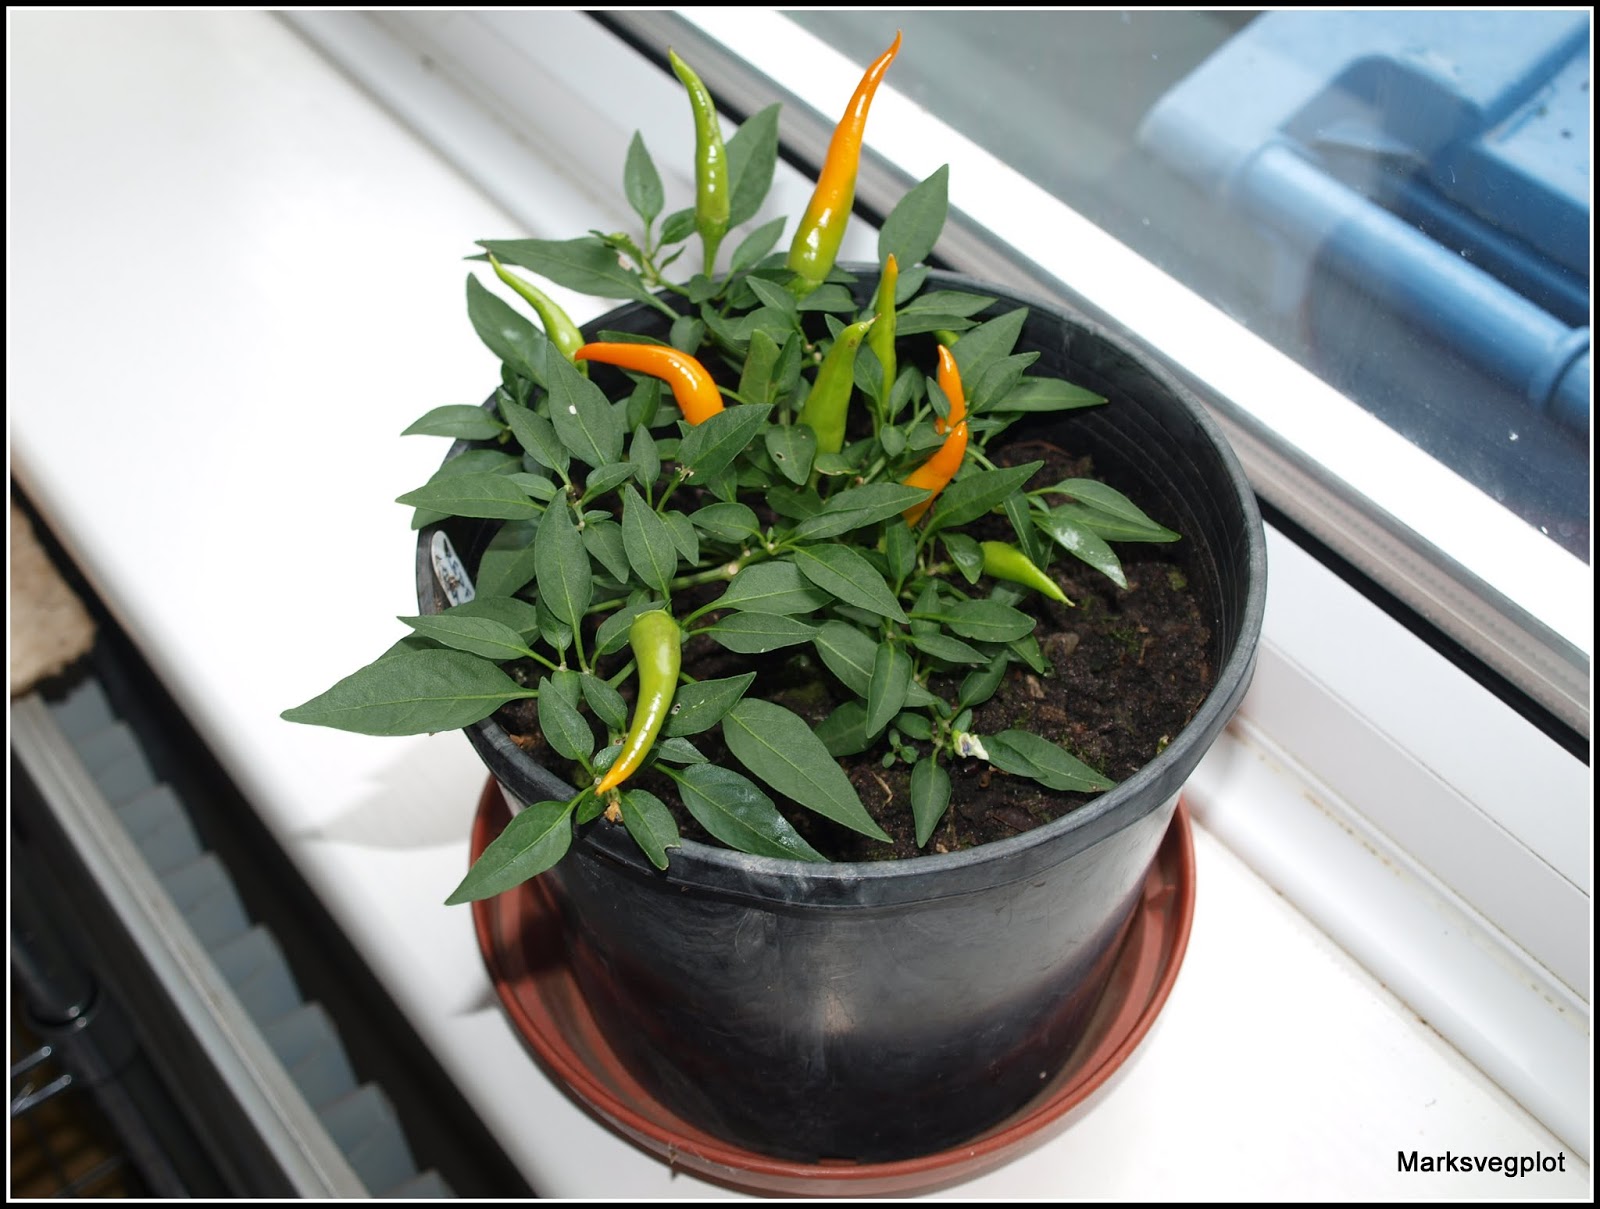
I have also brought indoors a couple of plants which have fruit that needs a bit of a helping hand with ripening, such as this little chap who I now believe to be a NuMex Sunburst Orange, who is now sitting on a windowsill above a radiator.

Just as with the Tomatoes, I have had a good crop of Chillis this year, and I think this is mainly due to the fact that we had a prolonged spell of hot weather in June, which allowed the plants to grow rapidly and build up their strength rather than having to struggle to survive in the cold and wet weather we often get in Late Spring.
Today then, I have picked another batch of ripe fruit:

In the basket are some each of "Aji Limon", "Ring of Fire", "Aji Benito", "Challock Chilli" and "Hungarian, long thin, red".
The "Challock Chilli" ones are the dark brown-coloured ones.

Some of you may recall that I helped their breeder, Stephen Shirley from Victoriana Nursery Gardens, to test them. After further refinements this chilli has now been stabilised and formally recognised as a breed called "Fat Bird". I saw some of them at the Challock Chilli Fest last weekend, and was interested to see that the new breed produces fruits that are much redder than the early prototypes.
With today's harvest added-in, my stash of fresh chillis now looks like this:

I already have a similar quantity in the freezer - the ones that escaped being made into Sweet Chilli Sauce etc!
Over the last few days I have been preparing some of my plants for over-Wintering, by pruning them very hard and re-potting them into fresh compost, prior to bringing them into the warm. The fresh compost will help to minimise the number of "little beasties" that come into the house with the plants. (I'm realistic enough to know that at least some will evade my scrutiny). This year I'm only going to try to keep a small number of plants (maybe 6 or 7), and I'm choosing the rarer and slower-growing ones, like my "Cozumel" and "Panama 6" plants. This way I should be able to keep them in better condition. I'll be using these "self-watering kits" to keep them optimally hydrated:

I have also brought indoors a couple of plants which have fruit that needs a bit of a helping hand with ripening, such as this little chap who I now believe to be a NuMex Sunburst Orange, who is now sitting on a windowsill above a radiator.
Just as with the Tomatoes, I have had a good crop of Chillis this year, and I think this is mainly due to the fact that we had a prolonged spell of hot weather in June, which allowed the plants to grow rapidly and build up their strength rather than having to struggle to survive in the cold and wet weather we often get in Late Spring.
Tuesday, 10 October 2017
Greasing my apple trees!
As many of you will know, my apple-growing prowess to-date has been far from remarkable. However the tree I bought last year ("Laxton's Superb") has done well, and produced a very commendable crop for such a small tree.
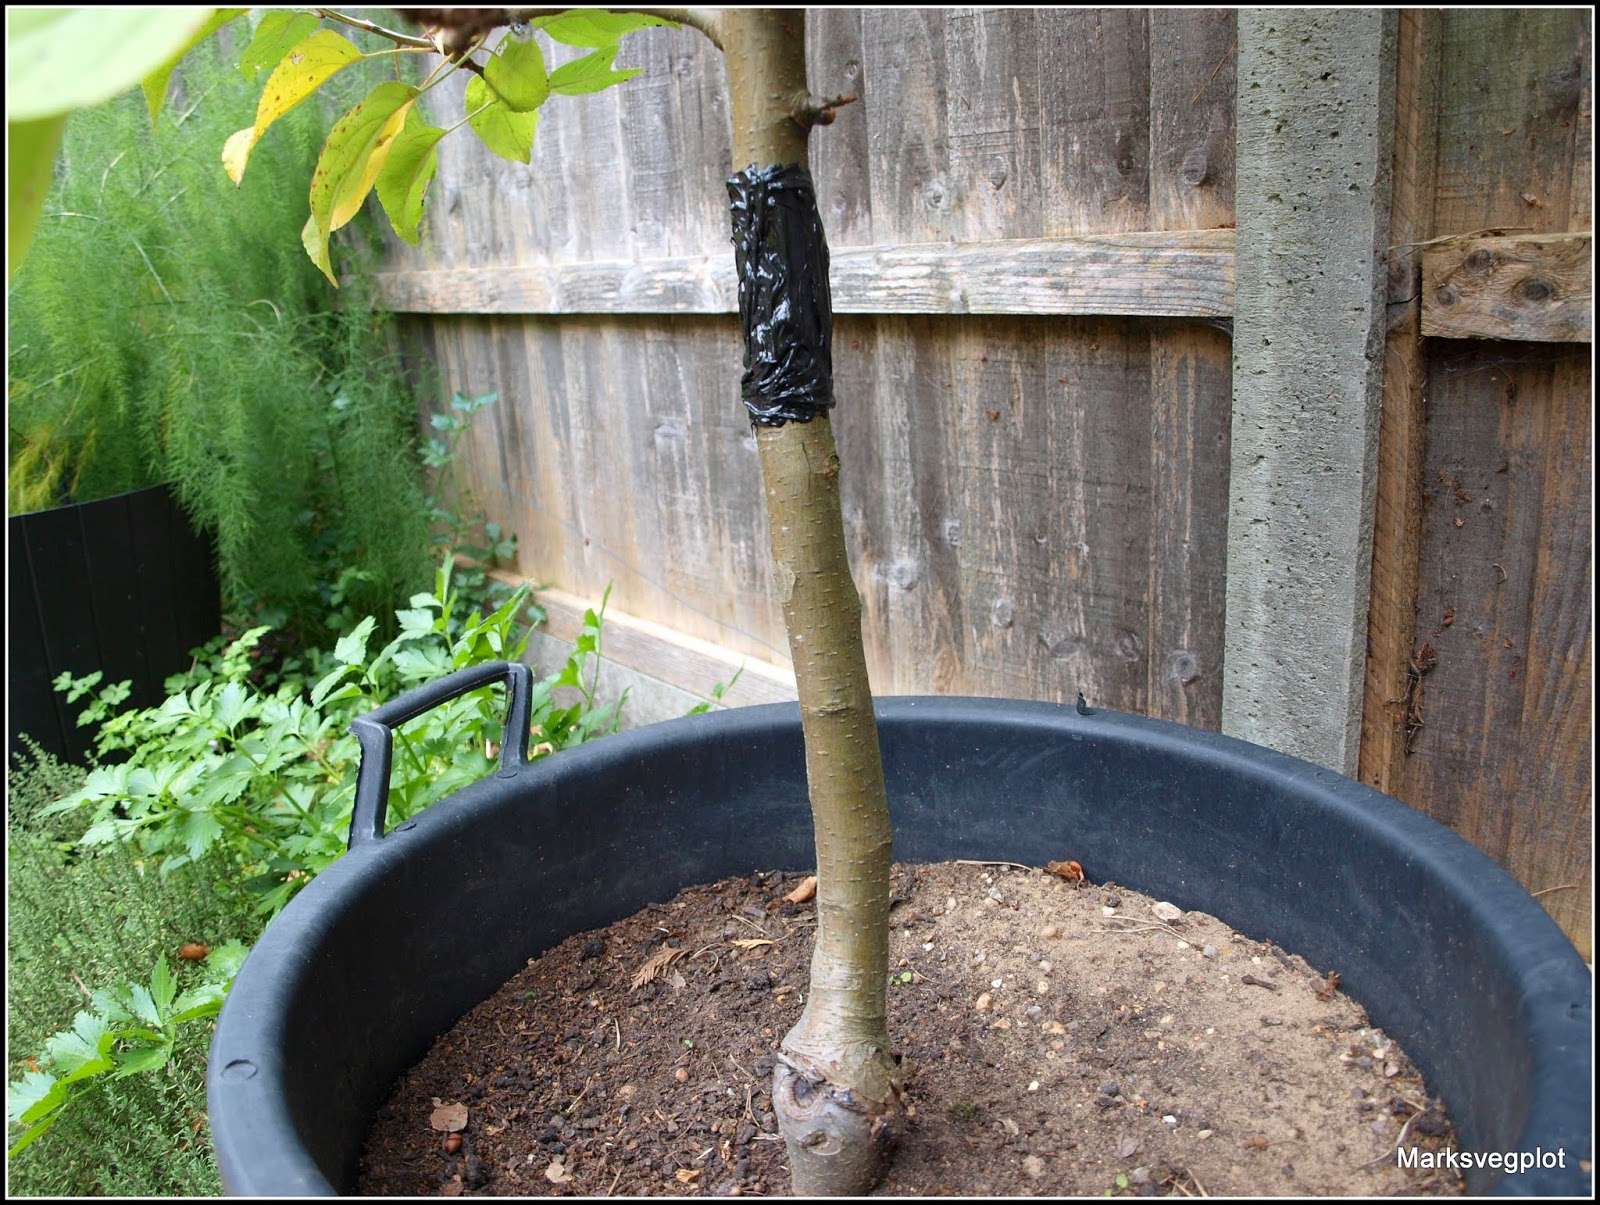
On account of previous issues - such as Bitter Pit (qv) - I have put my two apple trees into big pots, where I am better able to control the soil and its moisture level. This next photo is of my other apple tree, the "Winter Banana".
The few fruit that this tree produced this year were all attacked to a greater or lesser extent by burrowing creatures, possibly the Codling Moth.


With such a small potential harvest, every fruit is precious to me, and I'm determined to do what I can to prevent the insects damaging it. It is for this reason that I have applied grease to my trees! I purchased this little pot of Vitax Fruit Tree Grease at my local garden centre, priced at £6.99. I think it would be enough for about six to eight trees, if they were small ones like mine.

The grease is thick and black, rather like tar, though it doesn't smell of much. The principle of this stuff is that any insect trying to climb up into your tree will be unable to negotiate the sticky barrier and will either get stuck and die, or move off in search of easier "prey". Grease applications of course will not work in relation to flying insects, so they need to be used as part of an in-depth strategy, perhaps in conjunction with pheromone traps.
The product instructions say to apply it with a brush or spatula, but I found that a short length of bamboo cane worked just fine.

It says to apply a band of grease about 4 inches / 10cm in height, around the trunk of the tree, preferably about 18 inches from ground level, but below the level of the lowest branch. What it doesn't say is how thickly to apply it. Since I only have two trees to treat I decided to be generous!

So there we are - a band 4 inches tall and 18 inches above the soil surface...

Next, I shall be reading-up about pheromone traps...
 |
| "Laxton's Superb" |
On account of previous issues - such as Bitter Pit (qv) - I have put my two apple trees into big pots, where I am better able to control the soil and its moisture level. This next photo is of my other apple tree, the "Winter Banana".
 |
| "Winter Banana" |
The few fruit that this tree produced this year were all attacked to a greater or lesser extent by burrowing creatures, possibly the Codling Moth.


With such a small potential harvest, every fruit is precious to me, and I'm determined to do what I can to prevent the insects damaging it. It is for this reason that I have applied grease to my trees! I purchased this little pot of Vitax Fruit Tree Grease at my local garden centre, priced at £6.99. I think it would be enough for about six to eight trees, if they were small ones like mine.

The grease is thick and black, rather like tar, though it doesn't smell of much. The principle of this stuff is that any insect trying to climb up into your tree will be unable to negotiate the sticky barrier and will either get stuck and die, or move off in search of easier "prey". Grease applications of course will not work in relation to flying insects, so they need to be used as part of an in-depth strategy, perhaps in conjunction with pheromone traps.
The product instructions say to apply it with a brush or spatula, but I found that a short length of bamboo cane worked just fine.

It says to apply a band of grease about 4 inches / 10cm in height, around the trunk of the tree, preferably about 18 inches from ground level, but below the level of the lowest branch. What it doesn't say is how thickly to apply it. Since I only have two trees to treat I decided to be generous!
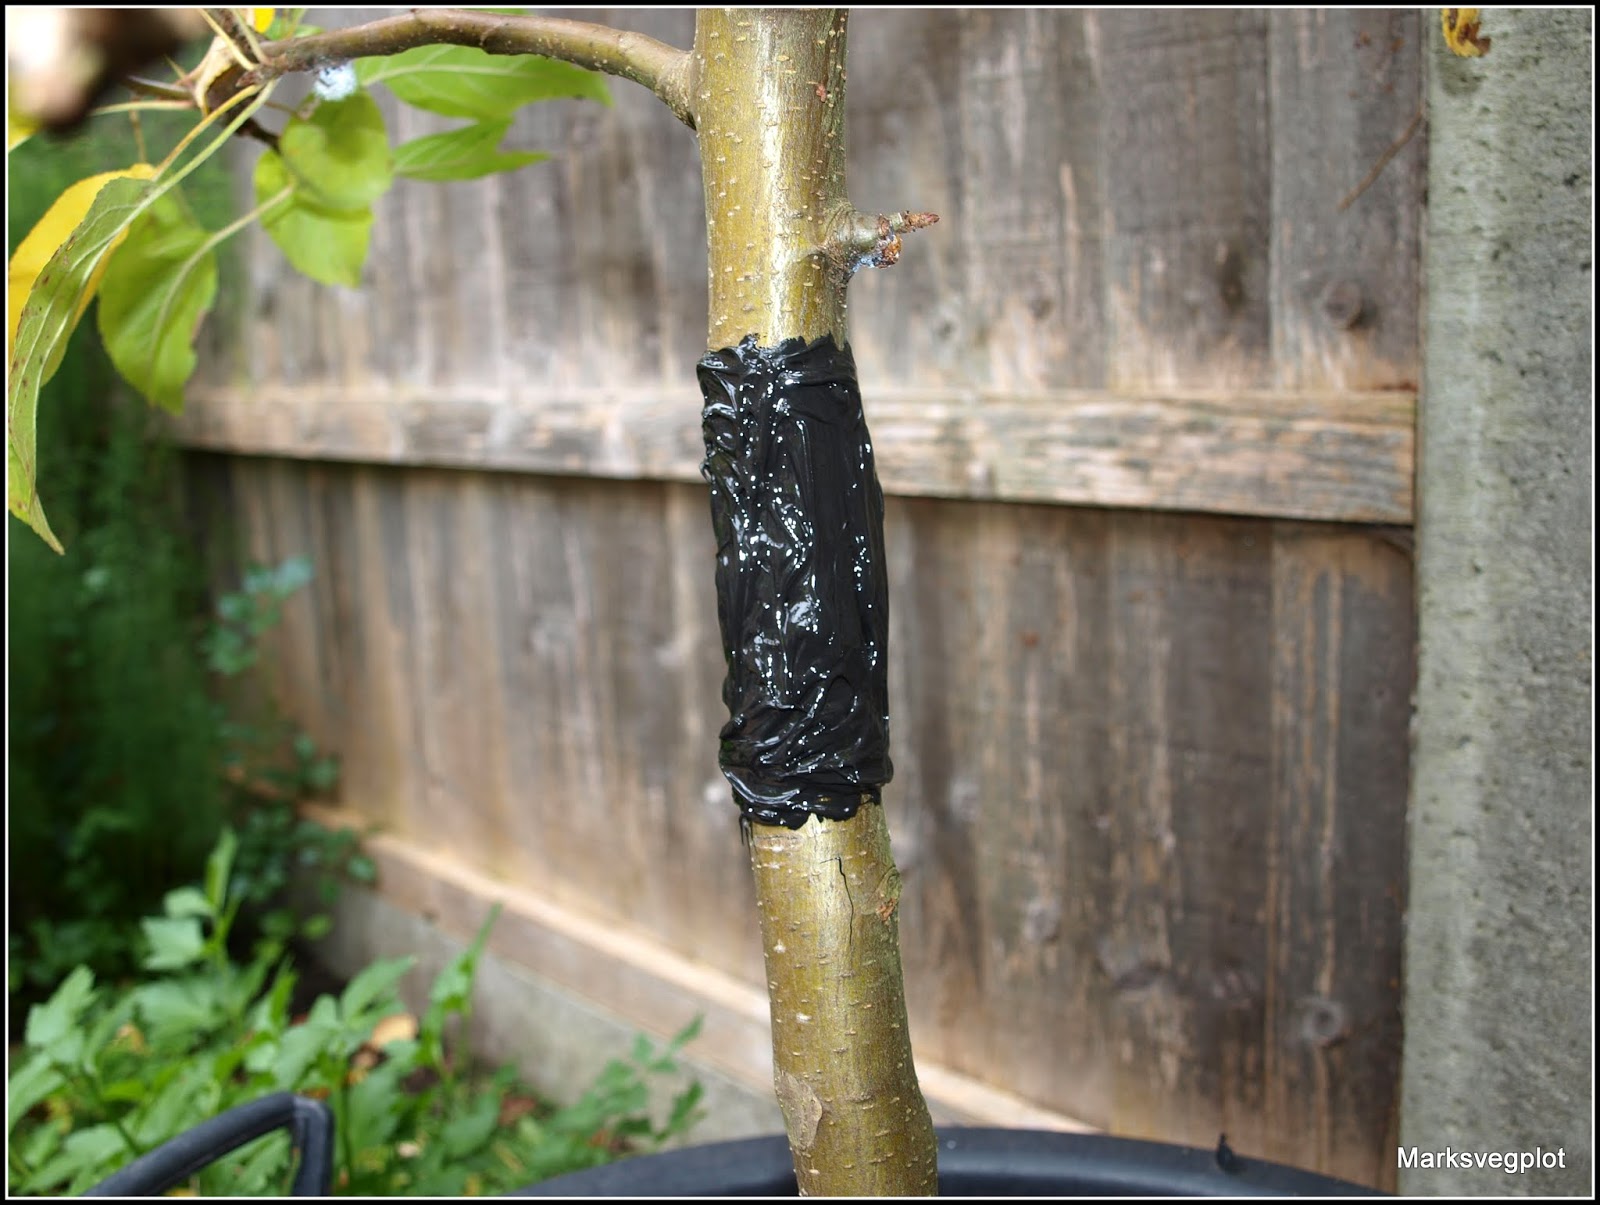
So there we are - a band 4 inches tall and 18 inches above the soil surface...
Next, I shall be reading-up about pheromone traps...
Sunday, 8 October 2017
Challock Chilli Fest
Every year at about this time we go down to Challock (near Ashford) in Kent for the Chilli Fest at Victoriana Nursery Gardens. This year is the fourth time we have been, and I can safely say that the show gets better every time.
Stephen, who owns and runs the Nursery is one of those people who really learns from his experience and makes improvements year-on-year. This year the introduction of a big marquee to host the chilli-tasting tables, and a covered seating area for food-consumption was a big success. We attended the show on the Sunday, and the weather was pretty good for October, but the previous day there had been a fair bit of rain, so the extra protection was most welcome.
This year was also the first time that an entrance fee has been charged. It was a modest £2.50 per person, and I know that much of this will go to Stephen's favourite charity, the Mission To Seafarers. I'm presuming that the balance will be used to offset some of the costs of hosting the show, which must be considerable. I don't begrudge paying this fee; I think it is very reasonable, and in stark contrast to some of the extortionate fees charged by some higher-profile events. The expert advice given by the whole team is worth the £2.50 on its own!
Despite the presence of a whole host of stalls selling various chilli-themed merchandise and food-and-drink, the main attraction of the Challock Chilli Fest is without a doubt the chillis themselves. Many other chilli festivals are aimed at what I call the chilli-consumers, whereas this one is aimed at chilli-growers. I have only a slight interest in bottled chilli sauces, but I love to be able to see and closely examine all the chilli plants on display, along with their fruits - which again you can see, handle and taste if you want to. You can buy chilli fruits (sold individually), grown on the actual plants that you see; you can buy packets of seeds, and you can buy fully-grown chilli plants too. (Most of these were in 12-litre pots and sold for about £20).
Along with most other chilli fans, I'm always on the lookout for something new, and there were plenty to choose from this year, including several new varieties from the Chilli Pepper Institute of New Mexico - like the NuMex Chinese New Year seen in my first photo, and this beautiful NuMex Veteran's Day:
I was also very taken by NuMex Lemon Spice and its cousins NuMex Pumpkin Spice and NuMex Orange Spice. The Lemon one was nicely citrusy, but the orange one is much hotter.
I was also very gratified to see that Stephen had grown a couple of specimens of the chilli I nicknamed "Cozumel". These came from seeds extracted from some dried chillis I bought while on holiday in Cozumel, Mexico, and I gave Stephen some seeds to try last year. Although (with the benefit of a polytunnel), both of his plants were much bigger than the two I grew, one of them is absolutely enormous! I think it is about eight feet tall - almost a tree.
I have no idea of the true identity of this "Cozumel" chilli, though I do think it looks a bit reminiscent of the one seen a lot in Italy and simply called "Peperoncino". It has the same characteristic blunt tip and longitudinal ridges.
When I am in the polytunnel at Victoriana, I'm like the archetypical kid in a sweet-shop, and I tend to snap off photos left right and centre, without necessarily remembering which chillis I have photographed! Here are a few of my photos from today:
I got the label in-shot for this one!
I think I can safely say that if (in the unlikely event that) my enthusiasm for chillis had been flagging at all, a visit to the Challock Chilli Fest would have revived it in no uncertain terms!
 |
| NuMex "Chinese New Year" - they really do look like Chinese firecrackers! |
Stephen, who owns and runs the Nursery is one of those people who really learns from his experience and makes improvements year-on-year. This year the introduction of a big marquee to host the chilli-tasting tables, and a covered seating area for food-consumption was a big success. We attended the show on the Sunday, and the weather was pretty good for October, but the previous day there had been a fair bit of rain, so the extra protection was most welcome.
 |
| A part of the chilli-tasting marquee, with Stephen and team on hand to provide advice if required |
This year was also the first time that an entrance fee has been charged. It was a modest £2.50 per person, and I know that much of this will go to Stephen's favourite charity, the Mission To Seafarers. I'm presuming that the balance will be used to offset some of the costs of hosting the show, which must be considerable. I don't begrudge paying this fee; I think it is very reasonable, and in stark contrast to some of the extortionate fees charged by some higher-profile events. The expert advice given by the whole team is worth the £2.50 on its own!
Despite the presence of a whole host of stalls selling various chilli-themed merchandise and food-and-drink, the main attraction of the Challock Chilli Fest is without a doubt the chillis themselves. Many other chilli festivals are aimed at what I call the chilli-consumers, whereas this one is aimed at chilli-growers. I have only a slight interest in bottled chilli sauces, but I love to be able to see and closely examine all the chilli plants on display, along with their fruits - which again you can see, handle and taste if you want to. You can buy chilli fruits (sold individually), grown on the actual plants that you see; you can buy packets of seeds, and you can buy fully-grown chilli plants too. (Most of these were in 12-litre pots and sold for about £20).
Along with most other chilli fans, I'm always on the lookout for something new, and there were plenty to choose from this year, including several new varieties from the Chilli Pepper Institute of New Mexico - like the NuMex Chinese New Year seen in my first photo, and this beautiful NuMex Veteran's Day:
 |
| NuMex Veteran's Day |
I was also very taken by NuMex Lemon Spice and its cousins NuMex Pumpkin Spice and NuMex Orange Spice. The Lemon one was nicely citrusy, but the orange one is much hotter.
 |
| NuMex Lemon Spice |
 |
| NuMex Pumpkin Spice |
I was also very gratified to see that Stephen had grown a couple of specimens of the chilli I nicknamed "Cozumel". These came from seeds extracted from some dried chillis I bought while on holiday in Cozumel, Mexico, and I gave Stephen some seeds to try last year. Although (with the benefit of a polytunnel), both of his plants were much bigger than the two I grew, one of them is absolutely enormous! I think it is about eight feet tall - almost a tree.
 |
| The big "Cozumel" |
 |
| Ripe fruit on the smaller "Cozumel" plant. |
I have no idea of the true identity of this "Cozumel" chilli, though I do think it looks a bit reminiscent of the one seen a lot in Italy and simply called "Peperoncino". It has the same characteristic blunt tip and longitudinal ridges.
When I am in the polytunnel at Victoriana, I'm like the archetypical kid in a sweet-shop, and I tend to snap off photos left right and centre, without necessarily remembering which chillis I have photographed! Here are a few of my photos from today:
 |
| I think this might be "NuMex Suave Orange". Most people would call this a heavy cropper... |
 |
| Is this perhaps "NuMex Big Jim"? |
I got the label in-shot for this one!
 |
| Thai "Bird Chilli" (seeds from another of Stephen's friends) |
 |
| See previous photo! |
 |
| This one looks rather like a Jalapeno (note the "crackling") |
 |
| I know this beautiful one. It's "Cheiro Roxa" |
I think I can safely say that if (in the unlikely event that) my enthusiasm for chillis had been flagging at all, a visit to the Challock Chilli Fest would have revived it in no uncertain terms!
Friday, 6 October 2017
Blanched Endives on the menu!
I'm sure that many readers know by now that I am a fan of the much-maligned Endive. This vegetable is very popular in many parts of Europe, but is seldom encountered in the UK except occasionally chopped-up as part of a bagged Mixed Salad. It is almost never available as a whole plant. Most Brits consider it to be too bitter, but this is a misconception. Modern cultivars of Endive are not excessively bitter, and their bitterness can be reduced by blanching.
To blanch something means to make it white (or at least pale), which is usually achieved through excluding light. When they are mature enough to eat, I blanch my Endives by tying them up quite closely, using soft string, like this:

This is a job best done on a dry day, because if the heart of the Endive is too wet it may rot. The time needed to achieve full blanching depends on a number of factors, such as the size of the plant and the weather conditions, but I usually find that 7 - 10 days is about right. If you are not sure if the plant has blanched enough you can always remove the string and re-tie it if necessary.
When you remove the string from a properly-blanched Endive you should see something like this:

The blanched part will probably be less than half of the plant, and the green leaves may not be pleasant to eat. This is not a problem for me, because an Endive like this produces plenty of salad for at least two big portions - probably more.

The size will also depend on the type of Endive and how long you let it grow before harvesting. I have no idea what variety this one is, because I grew mine from a mix of all the types for which I had seeds.


I think Endives are very photogenic, so I'm putting lots of photos in this post of mine!

Endives, with their crunchy texture, slightly bitter taste, beautiful creamy-golden colour and deeply-dissected leaf shape make excellent salad ingredients. Many people like to mix them with sweeter ingredients like Lettuce, but we actually prefer them on their own. The one I have shown off here was served with a nice sharp French Dressing / vinaigrette, as an accompaniment to roast Rack of Lamb with Gratin Dauphinois. This is a meal which we look forward to for weeks in advance, when the Endives are getting towards maturity! For Jane and me this meal is evocative of days spent in Hong Kong many years ago. We ate it several times in a little French restaurant called "Au Trou Normand", which we really loved.
Incidentally, if you plan to grow Endive, I recommend you treat it much like Lettuce, but be aware that it is prone to bolting if its soil is too dry. For this reason I usually grow my Endives for Autumn harvesting as opposed to Summer. I have also found that Endives sown very early in the year often bolt too, because they don't like the big fluctuations in temperature that Spring often brings.
Wednesday, 4 October 2017
Progress in the container garden
When my container-grown potatoes had been harvested, I re-used the pots and their soil to grow some second crops. Now these are beginning to mature.

Actually, two of the pots have already delivered their harvest. They had held some Dwarf French Beans. I have one more pot of beans left. Unfortunately, due to the depredations of slugs in the early stages, only two plants have survived in this pot. The other earlier ones had about 6 each.

Curiously, the slugs seem to have attacked the leaves, not the pods. Nonetheless I will think myself lucky if the two surviving plants produce enough pods for a single 2-person serving!

I have three pots of finger carrots (Amsterdam Forcing 3), two of which are nearing maturity.

Today I carried out a size check. It's difficult to judge the size of a carrot without pulling it up. This one seems just right (as long as you ignore the quirky forking at the root end). Carrots like this are best eaten raw as a salad ingredient - which is what I am growing them for.

I have three pots of Leeks (Musselburgh and Winter Giant). They are coming along very nicely. In fact although they are not yet big I think they could be used right now. I don't want or need to use them yet though, because I have some much bigger ones growing in one of the raised beds.

For now I'll leave them to get a bit bigger...

The last vegetable growing in my container garden is Mache / Lamb's Lettuce / Corn Salad.

As you can see, the plants are very tiny still. I had them in a seed-tray for quite a while after germination, and they didn't grow much at all and were beginning to go yellow. Since I planted them in the big pots they have greened-up a lot and have finally started to grow. I suppose the seed-compost had too few nutrients in it.

Fortunately Mache is quite hardy, so even at this late stage of the year I fully expect to get a crop from these plants at some point - but don't hold your breath!
So there you go - a demonstration I think that second-cropping is definitely worthwhile.

Subscribe to:
Posts (Atom)