Friday, 26 April 2013

More visual treats

Lots of my plants have some really colourful fresh new growth...

This is Cornus Alba Kesselringii (Dogwood)


This is also a Dogwood bud.


These are Snakeshead Fritillaries:


This is the bud of an Aquliegia flower:


This is Euphorbia "Clarice Howard":


This is Hypericum, with the old dried leaves from last year still hanging on, but being replaced by new growth:


At this rate, the garden will be full of new foliage very soon.

Thursday, 25 April 2013

How to handle Spring weather

Here in the UK complaining about the weather is a national pastime. It was only a week or two ago that we seemed to be stuck in the grip of a seemingly interminable severe Winter. Now we have typically "April" weather - sunshine interspersed with heavy showers of rain during the day, and cold nights still - occasionally frosty. On the TV Weather Forecast we keep being reminded that the sun in April is as strong as it is in August, and to go easy on the sun-bathing! I'm not ready for sun-bathing just yet, but I have been thinking very carefully about the effects of the weather on my plants.

Little plants, like my tomato seedlings, need lots of light to prevent them going leggy. This year I have had the benefit of the new Grow Light House, so my tomatoes are looking good, but I want to give them as much natural light as possible and to accustom them gradually to life outdoors. In the mornings, after the sun has come up and the temperature has reached about 10C, they go outside into one of my plastic mini-greenhouses, where they stay until about 6 p.m. when they come in for the evening and spend the last hour or so of daylight on a bedroom windowsill.


Notice how I have weighed down the greenhouse with some bricks. These structures have a lot of wind-resistance and are prone to taking off if not secured!

The process of gradually acclimatising the seedlings to outdoor conditions is known as "hardening off". Seedlings planted outside without the benefit of this procedure are likely to die of shock - or at least to do badly. If you are buying tomato seedlings, look for short sturdy ones, with stems that are purple-coloured rather than pale green. Dark colouring of the stems is a sure sign that they have been properly hardened-off.

During the Winter I protected some of my potted herbs in a coldframe, and now I am using the same structure to protect a couple of pots of shallots as well. In order to help the plants inside it to acclimatise, it is advisable to open the lid of the frame for a few hours whenever you get a sunny day.


If you don't open the lid, the temperature inside can get very high if the coldframe is in direct sunlight. Of course you have to remember to close it later in the day too. At this time of year you really need to adopt a "Start of Day" procedure and an "End of Day" procedure to make sure that all your plants get the right treatment! When I'm at home during the day I often have a "Middle of the Day" procedure too, whereby I transfer trays of seedlings from windowsills on one side of the house to another, in order to maximise their opportunities for getting natural light.

My long cloches have also seen a lot of use recently. They are good for providing weather-protection to young seedlings or newly-sown seeds, but again you have to think about what may happen if the temperature inside them gets too high. Until last weekend I had two of these cloches protecting my Shallots, but I raised them up on their legs, so that some air could get underneath. I would like to have removed them completely a few days ago, but I was pretty sure the foxes would dig up the Shallots if I did.


 Since this photo was taken, the cloches have been replaced by nets.


If the picture looks a bit fuzzy, it's because the nearest bed (where the cloches were) is covered in fine extruded-plastic netting, which looks almost grey in the strong light conditions. It's a very difficult type of net to handle (I don't think I'll buy any more like it), but hopefully it will keep the foxes away from my Shallots.

Wednesday, 24 April 2013

Celeriac and Lentils with Hazelnuts and Mint

This is a recipe from "Plenty" by Yotam Ottolenghi. (Page 216).


Because this recipe is Ottolenghi's, not mine, I'll not describe it in detail. If you want the full details, buy or borrow the book! (You won't regret it.)

The gist of it though is to cook some green lentils (I used Puy ones) and some Celeriac, and then steep them while still warm in olive oil, hazelnut oil, vinegar, black pepper and mint.


Meanwhile, you toast some Hazelnuts, chop them roughly, and use them as garnish, along with more Mint.


This is a dish that can be served hot, warm or cold. We had it as a cold starter. I felt that this would be the best way to appreciate the flavours. But with the lentils in it, it could be served as a nutritious and filling Main Course too.


The dish is a riot of flavours and textures! I particularly enjoyed the crunch of the Hazelnuts alongside the soft Celeriac. Every dish I cook from an Ottolenghi recipe is better than the last one. The man is a genius!

Tuesday, 23 April 2013

Bursting out all over

Well, Spring has definitely sprung now. We have what is normally described as April weather - sunny periods and showers, and at last the temperatures have made it into the teens. Over the weekend we had some glorious sunshine too.

With the change in weather the plants have decided to make up for lost time, so new buds and shoots are popping up all over the garden. Pride of place has to go to this most welcome sight - ths first Asparagus spears of the year. They grow very rapidly. One day there is nothing to be seen, and the next these things are three inches tall! I usually find that one or two spears come up well before the others. It's almost as if they are making a reconnaisance to see what the weather is like up above, and reporting back to the others: "It's OK lads, come on up!"


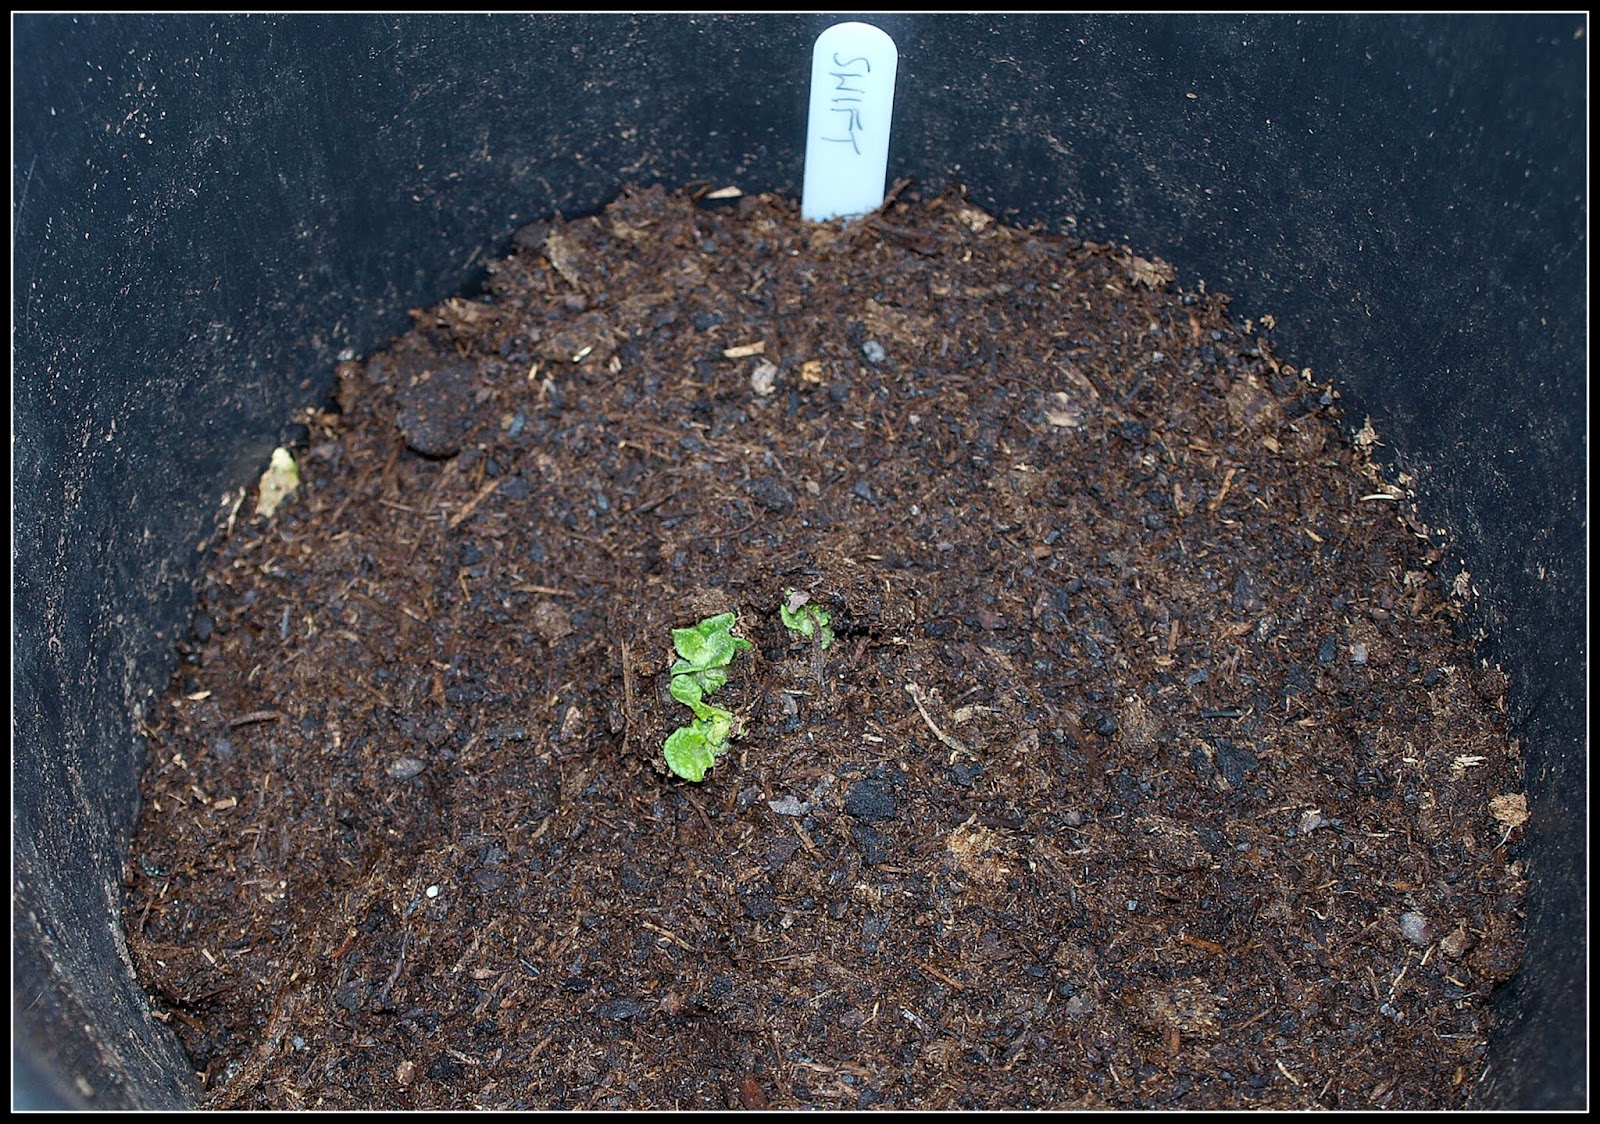
Here is another sight I have been anxiously waiting to see - the first potato plant peeping through the compost in its tub. This one is called "Swift", although this year it has not lived up to its name yet!


The Shallots have also decided to put out some leaves.


The ones in pots in the coldframe were a day or two ahead of the others in the raised bed, but they are all covered in green now.


The Radishes I sowed between the rows of Parsnips, Turnips and Beetroot are up now. They grow very rapidly indeed in conditions like we have at present.


In the Autumn, when I made my micro-pond I transplanted a number of tiny volunteer plants that I had found elsewhere, aiming to "soften" the harsh edges of the new feature.


These plants are showing signs of life now. There are a couple of Red-veined Sorrel plants:


All round this area the shoots of "Convallaria Majalis" (Lily of the Valley) are  coming up. At this stage they look a bit like smoother versions of the Asparagus.


There are also a few Hardy Geraniums / Cranesbills:


This type with its bright red shoots eventually turns into a plant about three feet tall, with lovely purple flowers.
I don't remember its name, but it is a relic from a time when I was as keen on Hardy Geraniums as I am now on Dogwoods.


Over by the compost bins, a new crop of Good King Henry is emerging.


When I made my Insect Hotel last year I conveniently ignored the fact that in its "basement" are a number of Comfrey plants. I wonder if they will do OK?


Comfrey it pretty tough stuff, so I expect it will push its way up somehow.

Monday, 22 April 2013

Harvest Monday - Broccoli again!

During the Winter months I have not had much to show off for Harvest Monday (hosted by Daphne at Daphne's Dandelions), but finally my Purple Sprouting Broccoli is in full swing, so I'm back in again!


This past week I harvested a batch of 40 spears of broccoli. I don't usually weigh my harvests, but I can tell you this is a lot of broccoli by my standards. I reckon 5 spears is a serving, so 40 spears will feed the two of us four times.


I wrote about harvesting PSB last week, and offered a few views about cooking it, so this time my post is confined to showing off the current batch in photo form.


Even if I didn't like eating PSB, I reckon it is picturesque enough to put it in a vase and treat it as a flower!


Sunday, 21 April 2013

Beef casserole with dumplings

One of my favourite styles of food is the good old casserole.

This was probably the first type of dish I ever cooked. I would like to say that I learned how to do it from my mother, but that's not the case. Looking back on it, I think I make casseroles the way I do mostly because it is NOT the way my Mum made them. Arrogantly, I thought "I can do better than that"! I don't think she ever browned the meat, and simply cooked it from cold. I think this misses something. Browning the meat adds a certain savouriness to it (technically known as the Maillard reaction). Also, I dust the meat in seasoned flour before browning it, which my Mum never did. This tends to seal in some of the juices, making the meat that much more tender, and it also thickens the gravy.

I know that many of my readers are experienced cooks and will know all about cooking casseroles, but then again many of them are not, and many of them live in foreign lands and may therefore be unfamiliar with this style of cookery. This is why I am today offering MY recipe for a beef casserole. Obviously some of you will say "Mine is better than Mark's", but I accept that - it's definitely in the spirit of the game!

Beef casserole with herby dumplings (serves 2)
Ingredients:

For the casserole:
Approx 350g beef - "stewing steak" or "braising steak" - cut into 3cm cubes
2 onions, peeled and roughly sliced
2 carrots, peeled and cut into large pieces
150g mushrooms, roughly sliced
2 cloves garlic
2 Bay leaves
A few sprigs of fresh Thyme (leaves only)
1 litre beef stock
2 tablespoons vegetable oil
1 tablespoon plain flour
Salt and pepper

For the dumplings:
100g self-raising flour (NOT plain flour)
50g beef suet
Approx 1 tablespoon chopped fresh herbs (I used Parsley)
Pinch of salt
Small quantity of water

Method:
  • Put the plain flour into a large plastic bag and add a generous quantity of black pepper and some salt
  • Put the meat into the plastic bag and shake it around to thoroughly coat it in flour
  • Brown the meat in a frying-pan, using the vegetable oil
  • Remove meat from pan; add onions to pan; cook for a few minutes until soft but not brown
  • Crush the cloves of garlic and add them to the onions; cook for a further 2 minutes
  • Put meat and onions into a deep oven-proof dish (a casserole?)
  • Add carrots, stock, herbs and seasoning
  • Cook (with pan covered) in the oven for approx two hours at 160C, checking once or twice to ensure that there is sufficient moisture in the pan (you are looking for tender meat in a nice thick gravy), adding water/stock if necessary
  • After one hour or so (timing not critical) add the mushrooms. [I find that if you add them at the start they can go very mushy.]
About 35 minutes before serving time, make the dumplings
  • Put all ingredients in a large bowl and mix well
  • Add some water and knead the mixture gently with your hands to form a soft dough
  • Add water in small quantities to ensure the mixture doesn't go too sloppy
  • Form the mixture into small balls - about the size of a golf ball
  • Place the dumplings in the casserole pan, pushing them into the gravy so that they are about half-submerged
  • Return the pan to the oven and cook for a futher 30 mins, uncovered
  • When cooked, the dumplings will be slightly crispy and brown on top, but soft underneath where they have been in contact with the gravy.

The best thing about this dish is that timings are not critical. You could cook it more quickly if you wish (though the meat would probably not be so tender) by turning up the oven temperature a little. But you could also spin it out if you need to - e.g. if wife/husband/partner calls to say they will be late home from work! Another half an hour or 45 minutes would certainly not be a problem.

When it comes to vegetables to serve with this dish, I strongly recommend mashed Potato (maybe even a 60/40 mixture of Potato and Celeriac?). For added colour, I suggest something green, such as Savoy Cabbage, or Broccoli.


OK, there you are the - Mark's version of beef casserole. Enjoy!

Saturday, 20 April 2013

Some colour in the garden at last!

The garden in Winter can be very drab and colourless, but with the advent of Spring it takes on a new lease of life! Since I haven't got much in the way of veg to show off at present, I thought you might like to see some photos of flowers instead...

First Hoverfly of the year, investigating the now over-blown Crocuses:


"Tete a Tete" daffodils, with Crocuses in the background:


Narcissus "Minnow" - aptly named because it is tiny:


The curious bi-colour Pulmonaria, aka Lungwort:


Primrose. Foliage looking a bit worse for wear after the severe Winter:


More Primroses:


The old-fashioned type of Primrose, still my favourite:


OK, this one's not a flower, but its main contribution is definitely in its colour - Thyme "Archer's Gold". I think the colour combination of the golden foliage with the blue glazed pot is very attractive:


That pot has a history too. It was bought in Hong Kong, back in the early 1980's. Two dollars (HK) well spent, if you ask me!