Those of you who are regular followers of my blog will know that over the last couple of weeks I have been re-potting and generally renovating most of my herbs. Today it was the turn of the Mint.
This is what I started with - four pots. Two of them have been protected, inside the coldframe, and two have been outside, exposed to the elements. I think you will be able to tell without my help which is which...
The first stage of the process is to tip the plant out of the pot onto your workbench. You can see clearly how "pot-bound" this plant has become. The roots of the Mint are very vigorous and soon fill a pot like this, which is exactly why you need to re-pot the plants every year.
Using a tool such as an old kitchen knife cut into the root-ball. When it is opened-up you will see that there is very little root in the centre - it all makes its way to the outside of the pot, as if it is trying to escape (which it is).
Cut a few pieces of the plant from the outside of the root-ball, selecting those bits that look healthiest and most "energetic", preferably with a few green shoots, like this:
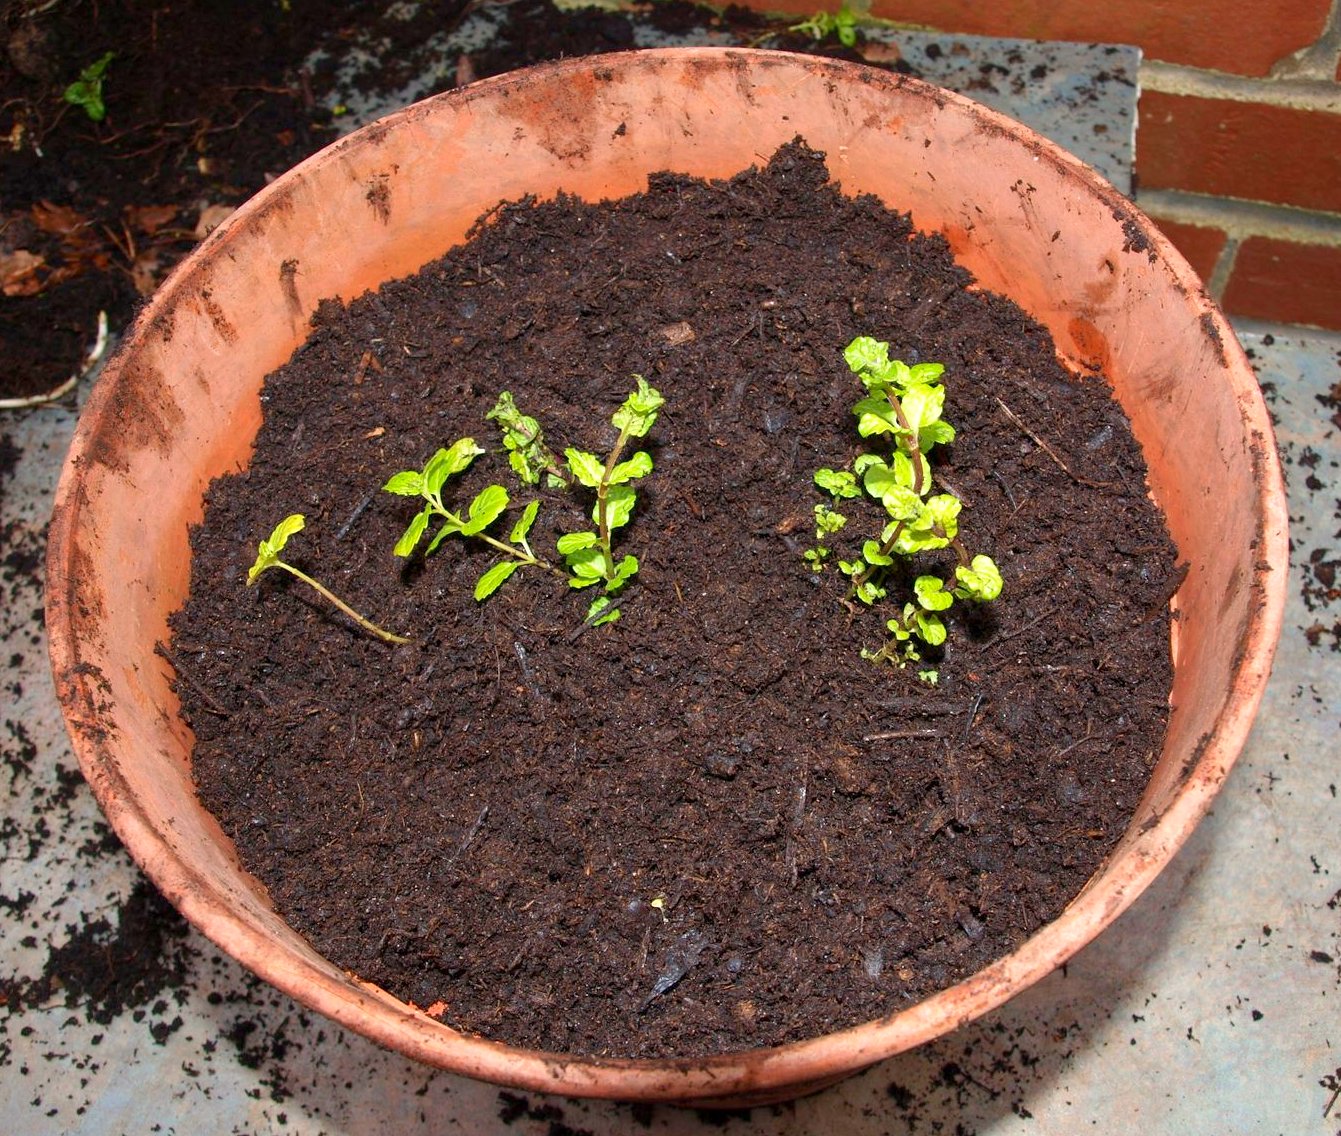
Refill the empty pot to about half-full with new compost, making sure to add a few stones or crocks at the bottom to improve the drainage. Then plant two of the pieces of Mint in each pot, well in towards the centre, so that they have plenty of room to expand.
Then pack in around the plants as much compost as you can, filling the pot nearly up to the rim, and burying all of the new plants except for the top couple of inches of the green shoots. Make sure that the white roots are well covered:
Water the plants in to settle them, and then the job's complete:
I'm sure these plants will enjoy exploring their new homes and within a few weeks they will have produced a mass of fragrant green leaves.
One final word of advice: don't be tempted to put the spare bits of root and the offcuts into your compost bin. They would all grow like crazy, and before long your compost would be 99% Mint.
Tuesday, 22 February 2011
Monday, 21 February 2011
Satsuma fungus?
Whilst out in the garden the other day I noticed some bright orange splashes on the larchlap fence panels, which are sodden from all the recent rain. Inspecting more closely, I found that I was looking at some patches of fungus, so out came the camera...
I have been trying to identify this fungus / mould. I'm not absolutely sure, but I think it is Calonectria Pyrachoa.
As I often do, I zoomed some of the photos I took. The individual nodules of this fungus look just like miniature citrus fruits, so I have nicknamed it the Satsuma fungus!
I have been trying to identify this fungus / mould. I'm not absolutely sure, but I think it is Calonectria Pyrachoa.
As I often do, I zoomed some of the photos I took. The individual nodules of this fungus look just like miniature citrus fruits, so I have nicknamed it the Satsuma fungus!
Now wouldn't some of that look nice growing next to some lovely green moss? I wonder if I could transplant it? No, probably not; these things only seem to grow wherever and whenever you don't want them to.
I have had so many comments about the worms in my compost bins that I want to make something clear: the worms moved in of their own accord. I did not purchase any worms! Perhaps because we tend to eat pretty well, our compost bins reflect this, so therefore all the Foodie worms for miles around head for our property!
For all you worm-lovers out there (Kelli?), here's another photo... I think these stripey red ones are called Brandlings, aren't they?
Sunday, 20 February 2011
Some lesser-known stars
This post is really an opportunity to show you some aspects of my garden that don't warrant a dedicated post of their own...
First up - the Aquilegia. I have a few of these next to one of my compost bins, and growing down the side of my house where there is only a narrow path between us and the neighbours' fence - in other words some of the least desirable parts of the garden. This is only fair, since the Aquilegias moved in uninvited, so must make do with the space that no-one else wants...
No flowers yet of course, but later in the year these plants will produce masses of pink and dark blue flowers. Notice how the leaves are water-repellent - the raindrops sit in the dished leaves like little silver ball-bearings!
Next the Crocus. At this time of year everyone is writing about Crocuses, and they are so well-known that no-one needs to be told about them, so they often get overlooked. These ones of mine were being a bit shy, staying firmly closed. Later in the day, when the sun had warmed up a bit I'm sure they opened out fully.
These ones, although more delicate in colour, were somewhat more forthcoming...
I'll be able to hoe them off fairly easily, but I'll wait for a dry day. Hoeing weeds in wet conditions may just re-plant them without killing them.
Talking of compost - I MUST show you this photo (close your eyes at this point if you're squeamish). I was turning the contents of one of my compost bins to help with the decomposition process. The number of worms in the bin was absolutely amazing!
I'm not worried by this sort of worm - I see them as useful allies. I sometimes think about how many trips to the Council recycling point must have been avoided over the years by the presence of these voracious little waste-processing creatures. [My friendly Robin also likes them - for a different reason.]
The Good King Henry plants are coming up strongly now. This plant is another prolific self-seeder, so it tends to crop up all over the place. I have not been impressed with its performance as a salad ingredient (I find it tasteless, and all but the tiniest leaves are tough). I suppose I could cook it like spinach, but I've never yet felt inspired to do so. However, despite all this criticism, you have to admit that it looks pretty in the sunshine.
The Prunus Autumnalis "Surbhitella" has a lot of blossom at present - which is a bit surprising, as it is supposed to be Autumn-flowering. Over the years I have had it (probably about 18) its flowering season has gradually got later and later.
Last week I ordered some of those "Longrow" plastic cloches, which I hope will help me to protect seeds and young plants from weather and foxes, and will allow me to get plants started a bit earlier in the season than would otherwise be the case. As the name suggests, these cloches are long and thin - 1.2 metres by 0.45 metres. I sowed my first seeds of the year (chillis) on Valentine's Day, indoors in propagators, and I have noticed that my rhubarb is just appearing above the surface of the soil, so things are beginning to happen, and within a month or so I will have a lot more to write about.
First up - the Aquilegia. I have a few of these next to one of my compost bins, and growing down the side of my house where there is only a narrow path between us and the neighbours' fence - in other words some of the least desirable parts of the garden. This is only fair, since the Aquilegias moved in uninvited, so must make do with the space that no-one else wants...
No flowers yet of course, but later in the year these plants will produce masses of pink and dark blue flowers. Notice how the leaves are water-repellent - the raindrops sit in the dished leaves like little silver ball-bearings!
Next the Crocus. At this time of year everyone is writing about Crocuses, and they are so well-known that no-one needs to be told about them, so they often get overlooked. These ones of mine were being a bit shy, staying firmly closed. Later in the day, when the sun had warmed up a bit I'm sure they opened out fully.
These ones, although more delicate in colour, were somewhat more forthcoming...
This next photo shows one of the least desirable effects of making your own compost. There is a carpet of tiny green seedlings on the surface of most of my raised beds (where I distributed the compost from the old cucumber bin that I dismantled at Christmas time).
I'll be able to hoe them off fairly easily, but I'll wait for a dry day. Hoeing weeds in wet conditions may just re-plant them without killing them.
Talking of compost - I MUST show you this photo (close your eyes at this point if you're squeamish). I was turning the contents of one of my compost bins to help with the decomposition process. The number of worms in the bin was absolutely amazing!
I'm not worried by this sort of worm - I see them as useful allies. I sometimes think about how many trips to the Council recycling point must have been avoided over the years by the presence of these voracious little waste-processing creatures. [My friendly Robin also likes them - for a different reason.]
The Good King Henry plants are coming up strongly now. This plant is another prolific self-seeder, so it tends to crop up all over the place. I have not been impressed with its performance as a salad ingredient (I find it tasteless, and all but the tiniest leaves are tough). I suppose I could cook it like spinach, but I've never yet felt inspired to do so. However, despite all this criticism, you have to admit that it looks pretty in the sunshine.
The Prunus Autumnalis "Surbhitella" has a lot of blossom at present - which is a bit surprising, as it is supposed to be Autumn-flowering. Over the years I have had it (probably about 18) its flowering season has gradually got later and later.
Last week I ordered some of those "Longrow" plastic cloches, which I hope will help me to protect seeds and young plants from weather and foxes, and will allow me to get plants started a bit earlier in the season than would otherwise be the case. As the name suggests, these cloches are long and thin - 1.2 metres by 0.45 metres. I sowed my first seeds of the year (chillis) on Valentine's Day, indoors in propagators, and I have noticed that my rhubarb is just appearing above the surface of the soil, so things are beginning to happen, and within a month or so I will have a lot more to write about.
Saturday, 19 February 2011
Borlotto beans with Polenta recipe
Today I made another dish using my home-grown Borlotto beans. It was inspired by a recipe in that "Heirloom Beans" book I wrote about the other day.
My recipe is called "Borlotto beans in Tomato sauce with griddled Polenta". It is a really easy dish, because most of the preparation can be done in advance, with just a few minutes' worth of work at the end.
I soaked the beans (a mixture of types, mostly borlotti) in water overnight and cooked them in advance - 10 minutes boiling hard, then about 30 minutes at a simmer, or until tender (you might need to cook the beans a bit longer than this if they are not so fresh). After cooking, they looked like this (not yet very appetising...)
I also made my tomato sauce some hours in advance, because I wanted it to have some time for all the flavours to infuse. This is how I did it: I made a "sofrito" with diced onion, carrot and celeriac, cooking it in a little vegetable oil over a low heat for approx 15 minutes until the veg were soft. I then added a tin of chopped tomatoes, a large pinch of chilli flakes, some finely chopped Rosemary (from the garden), a little water and some salt and pepper.
Rosemary leaves can be quite tough, so when using them in a dish like this, chop them very finely. Here you can see the ideal tool for the task - the hachoire or mezzaluna. Ours has a wooden chopping board that is dished in the centre like a saucer.
I brought the sauce mixture up to the boil and then turned the heat down to a simmer. I cooked the sauce slowly for about an hour, adding a little more water to keep the consistency right. When it was finished it was thick and gloopy and looked like this:
I then made some "hard" polenta. A couple of weeks ago I made some soft polenta, using the approved cooking method, and I found that it went lumpy, so this time I did a bit of experimenting: I slaked about 120g of the polenta flour with cold water, rather than pouring the polenta into boiling water. By "slaking" I mean mixing the polenta with a small quantity of water to make a stiff paste. I then put the polenta onto a low heat and gradually heated it to boiling point, adding more (boiling) water as required. I found this method to work better. The sort of polenta I used only needs 4 or 5 minutes cooking. Towards the end of the cooking time I added about 25g of butter and 25g of grated Parmesan cheese. At this stage, the polenta would have been just right for soft polenta, but I poured mine into a greased dish and left it to cool. At this stage it was bright yellow and looked like thick custard!
When the polenta was cool, I tipped it out of the dish onto some clingfilm. The colour on the underside was a bit more muted and it looked just like a slab of mass-produced Cheddar cheese.
I was able to slice the polenta and set it aside in the fridge ready to be griddled later on.
At this stage it looked like a sliced Madeira cake...
Half an hour or so before Dinner time I put the beans and tomato sauce into a pan and heated them gently to warm them through. No further cooking is really necessary at this stage. Meanwhile, the griddle was heating up for the polenta. I cooked three slices of polenta for each of us, turning them a couple of times to ensure even cooking.
When it was nicely browned I placed the polenta onto serving plates and ladled the bean and sauce mixture over the top, and garnished the dish with some chopped parsley. I served it with a tomato-and-olive salad, some nice bread, and a bottle of robust red wine.
Here's the finished article...
I felt that the polenta done "my way" was a great success. It was smooth and much lighter than the commercial stuff you can buy in the shops.
I nearly forgot to point out that this is a vegetarian meal. I am not a vegetarian myself, but there are times when meat seems superfluous!
Friday, 18 February 2011
Great Expectations
Regular readers of my blog will know only too well how eager I am to harvest the first of my Sprouting Broccoli (surely the most-photographed plants on the planet!)
Well my latest attempt to convince myself that the broccoli is nearly ready to eat revolve around making them LOOK bigger. See what you think of these:-
Firstly, in "normal" size. (These are the main heads of the plants, not the side-shoots.)
And then "zoomed":
So what do you think? Do they look more appetising in large scale, or not?
P.S. Lots of readers asked for Jane's recipe for that bread with thyme and juniper. She has put the recipe in to a comment on my original post http://marksvegplot.blogspot.com/2011/02/cooking-borlotti.html If any of you have a go at making it, please let us know how it turns out.
P.P.S. If you like the sound of Jane's recipe, you will probably be interested to read about her collection of cookery books, which is described today in a post on her own blog - http://www.competitiongrapevine.blogspot.com/
Thursday, 17 February 2011
Of Cabbages and Kings...
Some people think of the cabbage as a dull vegetable --- not me!
Who could accuse this of being dull?
I didn't grow the vegetable pictured here, but I wish I had. We bought it in the supermarket, but I thought it so photogenic that I felt it needed a brief moment of glory before disappearing into a pan.
This is a variety of cabbage called "January King". The leaves are lightly "savoyed" - in other words they are knobbly / blistered. It is pretty hardy and will withstand the sort of Winter conditions we get in England most years.
Its centre is firm and tightly-packed, becoming progressively lighter-coloured towards the heart.
So here's a question for you folks: if you had this cabbage in your fridge, what dish(es) would you cook with it? Please leave me a comment with your ideas.
P.S. How could I publish a post without at least one picture of one of my own veg? This is Cavolo Nero. Not a true cabbage perhaps, more of a kale, but definitely part of the Brassica family, so a close relative.
This photo was taken on 14 February. I think the Cavolo Nero has done well to look so fresh despite the Winter conditions.
My last photo for this post is an "arty" one, just zooming in on one of those translucent Cavolo Nero leaves. Notice the little spherical raindrop...
Awards - Round Two
[This is an extra post - I'll be doing my usual daily one later today...]
I have decided to award a second batch of the Mark's Veg Plot Chilli Awards. Please note: this is not a scheme that will ever produce huge masses of award-holders, we're talking about an elite group here you know!
Trying to decide who should get these things is tough! But, for better or for worse, these are the bloggers who I have invited to accept the award this time round:-
1. Takaeko, from Small Vege Garden in a Suburb (Osaka, Japan)
Takaeko deserves this award for a number of reasons: first, his determination to write his blog in English (despite being Japanese), as a way of improving his language skills. Second, his family values: he shows great respect for his older relatives (including his wife's family), and goes to some lengths to involve his children in his gardening activities in order to instill in them his own love of food and horticulture. Third, his enthusiasm and attention to detail in his gardening exploits (such as measuring the heat-retention effects of his plant protection equipment!)
2. Ana ("vrtlarica ana"), of Moj Vrt (near Zagreb, Croatia)
Vrtlarica ana's blog is one of those which I really enjoy following. She has published some really amazing posts (like the one about slaughtering the pig...). She is also a very active participant in all the blogging discussions. Couple this with some amazing photography, and you have a near-perfect blog / blogger.
3. Eliza Holcombe, from Appalachian Feet (SC, USA)
Eliza's blog has an incredibly wide reach; the range of subjects covered is enormous. But the common theme is practical sustainability - things that real people can actually do - and most of them are things that can make a difference to our environment. Appalachian Feet has also played host to a number of successful blog carnivals, like How To Find Great Plants, helping bloggers to get to know each other.
4. Kelli Boyles, aka Why I Garden, from Kelli Boyles' Garden (Northern Ireland)
Kelli was one of my first "cyber-companions". She started her blog at about the same time as I started mine, and we have been constantly in touch since then. She introduced me to Blotanical.com, which I know many of you use. Kelli's blog is to me a good example of what a personal (i.e. non-commercial) blog should be - chatty, informal, down-to-earth, but interesting and informative too.
I hope you will visit these blogs, and I'm pretty sure that if you do, you will like what you see...
My thanks to these four good people for graciously accepting my award. As I have said before though, there are loads more great bloggers out there, and just because their names are not on this list it doesn't mean that I don't enjoy their work. So thanks to them too!
Subscribe to:
Posts (Atom)