Monday, 20 March 2017

Harvest Monday - 20th March 2017

This week my harvest has been confined again to .... (yes, you guessed it!) Purple Sprouting Broccoli. My "Rudolph" plant has just about finished cropping now (it gave us enough for 3 meals), and most of what you see here is from "Red Spear".


I also want to take this opportunity to show off some bread I made recently. I can't claim that it is anything to do with home-grown harvests, but my reasoning is that people who appreciate home-grown veg will probably also appreciate home-made bread! This loaf is made from a recipe in Paul Hollywood's book "Bread":


The flour used in this bread is a mix of Rye (40%), Spelt (40%) and White (20%). The Rye gives the bread a pleasant slightly sour taste, and the Spelt is distinctly nutty. The White is there just to lighten the texture.


The recipe calls for a "sponge" to be made the day before - in effect a short-term Sourdough. Yeast and water is added to some of the flour and left to ferment overnight, and it becomes soft and bubbly. It certainly works, because this bread was a winner in every respect - extremely tasty, with a good texture. I was pleased with the balance between crust and crumb too, which I think is a sign of good kneading technique.


Paul Hollywood is not my favourite person in terms of personality, but he certainly writes good bread recipes!


I'm linking my post today to Harvest Monday, hosted by Dave at Our Happy Acres.

Saturday, 18 March 2017

Potting-up Chilli seedlings

A few weeks ago when I sowed my chilli seeds, I put 6 seeds in each 5-inch / 12.5cm pot. Germination has been variable. In most cases it has been good (6 or 5 seeds germinated), but in one or two cases I have only had one germination. The pots with the 5s and 6s were getting crowded, so I realised that it was time to transplant the seedlings to individual pots.


This pot holds 5 seedlings - one of which is very small (bottom left)


This year I am trying to be "sensible" with my chillis and not grow too many, so there is no way I can keep ALL the seedlings. I decided for now to keep a maximum of 3 of each type, and discard the surplus. This is basically "One for me; one as a spare; and one to give away". So, I had to make a selection. I chose the best / strongest-looking seedling to be the one to keep, and this one got re-potted in the 5" pot. The next-best two seedlings were put into some of those tall thin Elmlea pots that I use.


The biggest advantage of the Elmlea pots is that although they are tall (allowing good long roots to develop) they are narrow, so I can fit lots of them in my Growlight House.


Even so, there are too many pots now, and they don't all fit inside the "House". These ones are on the outside, but in a position where they can still benefit from a high proportion of the electric light available.


The bad news is that there are loads more to come. Some of the seedlings are not yet big enough to transplant, so I will have to repeat this exercise in a week or so...


If things go according to plan, I will end up with about 12 (well, possibly 15) chilli plants. Some of the seeds I sowed have yet to germinate, so I can't be sure.

Friday, 17 March 2017

Propagating Thyme

We use a lot of Thyme in our cooking, so I try to make sure we have plenty of it in the garden. This has proved harder than I expected. I find that it is very susceptible to insect damage - I think from thrips. Whatever it is, they eat away the surface of the leaves, stripping them of the glossy dark green part that contains all the essential oils, and leaving them brown, dry and unappetising.


I am reluctant to spray edible plants like herbs with too many chemicals, so I have been forced to accept that in my garden Thyme needs to be grown as an annual, not a perennial. Most years I buy a few potted Thyme plants and put them either in bigger pots or in the border. This is one of last year's plants:


They get cropped until they succumb as described above, then are replaced by new ones. This can be expensive, but fortunately this year it probably won't be necessary - because of these:


Last Autumn I realised that my most recent batch of purchased Thyme plants had self-seeded after flowering, so I potted-up some of the seedlings and kept them over the Winter in my coldframe. They are now quite decent little plants.


I have planted some of them in the border over by my fruit trees.


I wonder how long they will survive???

Thursday, 16 March 2017

A recipe for Purple Sprouting Broccoli

At this time of year the Purple Sprouting Broccoli is at its best, and in our household we try to find lots of ways to use it. Here's a dish that I recently invented...


Stir-fried PSB with Butternut Squash

I made this dish to complement a chicken risotto, so let's show you that first... Nothing special, just a conventional chicken risotto. I think you'll agree that is looks a bit "monochrome".


When I have finished cooking a risotto, I like to leave it to stand for 10 - 15 minutes to let the rice plump up a bit. This gives a "window of opportunity" in which to cook a side dish of some sort, which is where my PSB comes in.

A bit of advance preparation is advisable:


You can see there half a Butternut Squash, halved, peeled and diced; a sliced red chilli; about 10 Walnut halves; and a slack handful of PSB, washed and cut into small florets. Here's a closer view of the PSB:


I doused the Walnuts in Pumpkin Seed oil and toasted them in a hot oven for 10 minutes or so, which really brings out their flavour.


I also pre-cooked the Butternut Squash, roasting it with a splash of oil in a hot oven (200C) to achieve a bit of charring at the edges. I think this looks attractive as well as enhancing the flavour. It took about 25 minutes. When it was done, I set it aside until needed.


When the risotto started its 10 minutes standing-time, I whacked the heat up high on one of my gas rings, and heated some vegetable oil in a wok. Then, in went the PSB, shortly followed by the squash, the chilli and the walnuts. I turned the veg frequently with two wooden spatulas, adding a couple of splashes of water to create steam to help the broccoli cook. [Note: I think if I did this dish again I would parboil the PSB in advance, because I had to stir-fry it for longer than I had initially intended in order to soften the stems.] Just before serving, I added a generous splash of Balsamic vinegar to sharpen-up the flavours.


Here's the finished dish, served alongside the chicken risotto.


I've not illustrated it here, but the final element of our meal was some toasted home-made bread, with garlic butter - Yum!

I felt this was a good meal - nutritious, well-balanced, tasty and a good mix of colours, textures and flavours.

P.S. Might need some more recipes soon...


Wednesday, 15 March 2017

For the record

This post is really more for my benefit than yours! (I'll explain this in a minute.)

As you know, Mark's Veg Plot is devoted primarily to vegetables, and flowers don't feature very prominently. However, this year I am making an effort to grow more flowers. Last Autumn I divided some of my perennials and potted-up lots of "root-division cuttings", which I have kept in my coldframes over the Winter.

Now that the weather has warmed up a bit, the cuttings are all beginning to sprout new growth, so I decided the time was ripe to plant them. They have gone into the gaps made by the recent removal of several of my Dogwood (Cornus) shrubs from my North-facing border.


I have put in 7 x Verbena Bonariensis, 7 x Rubeckia "Goldsturm", 5 x Helenium and 2 x Echinacea "Pom Pom White". They are mostly quite small so there's not a lot to see at present, but hopefully by the Summer time there will be a good display. This post is intended therefore to record for me the starting position, as a point of reference for later on.


Following my usual cautious approach, I have kept back a few plants just in case... They are still in the coldframe, just in case we get another really cold spell and some or all of the ones I have already planted get killed off by frost! If all goes well though, I have another place earmarked for them, next to my shed, where until recently there were two more Dogwood bushes.

Tuesday, 14 March 2017

Planting First Early Potatoes

Wow, another post about planting! Things are really kicking off in my garden...

This time it's potatoes.

Chitted tuber of "Accord"

At the weekend I planted my First Early potatoes, two tubers each of "Juliette", "Lady Christl", "Accord" and "Belle de Fontenay". Funnily enough I planted my First Earlies on March 11th last year too.

I used the smallest of my containers, reserving the bigger ones for the Second Earlies and Maincrops which will be planted later. This is because the First Earlies are generally smaller plants and don't need so much space. The pots in question are 35cm in diameter, and 30cm tall.

This year I am using soil from the raised beds that I recently decommissioned, but I also added a good handful of Growmore general-purpose fertiliser to each pot. It will be interesting to see how things go, because I usually use compost for growing potatoes in, either commercial or home-made. As regular readers will know, I have become suspicious and disillusioned concerning commercial compost, so I am trying to minimize my use of it.

My planting method couldn't be easier. Dig hole in soil; drop potato tuber in it; cover with soil; done! The tip of the tuber ends up being about 2 or 3 inches under the surface.


Notice that I have planted the potatoes with the biggest chits (shoots) uppermost, and that I have used labels to remind me of which variety is which. Later on, when the shoots break through the surface I will add more soil.

My pots are placed inside my two "Seedling Greenhouses", which will give them some protection from wind, rain and frost.

Notice the bricks weighting-down the greenhouses!

If I didn't have these greenhouse things, I think I would probably delay planting for another two or three weeks, to allow the weather to improve a bit more (hopefully), but I acquired them specifically for this purpose. Their existence will permit me to harvest potatoes over a slightly longer period, which is what I want.


If things go according to plan, I should be harvesting spuds in Mid- to Late-May.

Monday, 13 March 2017

Harvest Monday - 13 March 2017

Don't say I didn't warn you... my harvest this week is just a little more Purple Sprouting Broccoli.


Yes, just this one piece. It is the main head of my "Rudolph" plant.


It may not be a big harvest, but (though I say it myself) that is a mighty fine-looking head of broccoli!


Just enough for another 2-person serving, I'd say.

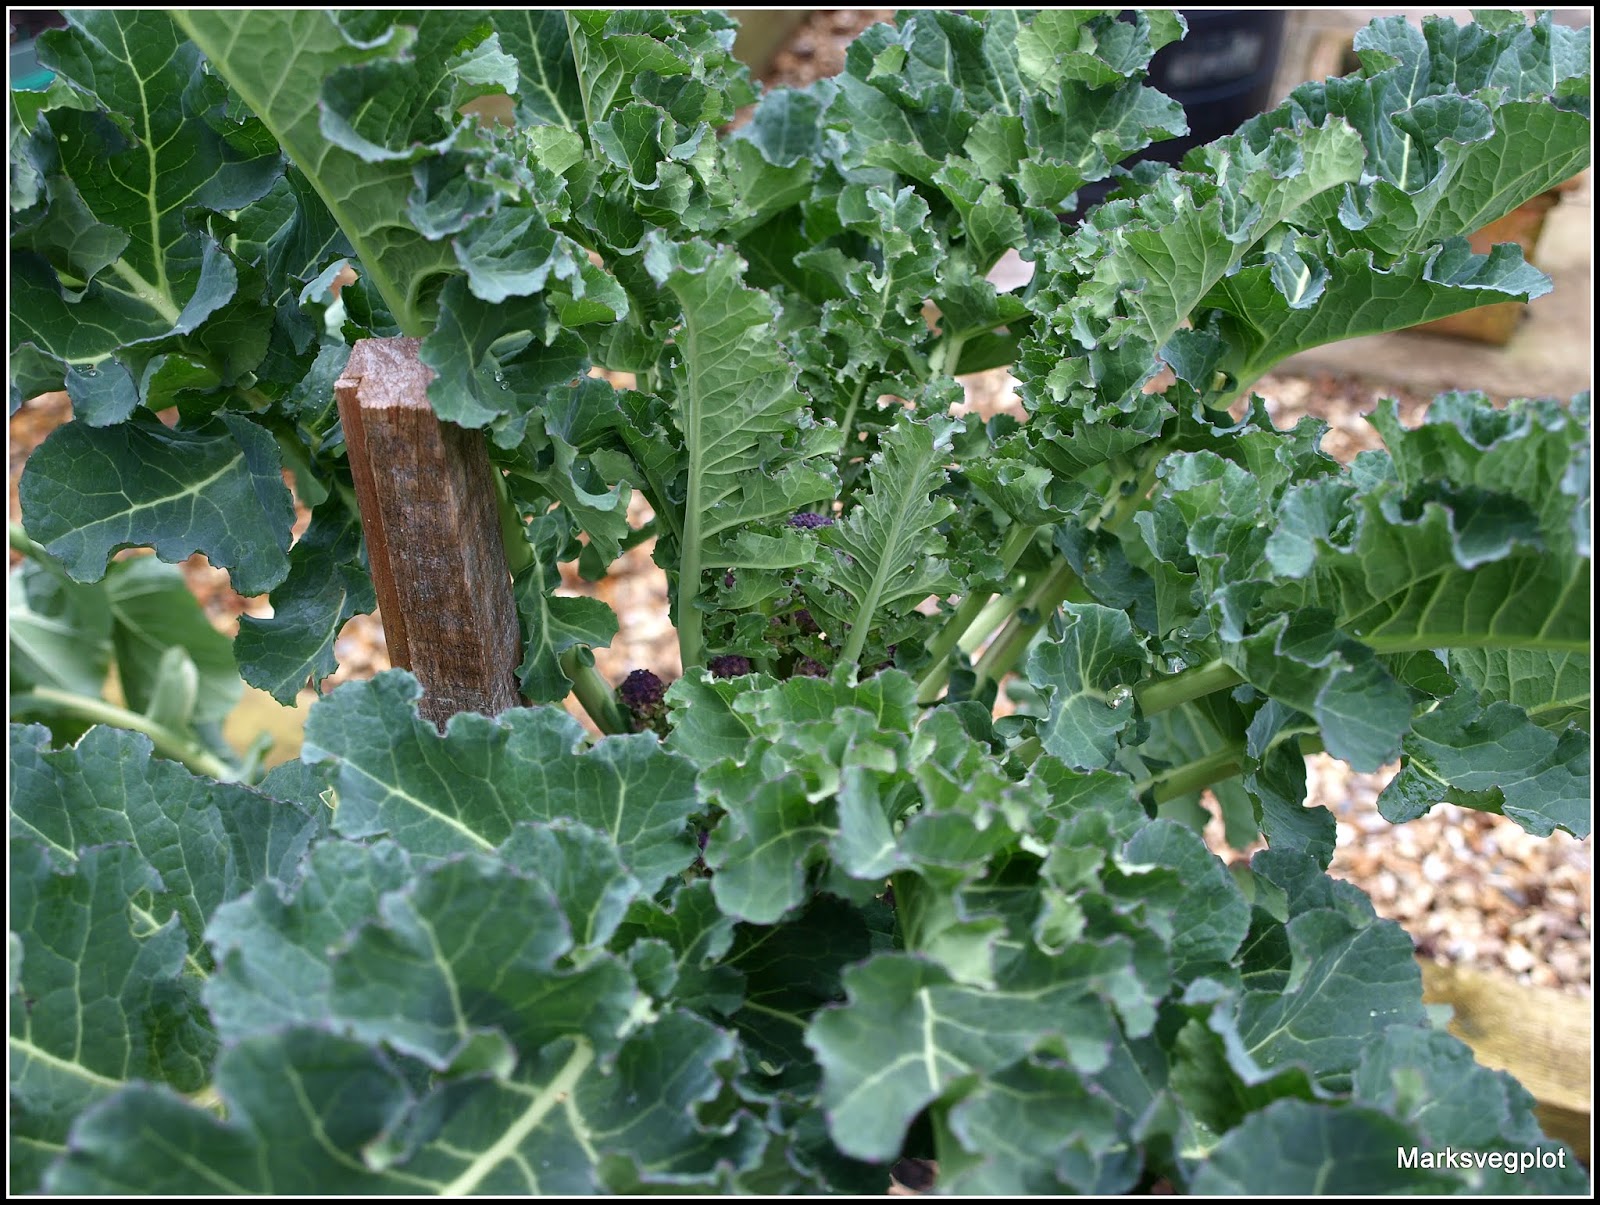
In the next few photos I'm going to show some broccoli that I didn't harvest. It's one of my "Early Purple Sprouting" plants. At first sight it looks far from ready. Just a mass of leaves, you'd think.


But pull back the leaves, and you'll see plenty of nice spears (shoots) forming:


Once these things get going, they develop quickly, so it probably won't be too long before there's another crop to be had.


I'm linking my post today to Harvest Monday, hosted by Dave at Our Happy Acres.