Saturday, 18 February 2017

Blueberries

I don't claim to be an expert on Blueberries, but I just want to write a few words about what I have learned about them...


The first thing is: Blueberries love acid soil and will not thrive if they don't get it. Not all suppliers will tell you this, in order to avoid putting you off buying their product because it may be perceived as difficult to grow. The solution is to grow them in containers, where you can more easily control their growing-medium:


As you can see, I have four Blueberry plants, and they are all in containers filled with Ericaceous compost, the type specially formulated for lime-hating plants like Blueberries.


My Blueberries are all ones obtained as Freebies in magazines, so I don't know their names. One of them produces pink berries. It is the one seen at the left in my photos. It's interesting to see that unlike the other three it hasn't dropped its leaves over the Winter. I expect that once Spring begins, those leaves will fall off and be replaced with new ones.


Blueberry plants produce most of their fruit on growth from the previous year, often in the form of a number of twiggy shoots at the end of a bigger branch, which is a point to bear in mind when pruning.


New shoots (red) emanating from an old branch (brown)


When I first started growing Blueberries I used to prune them quite severely each year, in an attempt to keep them compact, but the yields were disappointing. I have since learned that it's best not to cut too much off, even if this means letting the plants get very tall. When you get your young (Freebie?) Blueberry plant as a little tiny stick in a 1-litre pot you may not immediately realize that it will soon grow to 5 feet tall or more! This year I have just trimmed a bit off the tallest stems to make it easier to net them. I think the best approach to pruning is probably to remove some of the oldest stems in their entirety, when they get very woody. This promotes the formation of fresh growth from the base of the plant, rather than at the top.


By the way, I have learned through experience that Blueberries are very attractive to birds - particularly Blackbirds. And Blackbirds are both voracious and cunning. If you do not securely net your Blueberries, you will most likely lose all their fruit! In the past I have constructed various forms of temporary fruit-cage to protect my plants, reasoning that they are only vulnerable while the fruit is ripe or nearly so, but to be honest, a more permanent structure would be highly desirable. The Blackbirds will often steal the fruit well before a human would consider it edible, so "Better Safe Than Sorry" is the best policy.


You may have noticed that a couple of the Blueberry pots have got a lot of moss in them (why not all four, I ask...?)


Now, I'm not sure how much of a problem this is, but I'm planning to remove the moss soon anyway. My reasoning is that it probably uses up water and nutrients that should more properly be available to the Blueberries themselves, and may perhaps cause the compost to be more airless than would otherwise be the case.


Talking of water, Blueberries are supposedly best watered copiously (they are originally a bog plant, I think), and preferably with rain water. The water that comes out of our taps is full of chemicals that may adversely affect the pH of the compost. I have to say though that I know of several people who have disregarded this advice and yet have produced fine crops of Blueberries...


And if you do all the right things (or if you're lucky), this is what you get:


I'm not going to kid you that I have had massive crops from just 4 plants, but the yield has certainly been worthwhile. I would say off the top of my head that about 500g per plant would be a good result. Frustratingly, Blueberries ripen successively, not all at once, so you have to pick the berries on several occasions. I tend to pick all those that are mainly blue, even if it's obvious they are not 100% ripe, and then ripen them indoors. This is not only more convenient, but it also reduces the risk of losing them to the birds.


One final thought: Just like Strawberries, some Blueberry plants produce their fruit early in the year (June, maybe), and others later - say September or October - so it's possible to have ripe berries available for quite a long period of time. If you are buying new plants, it's worth researching this.

Thursday, 16 February 2017

A blank canvas

I haven't seen my veg plot as empty as this for many years!


Four of my five raised beds (one not seen in photo above) are bare at present. The only vegetables left from last year are 3 leeks, one solitary Chicory, and the four PSB plants.


At least the PSB is looking as if I will be able to pick some before long:


As you know, this year I am aiming to have the garden look a little less cluttered than it has been in recent years, and striving for better quality at the expense of quantity. This is why I am currently resisting the temptation to sow and plant too early. Despite the fact that it's still only half-way through February, many other gardeners are proudly writing about all the seeds they have sown this month. I'm not going to join in with the trend though: I'm deliberately leaving things a bit longer, because I know that seeds started off too early often struggle in the cool temperatures and low light levels. I want sturdy, strong plants that will give me a good yield and be more resistant to pests and diseases.


The beds and pots are ready to go, when the time comes. I expect I will be sowing my chillis at the end of this month, and tomatoes in early March. Likewise, the first potatoes will be ready to go into these big pots in the first half of March, with some protection from the more-or-less inevitable frost.


Even I have sown a few seeds already though - onions, leeks, parsley and Broad Beans. All but the beans are in little pots indoors, and the beans are in pots inside one of the plastic greenhouses.


I'm also beginning to see new growth on many of the herbs, like these little Thyme seedlings, raised last Autumn and over-wintered in a coldframe:


Those will be planted out within the next few weeks too, because I will soon be needing the coldframe for raising chillis and tomatoes.


Another job I need to do soon is re-pot the Mint, which is beginning to show signs of new life:


I always grow Mint in pots (several of them), because it is very invasive and will spread rapidly if given half a chance. I discard most of the plants each time, reserving just a few nice shoots for re-planting in fresh compost.


One other thing that will need replacing is this pot, which holds my Olive tree:


The big crack appeared about 10 days ago, when we had that prolonged spell of very cold weather. Terracotta pots do have a habit of doing this. Water gets into them, and when it freezes, it expands and can crack the pots. To be fair, this particular pot is fairly old, so it has had a good run for its money, and is in any case hosting a big plant whose roots are presumably putting the pot under considerable pressure. Incidentally, one way of reducing the risk of frost-induced cracking is to stand the pot on purpose-made "feet" or just some pieces of brick. This will reduce the amount of water taken up by the pot.


The last part of the blank canvas I want to show you today is this:-


It is the border on the side of the garden opposite the veg-patch - in other words the North-facing wall. I know, because of its orientation, that this border is not ideal for this, but I am going to attempt to grow some flowers here. To this end I have removed some of the big Dogwood shrubs (and that wasn't easy, I can tell you), to make space for planting the root-division "cuttings" I took last Autumn. I have several each of Rudbeckia, Echinacea, Helenium and Verbena Bonariensis, most of which will go into the vacant space. These are all reasonably tall types, so hopefully they will be able to cope with the continued presence of the remaining Dogwoods - I couldn't bear to part with them all.


By the way, I just want to say Thank You to all the people whole left me comments about using spare Onion sets to produce Spring Onions / Green Onions, by planting them in pots. I have done this with a few because I had loads of sets which would otherwise have remained unused. Here's the evidence:


Sunday, 12 February 2017

Project complete!

Well, the project to remove the two old raised beds has been finished. The space where they stood is now a flat open space covered with 25mm shingle:-


So now I can get rid of that nasty blue Builder's Bag. Hooray!


And of course the whole purpose of this project was to make a place to house big containers for growing things like potatoes, chillis and blueberries, so I have re-located all those pots I filled with soil the other day.


I have put 8 of the smaller pots into my two so-called "Seedling Greenhouses", which will hopefully allow the soil in them to warm up a bit before planting-time. The greenhouses are weighted-down with bricks to stop them blowing away!


It's too early to plant the potatoes just yet, but they are chitting away quite nicely on the windowsill in an unheated spare bedroom, and should be ready in about a month's time.


This is "Charlotte" (my favourite), an ever-reliable and heavy-cropping Second Early variety.


Friday, 10 February 2017

This week I have mostly been shovelling s...

"Soil", that is... The two old raised beds have now gone, along with the line of paving-stones that used to run between them.


Most of the soil has gone into the other 4 big raised beds - you can see that the ones in the photo above are pretty full now. I have put the remainder of the soil into a number of big pots:-


Most of these will be used for growing potatoes, so as I filled them I added a handful of "Growmore" general-purpose fertiliser into each one in preparation. I'm not adding any pelleted chicken manure this time (which I usually do, for potatoes), because I think the soil from the raised beds will have enough nitrogen in it already. I'm quite pleased with that soil, actually. I have been enriching it with compost year on year for the past 15+ years (I can't remember when I first made the beds!), and it is now lovely and dark, rich and crumbly.


The next phase of the project is to cover the empty space with shingle. What this means is that I will soon be able to get rid of the unsightly blue nylon builders' bag that has been lurking in my garden for the last two years! When it arrived it contained 1000kg of shingle. Even now, when it is about 75% used up, it is too heavy for me to shift, so I have to transport the shingle a little at a time, which is very time-consuming (and hard work).


Still, we're getting there, and the garden is beginning to look a little bit less like a tip.

Wednesday, 8 February 2017

Leeks - a meagre harvest

OK, I'll admit it. My crop of Leeks this year was not a success! Foolishly, I tried to cram too many vegetables into a small space and planted my Leeks in beds that were already hosting other crops - Parsnips and PSB. The foliage of the Parsnips was particularly luxuriant last year. As a result, the Leeks were completely overshadowed and never grew beyond the "miniscule" stage.


However, it's not all bad news, since I did plant my spare Leeks in a big (35-litre) pot and they have done a lot better.


Leeks "Toledo"

Eight Leeks crammed into one pot were never going to be huge. Furthermore, the soil in the pot had already been used to grow a crop of potatoes, and had not been refreshed. I now need the pot for this year's potatoes, so I have pulled up the Leeks.


Actually, if I had been planning to grow these as "Baby Leeks", I would be well pleased. Other than their diminutive girth, there is little to complain about.


Here they are, cleaned up ready for using in the kitchen:


The moral of this tale is definitely "Less is More". The concept of under-cropping (growing one crop underneath another) sometimes works, but you have to choose the right crops! I was greedy, hoping to get two crops at once, but it didn't work this time.

Monday, 6 February 2017

Plans for the raised beds - or not

As I mentioned a short while ago, I have decided not to build more of the big raised beds, but to create an open space to hold big pots and containers. This is the space:


The two low raised beds at the back of the photo are destined to be removed. This is becoming more urgent by the day, due to the seriously decayed state of the wooden edging. I patched up this corner last Summer, but it was at best a very temporary repair:


I have four of the "New Pattern" raised beds, made with two layers of 20cm-high sleepers. The level of the soil and compost with which I filled them has gone down a fair bit, so there is plenty of room for more. The soil from the 2 old beds will therefore be distributed amongst the 4 new ones.


At the weekend I took off the galvanised steel angle-brackets from the old beds, in preparation for removing the wood. The only thing holding me back now is the presence of some rather nice Radicchio plants in one of the beds. They have spent the Winter under cloches, as seen here:


Despite the cloches, the outer leaves of these plants got frosted in the long spell of sub-zero weather we had last month. However, once you remove those outer leaves, the centres are fine.


With Radicchio, a little bit goes a long way. The heads are very tightly packed and when you "unpack" one you do get a lot of edible leaves. Fortunately Radicchio keeps for ages in the fridge, especially if you leave the main stem intact. I think these plants will all be harvested very soon, so that I can get on with the shifting of soil.


Elsewhere in the garden, the first signs of shoots are appearing on the Purple Sprouting Broccoli (rather later than usual):


PSB "Rudolph"


My container-grown Leeks are going to be picked soon. I don't think they are going to get much bigger.


Since the weather has turned a bit milder the bulbs have started popping up all over the place too. Most of mine are in pots, like these Tulips:


I also have quite a few of the little "Tete-a-Tete" daffodils scattered round the borders.


Is it too early to be thinking of Spring???

Saturday, 4 February 2017

Planting Onion sets

Today I have planted some onion sets. It's probably a bit early, but with the aid of my recently-acquired massive coldframe, I think it is OK to start. If I were planting the onions outside, I would probably wait another month.


The coldframe (photo from just after assembly)


I have zero experience with growing onions - either from sets or from seed - but I have read up on it, and it seems easy enough (famous last words...).


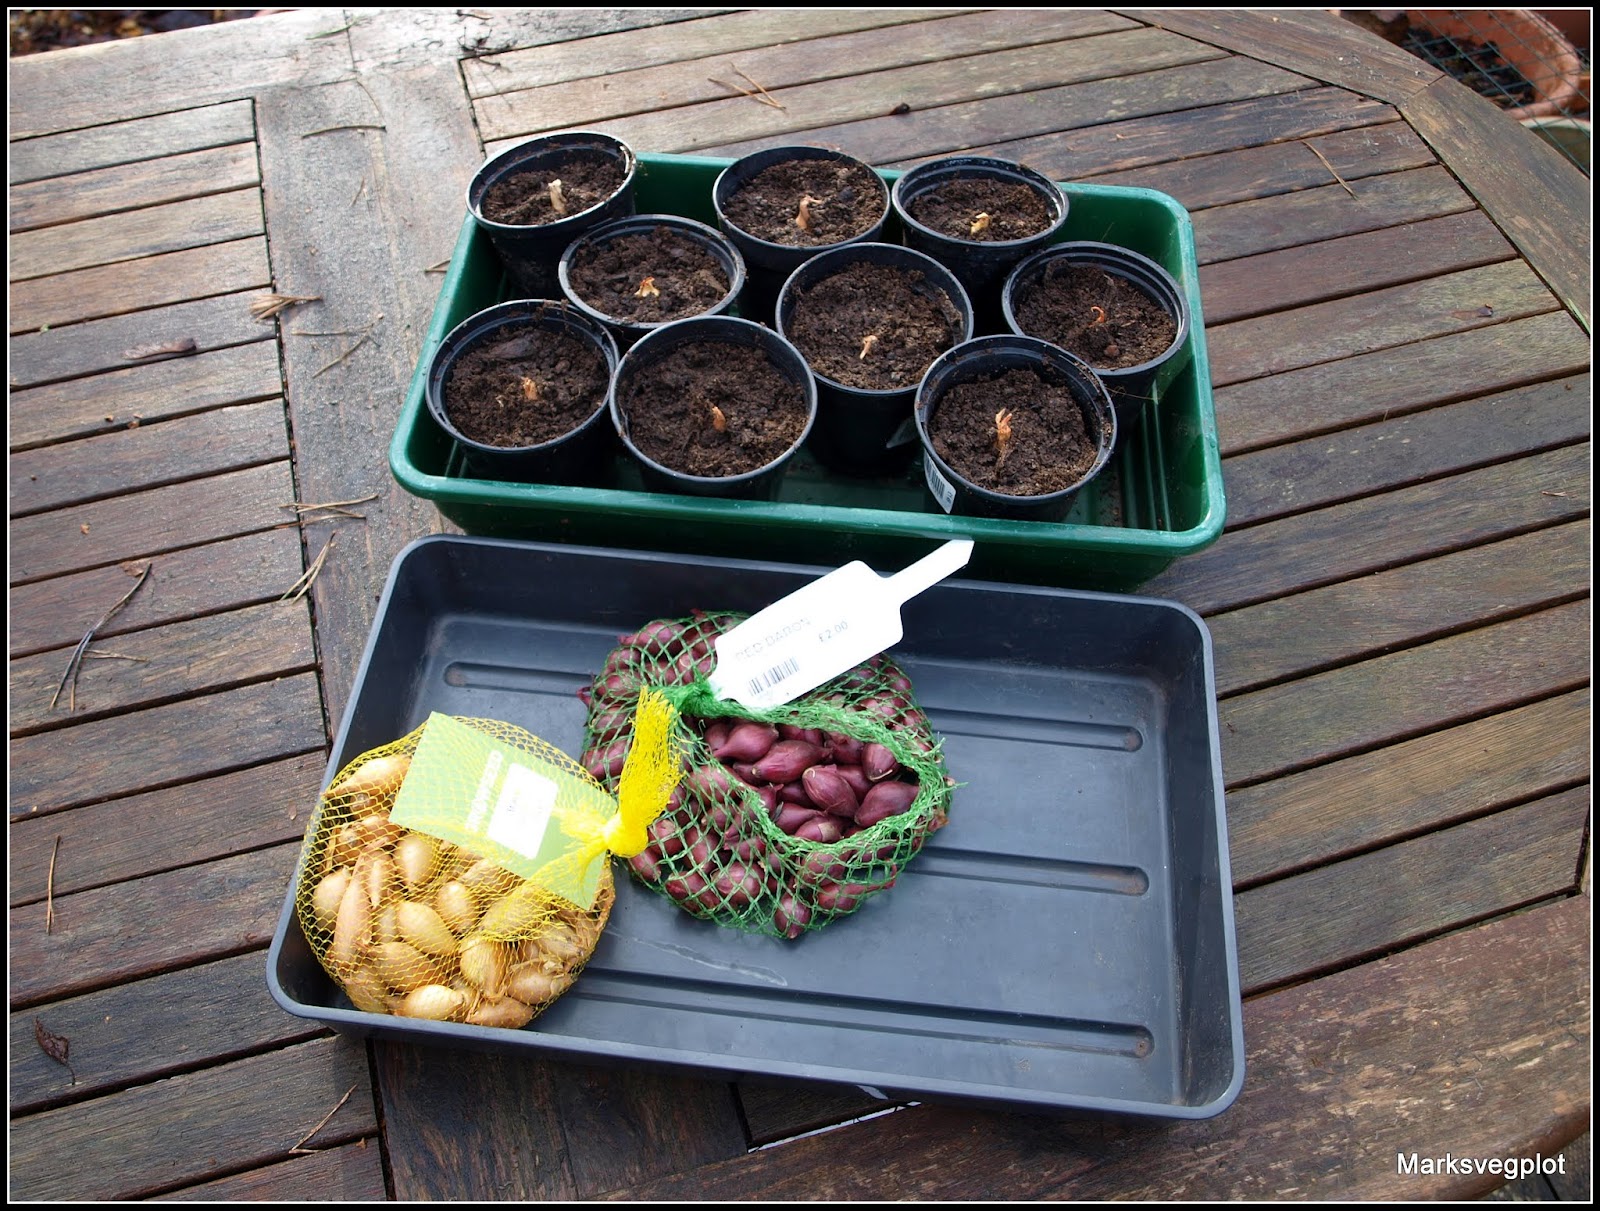
I have two different varieties of onion. One is "Red Baron", which I bought last weekend at the Hampshire Potato Day.


I reckon there must have been about a hundred sets in that bag, but I certainly can't afford the space to grow that many! Since this is my first attempt I have planted just a few, to try them out.


The other variety is "Sturon", a white type. These are the sets kindly given to me by Gerry from GrowSeed.


The planting technique is dead easy. Just push the sets into the soil (either in the open or in pots / modules), so that just the tips stick out, like this:-


My trays of little pots have now gone into the coldframe, where they will be protected from the weather, until it's warm enough to plant them outside (probably late April).


I have also sown some onion seeds today, though there is nothing much to see so I'm not showing a photo. They are seeds for "Long Red Florence", whose name is self-explanatory! I have sown 4 or 5 seeds each in plastic 5-inch pots, and when the plants are big enough I will transplant them as a clump.


As I said, I have been reading-up on growing onions, and I note that they do best in full sun, so I'm a bit worried, since my garden never gets as much direct sun as I would like. One of the jobs I have done today is removing a couple of the lower branches of my big Bronze Maple tree, hoping to let in some more light.


So, let's see how it goes...