My Broad Beans are reaching the stage when I'll want to plant them out in one of the raised beds, but I want to introduce them gently to the Big Wide World, so in their early stages my plan is to give them the protection of my Parasene "Longrow" cloches. The only trouble is, my cloches have been sitting under a tree at the bottom of the garden all Winter:
They look decidedly scruffy!
To make matters worse, they have been standing immediately below the bird-feeder, so they were covered in seed husks and bird poo as well as algae, mould and grime.
In that grubby state they would hardly let any light through. Definitely time for a Spring Clean!
So it was out with a bucket of warm soapy water and a stiff brush, to give them a thorough scrub-down. Fortunately the clear PVC panels (2 on each cloche) can be removed simply by unclipping them, which made the task a lot quicker and easier. After about an hour's worth of scrubbing and rinsing, they look almost as good as new:
The cloches are 1.2 metres in length, so they fit very conveniently in my 2.4m raised beds. I find them very useful. They provide protection against damage caused by frost, wind, heavy rain and (most importantly for me) animals.
I have a bit of a Love-Hate relationship with these cloches. The concept is great - in terms of design they are just what I need - but the construction leaves a lot to be desired. They are much flimsier than I had hoped for when I bought them The metal bends easily and a couple of the PVC panels have cracked. The end-pieces provided were incredibly flimsy and fiddly to fit. They only lasted one year, so now my cloches are open-ended.
Despite these criticisms, I have had the cloches for six years now, so I suppose they can't be that bad. If you are thinking of buying any, you can get them from lots of different suppliers - e.g. Harrod Horticultural - for about £40 each. Just don't be deceived by the description "...rugged steel frames"!
Friday, 10 March 2017
Wednesday, 8 March 2017
I'm proud of my chits!
My seed potatoes have been chitting since the last weekend of January, so nearly six weeks now. I have kept them on the windowsill in an unheated spare bedroom, where they have developed much better than in previous years when I had them in the garage, which was really a bit too cool. I suspect that many people have difficulty finding an ideal place for chitting potatoes. It needs to have a "good" amount of light and warmth - not too sunny, not too dark, not too hot, not too cold!
Yes, of course potatoes will chit even in less-than-ideal conditions, but the shoots may be long thin and pale. What I look for is short, fat, dark-coloured shoots, like the ones in my photos below. The different potato varieties have all produced different styles of chit. They look very weird when viewed in close-up.
I think some of my potatoes are ready for planting now, so I will probably be planting them in the next week or so. The outside temperature is still not high, particularly at night, when it has been going down to just 3 or 4C, but I will put my first potatoes into containers that fit inside my two "Seedling Greenhouses" where they will have at least some protection from frost, wind and rain.
I will be planting my First Earlies in the protected pots, and then a bit later on I'll plant Second Earlies and a couple of Maincrops in the bigger (unprotected) pots. If the weather turns really cold after planting, I'll drape a length of fleece over the containers to stop frost settling on the tender potato shoots.
A bit of advice for beginners.
Potatoes fall broadly into three types:-
1. First Earlies - the ones to grow if you want small "new potatoes" early in the season - are normally planted mid-March to end of April and take approximately 10 weeks to mature, so harvesting is normally late May to end of June. They do not generally store well, and are best eaten immediately after harvesting.
2. Second Earlies - Harvested as bigger tubers than First Earlies but not as big as Maincrops (see next). They usually take approximately 13 weeks to mature. Can be planted at the same time as First Earlies if required, but usually a few weeks later in order to extend the harvest. Harvest in July or early August. Can be stored if desired.
3. Maincrops. Bigger tubers, suited for longer storage (e.g. over the Winter). They are normally bigger plants and take much longer to mature - usually about 20 weeks, so harvest from September onwards.
To these types I think we must also add a 4th category - the so-called Second Cropping ones, which are planted in June or July in order to mature round about Christmas time. They usually need protection from Autumn frosts and for this reason are typically grown in pots or bags, sometimes under cover in a greenhouse.
If, like me, you decide to grow your potatoes in containers, I urge you to get big ones. The best containers I have are 35-litre black plastic pots, which seem ideal to me. The smaller ones I used in times gone by were really too small, and the compost / soil in them dried out too quickly. When growing potatoes in containers it is vital to make sure they are kept well watered, otherwise your plants will be stunted and will die back too soon, leaving you with a very meagre crop.
If you need more advice on growing potatoes in containers, (or if you're just interested to see how I have fared), I have written about this subject many times, so use the "Search this blog" facility in the side-bar on the right, and put in the word "potato".
Yes, of course potatoes will chit even in less-than-ideal conditions, but the shoots may be long thin and pale. What I look for is short, fat, dark-coloured shoots, like the ones in my photos below. The different potato varieties have all produced different styles of chit. They look very weird when viewed in close-up.
| Accord |
| International Kidney |
| Kestrel |
| Ratte |
I think some of my potatoes are ready for planting now, so I will probably be planting them in the next week or so. The outside temperature is still not high, particularly at night, when it has been going down to just 3 or 4C, but I will put my first potatoes into containers that fit inside my two "Seedling Greenhouses" where they will have at least some protection from frost, wind and rain.
| The potato pots, all ready for planting. |
I will be planting my First Earlies in the protected pots, and then a bit later on I'll plant Second Earlies and a couple of Maincrops in the bigger (unprotected) pots. If the weather turns really cold after planting, I'll drape a length of fleece over the containers to stop frost settling on the tender potato shoots.
A bit of advice for beginners.
Potatoes fall broadly into three types:-
1. First Earlies - the ones to grow if you want small "new potatoes" early in the season - are normally planted mid-March to end of April and take approximately 10 weeks to mature, so harvesting is normally late May to end of June. They do not generally store well, and are best eaten immediately after harvesting.
2. Second Earlies - Harvested as bigger tubers than First Earlies but not as big as Maincrops (see next). They usually take approximately 13 weeks to mature. Can be planted at the same time as First Earlies if required, but usually a few weeks later in order to extend the harvest. Harvest in July or early August. Can be stored if desired.
3. Maincrops. Bigger tubers, suited for longer storage (e.g. over the Winter). They are normally bigger plants and take much longer to mature - usually about 20 weeks, so harvest from September onwards.
To these types I think we must also add a 4th category - the so-called Second Cropping ones, which are planted in June or July in order to mature round about Christmas time. They usually need protection from Autumn frosts and for this reason are typically grown in pots or bags, sometimes under cover in a greenhouse.
If, like me, you decide to grow your potatoes in containers, I urge you to get big ones. The best containers I have are 35-litre black plastic pots, which seem ideal to me. The smaller ones I used in times gone by were really too small, and the compost / soil in them dried out too quickly. When growing potatoes in containers it is vital to make sure they are kept well watered, otherwise your plants will be stunted and will die back too soon, leaving you with a very meagre crop.
If you need more advice on growing potatoes in containers, (or if you're just interested to see how I have fared), I have written about this subject many times, so use the "Search this blog" facility in the side-bar on the right, and put in the word "potato".
Monday, 6 March 2017
How to germinate chillis
All over my social media orbit right now I'm seeing people writing about chillis. The early starters already have plants several inches high, and are posting about transplanting them to bigger pots. Others are bemoaning the fact that their seedlings have gone leggy for lack of light - or worse, haven't germinated at all. My first ones germinated a few days ago. They are a variety called "Fidalgo Roxa".
Getting chilli seeds to germinate can be an uncertain business, so I thought I would offer a few hints and tips on this today. I hasten to add that I don't claim to be an expert on this subject - my words are based on my own experience, which may be different to yours!
The first thing to note is that the chilli is originally a tropical plant (originating in South America or possibly Mexico), so not surprisingly its seeds germinate best in warm temperatures. Our outdoor temperatures here in the UK never get very high, so you will need to give your chillis some help. Possible strategies include:
1. A purpose-built growhouse affair, such as the Vitopod though typically these are pretty expensive (maybe £100 - £150). If money is not a problem for you, this is the most desirable!
2. A more basic electric propagator, which usually costs much less (maybe £25 - £35). Some of these have variable temperature controls and/or thermostats, though of course more features mean higher prices.
3. An unheated propagator - basically a plastic seed-tray with a clear acrylic cover - which you could position on a windowsill above a radiator. You can get one for about £6 - £7.
4. Electric Heat-mats, which are placed underneath a tray of seeds. Prices vary, but if you shop on eBay you can get something suitable for less than £20. If you want one with more features (such as variable temperature), you have to pay a bit more.
5. Put your seeds in the airing-cupboard (if you have one). This is what I do. I use unheated propagators like the ones mentioned at 3 above, which can conveniently be stacked one on top of another.
I keep a thermometer in there too, which indicates that the cupboard reaches temperatures in excess of 30C when the central heating is on, and falls to about 15C overnight. During the day I sometimes prop the door partially open because I don't want the seeds to get too hot.
6. Keep your seed-tray on top of a fridge. The motor of a fridge puts out quite a bit of heat, so this can be a viable option.
I can't say with any precision what temperature a chilli seed needs in order to germinate. I think it depends on the type (which is awkward if like me you sow many different types simultaneously). As a general rule I would say that the chillis whose fruits are hottest (e.g. the Capsicum Chinense ones like the Habaneros, Bhuts and Scotch Bonnets) do best in higher temperatures (maybe 25C +), and the milder Capsicum Annuum types will do OK with about 20C. This is of course a big generalisation!
In addition to requiring heat, your chilli seeds will need moisture and a fairly high level of humidity. Many of the options above have built-in covers, but if you want to go for a cheaper option, then putting a simple seed-tray in side a big plastic bag works pretty well. It's best to clip the bag shut to maintain the humidity at the optimum level.
Another thing that you may not know is that some seeds (including some chillis) germinate better if they are kept in the dark, and some germinate better in the light. If you find your seeds have not germinated after a couple of weeks, try moving them to a different location - light to dark or vice versa.
Some chilli seeds don't like being buried too deeply, so if you experience poor germination try just laying the seeds on top of the compost rather than burying them. You'll still need to apply a bit of pressure to ensure that they are in contact with the moist compost.
Once you have sown your seeds, it's important to keep checking them to see if they have germinated. As soon as they have, you need to move them to a place with lots of light. If you don't, they will probably go very long and thin (aka "etoliated"). Mine go into the Growlight House - which has good lighting, but no heat source.
Unless you are really lucky, the amount of daylight available on a normal windowsill is seldom sufficient. Before I had the Growlights, I used to laboriously move my seedlings from one side of the house to another twice a day, to give them the best light possible!
Another question often asked is "How long should I wait before giving up on seeds that have not germinated, and starting again?". A very tricky question! Some seeds do take a very long time to come up (a month or more). My personal opinion is: leave them 3 weeks, and if nothing has happened, sow another batch - but don't discard the first batch! I often use a slightly different approach for any second batches - different temperature, different light conditions etc. If you wait too long before re-sowing, you may run out of time. In other words, any plants you do manage to raise will not have enough time to mature and produce fruit before the "good" weather ends.
I hope this post has been of some use to you. If you have any thoughts on the subject, please do contribute them via the Comments box below!
| Fidalgo Roxa |
Getting chilli seeds to germinate can be an uncertain business, so I thought I would offer a few hints and tips on this today. I hasten to add that I don't claim to be an expert on this subject - my words are based on my own experience, which may be different to yours!
The first thing to note is that the chilli is originally a tropical plant (originating in South America or possibly Mexico), so not surprisingly its seeds germinate best in warm temperatures. Our outdoor temperatures here in the UK never get very high, so you will need to give your chillis some help. Possible strategies include:
1. A purpose-built growhouse affair, such as the Vitopod though typically these are pretty expensive (maybe £100 - £150). If money is not a problem for you, this is the most desirable!
2. A more basic electric propagator, which usually costs much less (maybe £25 - £35). Some of these have variable temperature controls and/or thermostats, though of course more features mean higher prices.
3. An unheated propagator - basically a plastic seed-tray with a clear acrylic cover - which you could position on a windowsill above a radiator. You can get one for about £6 - £7.
4. Electric Heat-mats, which are placed underneath a tray of seeds. Prices vary, but if you shop on eBay you can get something suitable for less than £20. If you want one with more features (such as variable temperature), you have to pay a bit more.
5. Put your seeds in the airing-cupboard (if you have one). This is what I do. I use unheated propagators like the ones mentioned at 3 above, which can conveniently be stacked one on top of another.
I keep a thermometer in there too, which indicates that the cupboard reaches temperatures in excess of 30C when the central heating is on, and falls to about 15C overnight. During the day I sometimes prop the door partially open because I don't want the seeds to get too hot.
6. Keep your seed-tray on top of a fridge. The motor of a fridge puts out quite a bit of heat, so this can be a viable option.
I can't say with any precision what temperature a chilli seed needs in order to germinate. I think it depends on the type (which is awkward if like me you sow many different types simultaneously). As a general rule I would say that the chillis whose fruits are hottest (e.g. the Capsicum Chinense ones like the Habaneros, Bhuts and Scotch Bonnets) do best in higher temperatures (maybe 25C +), and the milder Capsicum Annuum types will do OK with about 20C. This is of course a big generalisation!
In addition to requiring heat, your chilli seeds will need moisture and a fairly high level of humidity. Many of the options above have built-in covers, but if you want to go for a cheaper option, then putting a simple seed-tray in side a big plastic bag works pretty well. It's best to clip the bag shut to maintain the humidity at the optimum level.
Another thing that you may not know is that some seeds (including some chillis) germinate better if they are kept in the dark, and some germinate better in the light. If you find your seeds have not germinated after a couple of weeks, try moving them to a different location - light to dark or vice versa.
Some chilli seeds don't like being buried too deeply, so if you experience poor germination try just laying the seeds on top of the compost rather than burying them. You'll still need to apply a bit of pressure to ensure that they are in contact with the moist compost.
Once you have sown your seeds, it's important to keep checking them to see if they have germinated. As soon as they have, you need to move them to a place with lots of light. If you don't, they will probably go very long and thin (aka "etoliated"). Mine go into the Growlight House - which has good lighting, but no heat source.
Unless you are really lucky, the amount of daylight available on a normal windowsill is seldom sufficient. Before I had the Growlights, I used to laboriously move my seedlings from one side of the house to another twice a day, to give them the best light possible!
| Just germinated - time to go into the Growlight House |
Another question often asked is "How long should I wait before giving up on seeds that have not germinated, and starting again?". A very tricky question! Some seeds do take a very long time to come up (a month or more). My personal opinion is: leave them 3 weeks, and if nothing has happened, sow another batch - but don't discard the first batch! I often use a slightly different approach for any second batches - different temperature, different light conditions etc. If you wait too long before re-sowing, you may run out of time. In other words, any plants you do manage to raise will not have enough time to mature and produce fruit before the "good" weather ends.
I hope this post has been of some use to you. If you have any thoughts on the subject, please do contribute them via the Comments box below!
Harvest Monday - 6th March 2017
Apologies for my prolonged absence! I'm returning to Harvest Monday for the first time in over 3 months because today I actually have a harvest to show off. It's the first of my Purple Sprouting Broccoli.
This variety is called "Rudolph", and is usually one of the first to mature. Today I have picked only 8 spears, which is just enough for the meal that Jane is planning to make for our Dinner - her "Sicilian Pasta with Broccoli".
PSB doesn't keep very well once it has been picked, and does not freeze successfully, which is why it is a good idea to grow plants of several different varieties, in the hope that they will mature at different times. In my garden this year, "Rudolph" is first, but will be closely followed by "Red Spear", with "Early Purple sprouting" coming along later.
There is precious little else in my veg-plot at present, because I am effectively starting again from scratch, so brace yourselves for more pics of PSB over the next few weeks!
This variety is called "Rudolph", and is usually one of the first to mature. Today I have picked only 8 spears, which is just enough for the meal that Jane is planning to make for our Dinner - her "Sicilian Pasta with Broccoli".
PSB doesn't keep very well once it has been picked, and does not freeze successfully, which is why it is a good idea to grow plants of several different varieties, in the hope that they will mature at different times. In my garden this year, "Rudolph" is first, but will be closely followed by "Red Spear", with "Early Purple sprouting" coming along later.
There is precious little else in my veg-plot at present, because I am effectively starting again from scratch, so brace yourselves for more pics of PSB over the next few weeks!
Saturday, 4 March 2017
My Garden Right Now
I'm writing this post specifically in order to participate in Michelle Chapman's meme called #mygardenrightnow. If you want to know the full story behind this, I'll let Michelle explain... The gist of it though is that lots of gardeners, and garden bloggers in particular, are linking up with posts about how their garden looks in March - which in most cases is definitely not the lush, bountiful cornucopia the August brings!
My garden at present is heavily dominated by bare soil:
My raised beds don't look very exciting just now, but they have been topped-up with homemade compost and raked over, all ready to go whenever it becomes warm enough to start sowing and planting. Likewise, I have 16 big containers filled with soil, ready to plant my potatoes in. Some of them are lucky enough to be ensconced in plastic greenhouses which will hopefully be helping the soil to warm a bit.
The only significant food plant in the garden right now is the Purple Sprouting Broccoli, which is ready for harvesting at last - in fact I plan to cut the first few spears of it tomorrow:
Down one side of my garden (unfortunately facing North) I have a brick wall, and up against it I have made a border filled with shrubs, Hellebores and bulbs:
Most of my Hellebores are ones grown from seeds sent to me by friends, with a few grown from purchased plug-plants. They are mostly not yet very big, but they get bigger each year and some of them are very nice now:
This dark one is from seeds sent to me by Elaine Rickett, who many of you will know via her blog Rosebank Diaries. Thanks, Elaine!
Everyone has "Tete a Tete" daffodils, don't they? Most of mine are planted in little clumps in the aforementioned border and elsewhere:
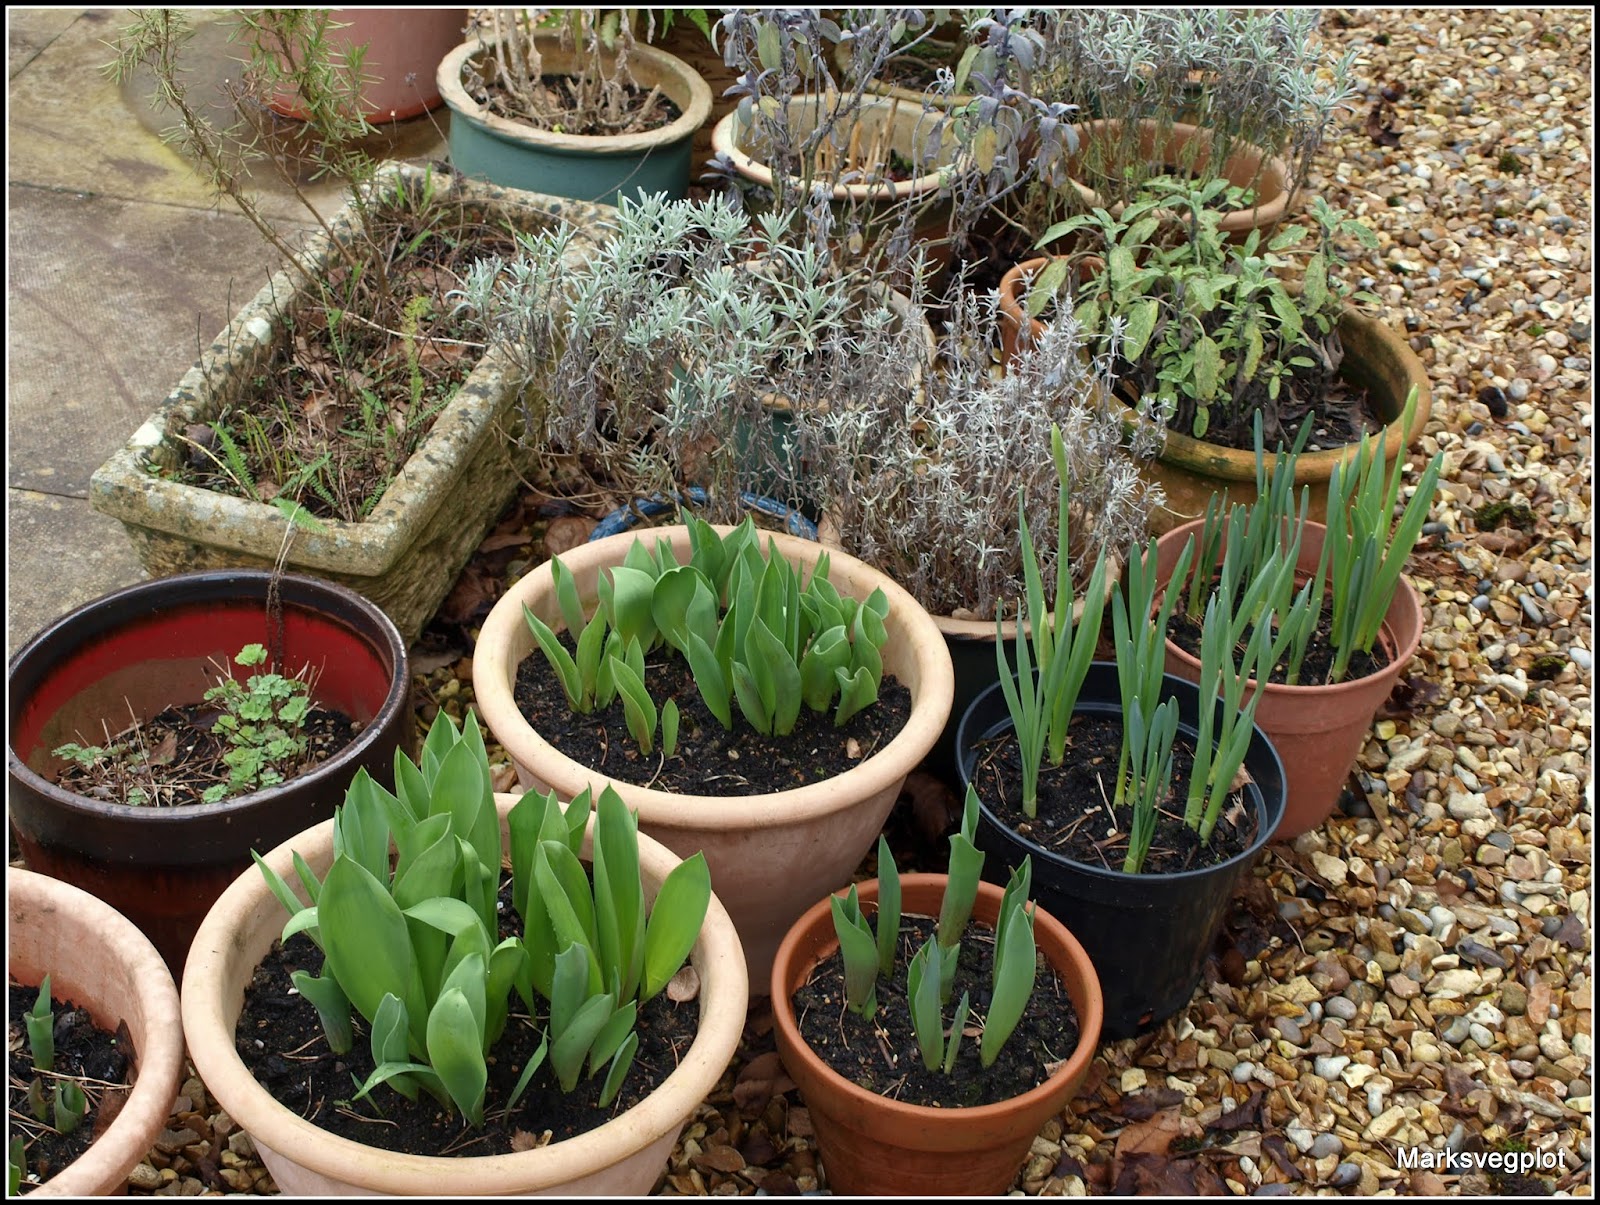
I have more bulbs - plus over-Wintered herbs - in a number of pots, awaiting their turn to show off.
Sheltering in the lee of my big new wooden coldframe are several pots of perennial herbs. This one is Greek Oregano, which is now growing quite strongly again.
So, there's not a lot to see yet, but it won't be long before my garden starts filling up again. I have potatoes chitting, Leeks, onion sets and seeds growing away in the coldframe; Broad Bean plants coming along in one of the plastic greenhouses, chilli seeds in the airing-cupboard and seedlings under the Growlights, root-divisions of herbaceous perennials waiting to take their places in the border... It may not be very evident to the non-gardener, but my plot is actually bursting with potential! I can hardly wait for the weather to warm up.
My garden at present is heavily dominated by bare soil:
My raised beds don't look very exciting just now, but they have been topped-up with homemade compost and raked over, all ready to go whenever it becomes warm enough to start sowing and planting. Likewise, I have 16 big containers filled with soil, ready to plant my potatoes in. Some of them are lucky enough to be ensconced in plastic greenhouses which will hopefully be helping the soil to warm a bit.
The only significant food plant in the garden right now is the Purple Sprouting Broccoli, which is ready for harvesting at last - in fact I plan to cut the first few spears of it tomorrow:
Down one side of my garden (unfortunately facing North) I have a brick wall, and up against it I have made a border filled with shrubs, Hellebores and bulbs:
Most of my Hellebores are ones grown from seeds sent to me by friends, with a few grown from purchased plug-plants. They are mostly not yet very big, but they get bigger each year and some of them are very nice now:
This dark one is from seeds sent to me by Elaine Rickett, who many of you will know via her blog Rosebank Diaries. Thanks, Elaine!
Everyone has "Tete a Tete" daffodils, don't they? Most of mine are planted in little clumps in the aforementioned border and elsewhere:
I have more bulbs - plus over-Wintered herbs - in a number of pots, awaiting their turn to show off.
Sheltering in the lee of my big new wooden coldframe are several pots of perennial herbs. This one is Greek Oregano, which is now growing quite strongly again.
So, there's not a lot to see yet, but it won't be long before my garden starts filling up again. I have potatoes chitting, Leeks, onion sets and seeds growing away in the coldframe; Broad Bean plants coming along in one of the plastic greenhouses, chilli seeds in the airing-cupboard and seedlings under the Growlights, root-divisions of herbaceous perennials waiting to take their places in the border... It may not be very evident to the non-gardener, but my plot is actually bursting with potential! I can hardly wait for the weather to warm up.
Friday, 3 March 2017
Wise words for the Beginner?
Having been gardening in earnest for about 30 years now, it's always tempting to look at the efforts of new gardeners and say to myself "That's not the way to do it. That'll never work. They'll live to regret it" etc, etc. Do you remember the know-it-all Father-in-Law character from the Fast Show? The one whose catchphrase was always "You don't want to do it like that!"? I don't want to be like that person, so I strive to share whatever expertise I have accumulated over the years, in the hope that some Newbie Gardeners may thereby be able to avoid some of the pitfalls along the way. It has also always been a point of honour to mention my mistakes and failures as well as my triumphs and successes.
I don't know if you have noticed, but one of the Pages on my blog is one called "Resources". On this page I give links to some of the blogposts I have written in the past that might be considered "advisory" - the sort of thing that might be beneficial to someone new to this gardening malarkey. Hopefully there are a few things there that might be of interest to more experienced gardeners too.
Today I'm going to invite you, my readers, to contribute some tips of your own! I would love it if you would leave me answers to the following 3 questions in the Comments box down below...
1. What one single vegetable would you recommend as being suitable for a Beginner? (Preferably something easy to grow, very productive and practically bound to succeed!)
2. What one tip would you give to a new gardener taking on a veg-plot or allotment for the first time?
3. What do you enjoy most about veg-gardening as a hobby / pastime?
If I get a good response on this I may collate all the feedback and publish it as a new article on my Resources page, so please do join in. Thanks!
![]() |
| Winter 2010 / 2011 |
I don't know if you have noticed, but one of the Pages on my blog is one called "Resources". On this page I give links to some of the blogposts I have written in the past that might be considered "advisory" - the sort of thing that might be beneficial to someone new to this gardening malarkey. Hopefully there are a few things there that might be of interest to more experienced gardeners too.
![]() |
| Tomato "Sungella" |
Today I'm going to invite you, my readers, to contribute some tips of your own! I would love it if you would leave me answers to the following 3 questions in the Comments box down below...
1. What one single vegetable would you recommend as being suitable for a Beginner? (Preferably something easy to grow, very productive and practically bound to succeed!)
2. What one tip would you give to a new gardener taking on a veg-plot or allotment for the first time?
3. What do you enjoy most about veg-gardening as a hobby / pastime?
If I get a good response on this I may collate all the feedback and publish it as a new article on my Resources page, so please do join in. Thanks!
Wednesday, 1 March 2017
Celery Leaf
Last year I (perhaps foolishly) allowed a Celery Leaf plant to flower in my garden. It produced thousands of seeds, many of which have now decided to grow.
Can you see the big open tub at the right of the photo above - the one with Asparagus growing in it? Well, the whole surface of that tub was until recently almost completely covered with tiny Celery Leaf seedlings. But then I though "Shouldn't I rip them out, because the Asparagus will be appearing before very long?" I am also aware that Celery Leaf seedlings make a delectable, though pungent, salad ingredient. So I hedged my bets and kept "just a few".
Thinking about it now, I reckon that what I'll do is transplant some of the seedlings to a more sensible location, so that I can freshen-up the tub prior to the arrival of the first spears of Asparagus. Before that though, I may well take a crop of the lovely tasty little leaves!
Ironically, I saved a big bag of Celery Leaf seeds last year too, just in case none of the naturally-sown ones survived! I don't think they will be needed.
By the way, if you haven't already discovered Celery Leaf, I recommend you try it. It's easy to grow (Evidently. See above!), and very convenient to have around. Just a couple of leaves added to a soup stew or stock give your dish a delightful intensely savoury flavour. You don't need a lot of it though, because of its strong taste - perhaps a small clump of 5 or 6 plants? This my original plant, which I cut down to ground level after it had flowered.
Despite the Winter frosts, and the current rain, it seems to have survived very well. I had expected it to die after flowering, so this is a bonus.
| Photo from July 2016 |
Can you see the big open tub at the right of the photo above - the one with Asparagus growing in it? Well, the whole surface of that tub was until recently almost completely covered with tiny Celery Leaf seedlings. But then I though "Shouldn't I rip them out, because the Asparagus will be appearing before very long?" I am also aware that Celery Leaf seedlings make a delectable, though pungent, salad ingredient. So I hedged my bets and kept "just a few".
Thinking about it now, I reckon that what I'll do is transplant some of the seedlings to a more sensible location, so that I can freshen-up the tub prior to the arrival of the first spears of Asparagus. Before that though, I may well take a crop of the lovely tasty little leaves!
Ironically, I saved a big bag of Celery Leaf seeds last year too, just in case none of the naturally-sown ones survived! I don't think they will be needed.
By the way, if you haven't already discovered Celery Leaf, I recommend you try it. It's easy to grow (Evidently. See above!), and very convenient to have around. Just a couple of leaves added to a soup stew or stock give your dish a delightful intensely savoury flavour. You don't need a lot of it though, because of its strong taste - perhaps a small clump of 5 or 6 plants? This my original plant, which I cut down to ground level after it had flowered.
Despite the Winter frosts, and the current rain, it seems to have survived very well. I had expected it to die after flowering, so this is a bonus.
Subscribe to:
Posts (Atom)