Saturday, 31 January 2015

Meatless Meal Day

Although we are definitely not vegetarians, we normally try to have at least one main meal a week that does not involve meat. This is my Meatless Meal Day offering for this week:

Halloumi cheese with Green Lentils and Bulgur.


For some reason I just fancied making something with lentils. Perhaps it was because I had been browsing through our copy of Sabrina Ghayour's book "Persiana". There is a recipe on page 157 for a salad dish using lentils and quinoa. We don't have any quinoa, and we don't really like it anyway, so I decided that my dish would have bulgur in it instead. By the way, I am not intending to recreate the recipe in Persiana, but simply something inspired by it.

So, the first task was to soak some lentils (about 60g per person seemed about right).


When it was getting towards dinner-time I simmered the lentils until cooked but still reasonably firm and then drained them. I made the bulgur according to the instructions on the pack - allowing 60g per person, you put it into a saucepan with 600ml of cold water, bring it to the boil, cover the pan and simmer for 15 minutes or until all the water has been absorbed. Towards the end of the cooking time I threw in a small quantity of finely-sliced red onion.

I roasted a tray of miniature plum tomatoes until soft but not too squishy. They were drizzled with olive oil and sprinkled with salt before cooking. In some ways, the tomatoes turned out to be the star of the show, because the roasting concentrated their flavour and brought out their sweetness.


I took a decent-sized bunch of parsley (from the garden) and a few sprigs of mint (from the supermarket) and chopped them finely.


I also prepared  a salad containing Little Gem and Red Cos lettuces. Not home-grown I'm afraid.


Meanwhile, I cut my Halloumi into thick slices and fried them until lightly golden, turning once or twice to avoid burning it.


Finally, the dish was assembled, with all the ingredients still warm (except the herbs). I mixed lentils with bulgur, added the herbs and a little squeeze of lemon juice to freshen things up, and then decorated the dish with the tomatoes.


The only thing that remained was to serve it up:


We loved this dish. The combination of flavours was exactly right. Sharp from the cheese; savoury from the bulgur and lentils; fresh from the herbs; and sweet from the tomatoes. Perfect!

Friday, 30 January 2015

Small signs of growth

I know it's far too early to expect Spring to be here, but I like to record (for my own reference purposes if for nothing else) when I see the first signs of new growth appearing in the garden. It gives me some encouragement as well, reminding me that Winter will eventually end - and the sooner the better, maybe!

Last weekend I saw these. They are leaves of Daffodil "Tete a Tete", pushing up through a carpet of Maple leaves.


Those bulbs are ones that have previously been grown in pots. Rather than storing them over the Summer (or even worse, throwing them away), I planted them in clumps of about 5 or 6 all along the side of the garden where the big Dogwoods grow. The foxes / badgers have dug up a few I notice, but enough will survive to bring a little colour to the border before the shrubs are in leaf.

This one is Tulip, in similar conditions. The stick is a marker to stop me digging it up and to protect it from animals.


Nearby, around the edge of my micro-pond are some Hardy Geraniums. Their new shoots are bright red, so easily spotted as they emerge:


This is also at the edge of the pond - Red-veined Sorrel.


Sorrel is one of those plants that once you introduce it to your garden it is there for ever, since it self-seeds very profusely. I don't mind having a bit of it around, but I'll certainly dig some plants up if they try to take over!

Nearby I can see the buds of Lily of the Valley beginning to swell:


Lily of the Valley spreads rapidly too, given the right conditions, so I have no hesitation about ripping it out if it tries to grow in a place where it's not welcome.

Around the trunks of the 3 trees in my back garden I have planted lots of Crocuses (again, ones that have previously been grown in pots), and these are just beginning to peep through. One of them seems to have produced its flower even before surfacing from underneath the weed-suppressing membrane:


Round the side of the house, by the back door, the Aquilegias are beginning to appear. The new leaves are bright purple when they emerge, gradually lightening as they get bigger. The straw-like stalks from last year's leaves will soon be in demand as nesting-material for the birds, so I try not to be too rigorous in removing them.


At the weekend I pruned my solitary Pear tree (it's grown as a minarette, so it didn't take me very long!). I noticed that the buds are beginning to fatten:


Last year this tree produced no fruit at all (it has developed a biennial habit), so hopefully this means that this year I will get a few fruit.

With the Blueberries, something would have to go disastrously wrong for me to get no fruit, since I have six plants, all of different varieties!


Finally, since we are talking about buds opening, let's take a look at the Hellebores again:


Yes, that's right, buds but STILL no open flowers. Soon, maybe, soon...

Thursday, 29 January 2015

Building a nesting-box

Last weekend was the RSPB's Big Garden Birdwatch (a survey of bird populations, reliant on observations by amateur bird-watchers). I didn't participate in the survey myself, but I thought it was a good occasion on which to do my bit towards helping the birds, by constructing a nesting-box.


I'm not a skilled carpenter, so my efforts are a bit amateurish. No precise measurements, no finesse here, but it will probably serve the purpose well enough!


My nesting-box is constructed from a plank of good-quality chipboard left over from when our kitchen was re-done. It has been sitting in the garage for the last couple of years, waiting for just this sort of opportunity. [Our garage is full of bits and pieces that will "come in useful one day"!]

I sawed the plank into the relevant lengths (to my own design) with a handsaw. Two sides (notice that one end is angled), back, front, base and lid.


The entry-hole in the front was made with this gadget (I don't know what it is called), which fits onto an electric drill:


The only one I have makes a 25mm hole, which would be OK for Bluetits, but a bit tight for Great Tits or anything bigger, so I widened the hole to about 30mm.

I made two holes high up in the back piece, which are used for attaching the nesting-box to a tree. They look neat on this side, but the exit-hole on the other side ended up very ragged (you will see this in a later photo). This is one of the hazards of using chipboard rather than real wood.


I also drilled some holes in the base, for drainage and attachment purposes.


The box was simple to assemble, using some 40mm (1.5") nails. The lid was attached with a small hinge found in my spares box:

You can see here the ragged "exit-holes" I described earlier

Making the lid hinged will mean that the box is easy enough to clean when necessary. Actually, I expect it will probably only last a year (two at most), because the chipboard will fall apart quite rapidly!


Anyway, here is the finished item:


I'm quite proud of that. Even if it only lasts one nesting-season it will have been worthwhile, constructed as it is from odds and ends costing effectively nothing. It only took me about an hour and a half to make too - and half of that was spent ferrying all the tools, nails, wood etc outside and then back in again when I had finished! And at least I now have a workable "template" if I decide to make another box with better materials (that's to say, proper wood, as opposed to chipboard).

As the sun went down I scrambled up a ladder and fixed the box in place in my Bronze Maple tree at a height of about 12 feet above ground level.


It looks precarious, but it isn't. The main weight of the box is supported by a tree-branch about two inches in diameter, and it is secured top and bottom with lengths of strong plastic washing-line cord.


So, let's see if anyone moves in...


P.S. I'm re-publishing this post since I accidentally posted two yesterday, leaving nothing for today.

Wednesday, 28 January 2015

Wild salads on my doorstep

I have recently become more interested than ever in foraging. By this I mean harvesting wild foods. It is a hobby / pastime / practice that had all but died out until recently, and I believe it is undergoing a bit of a comeback. From what I see and read, many top chefs are very keen to include foraged ingredients in their dishes, and such things can often command a high price.

Well, I'm not into commercial foraging, that's for sure (and I'm dubious about the ethics of this practice anyway), but I'm not averse to including a little bit of wild food in my diet. As regular readers will know, I often collect Chestnuts, Blackberries, Elderberries, Rosehips and Sloes. Last year I was lucky enough to identify a place to get loads of wild Plums (I will be visiting it again!), and I even dug up some wild Horseradish. If I had more knowledge of the subject I'm sure I could pick lots of edible fungi, of which there are many, many types around where I live. You have to admit it: we are surrounded by free food.

Today I want to mention a few plants that are very commonly found, and very well known, but seldom seen as sources of food. They are all growing in or very close to my garden.

Allotment-holders and gardeners all round the country know this one all too well - Stellaria media, aka Chickweed.


It grows in profusion on many allotment sites, and seems to have a particular liking for freshly-turned soil. But how many gardeners know that it is edible? It can be used in much the same way as cress - for instance in an egg sandwich, or as a garnish for other types of salad.

If you look carefully, I bet there is some in your garden, or along the side of your road. (If you're planning to eat it, just be careful about where you pick it!)


This next one is also a plant that is very widespread - Cardamine hirstuta, commonly called Hairy Bittercress


This is what Wikipedia has to say about it: "This plant grows best in damp, recently disturbed soil. These conditions are prevalent in nursery or garden centre plants, and hairy bittercress seeds may be introduced with those plants. Once established, particularly in lawn areas, it is difficult to eradicate." Very true! I find this plant popping up again and again in my garden. Fortunately it is quite easy to pull up  complete with its roots, but you can be sure that more will grow. Maybe the best approach is to treat it as a crop. Then you will actually welcome large quantities (maybe)! Although it is certainly edible, you wouldn't want to eat large quantities. The clue to this is in its name.

What about this one? Everybody know it - the Dandelion, Taraxacum.


Gardeners normally treat it as a weed, but it is definitely edible. In fact it is more edible than most other plants; you can eat leaves, flowers and roots. Here in the UK (and elsewhere too) it has an image problem, being known mainly for its diuretic effect. the French call it "pissenlit" (bed-wetter). This is unfair, because the part of the plant with the strong diuretic effect is the root, which is seldom eaten. The leaves, on the other hand, make a competent salad ingredient, especially when blanched, which makes them sweeter. The name "Dandelion" is allegedly a corruption of the French "Dent de Lion" (Lion's tooth), being a reference to the pointed tooth-like edges of the leaves (see photo below).


What do you think of this statement, taken from Wikipedia:
"The dandelion plant is a beneficial weed, with a wide range of uses, and is even a good companion plant for gardening. Its taproot will bring up nutrients for shallower-rooting plants, and add minerals and nitrogen to soil. It is also known to attract pollinating insects and release ethylene gas which helps fruit to ripen."

Although this particular specimen is growing in my garden and not therefore wild, I offer it as a representative of its type - Allium ursinum, Wild Garlic, also known as Ramsons or Ramps.


This plant grows in damp woodland places, and if conditions suit it, spreads rapidly. For this reason, some people have said I ought not to have introduced it to my garden. So far, mine is under control, but I shall keep a good eye on it!

The Wild Garlic leaves have a strong garlic-ey smell and flavour, and I don't think I would enjoy this as a salad ingredient (though lots of people apparently do), but it is fine made into sauces or pesto. A small quantity added to buttered vegetables can be very pleasant.

If you are interested in foraging, maybe you would like to get some books on the subject. Try these for a start:
Food for Free by Richard Mabey (still the forager's "bible")
River-Cottage Handbook No7 - Hedgerow by John Wright
Wild Food by Roger Phillips

You might also be interested in this website: (My thanks to Lucy at Loose and Leafy for this link.)
Eatweeds.co.uk

If you need help with plant identification, you could try these people www.flowerchecker.com And yes, it is a team of people who will try to identify plants and fungi from photos you send in. They responded to an open query I posted on Twitter the other day, and I got a 95% certain ID within about 5 minutes of asking.

Tuesday, 27 January 2015

Sleepers

You know I said I was going to renew some of my raised beds? Well, I have decided to experiment with a new style, using sleepers. These are sleepers:


These ones are 2.4 metres long, by 20cm wide, and 10cm tall. Each one weighs 33.5kgs!


They are treated with preservative, but (allegedly) it is not the toxic sort of stuff that used to be used on railway sleepers, so my veggies should be OK.

Currently my plan is to build one double-height bed (with the sleepers standing on their narrow edges - i.e. 40cm tall) and see what it looks like, before committing to making any more. I may decide they are not right, and revert to my former style of bed, edged with 19mm-thick planks. With these sleepers I think I may be able to make something a little bit like the Woodblocx bed, but much cheaper. The plan is to make the bed 2.4 metres long x 1.2 metres wide - mainly because this entails the minimum amount of sawing. Cutting through one of those sleepers with a handsaw may be quite a difficult task!

If I make the new bed(s) that size, it will mean re-arranging the whole layout of my plot, so I will probably get rid of some or all of the paving-stones that currently surround it and form paths between the beds. To be honest, this is also overdue. Some of the paving-stones are about 15 years old and beginning to show their age. A lot of moss and algae grows on them so they do get quite slippery in Winter. They are also difficult and time-consuming to keep clean and tidy. I have bought some more shingle like that which already covers much of the rest of the garden, and this will replace the paving-stones.


This is a tonne (1000kgs) of shingle. The stones have a nominal diameter of 20mm. You can see that it is a pretty good match for the stuff I had laid down about 5 years ago.


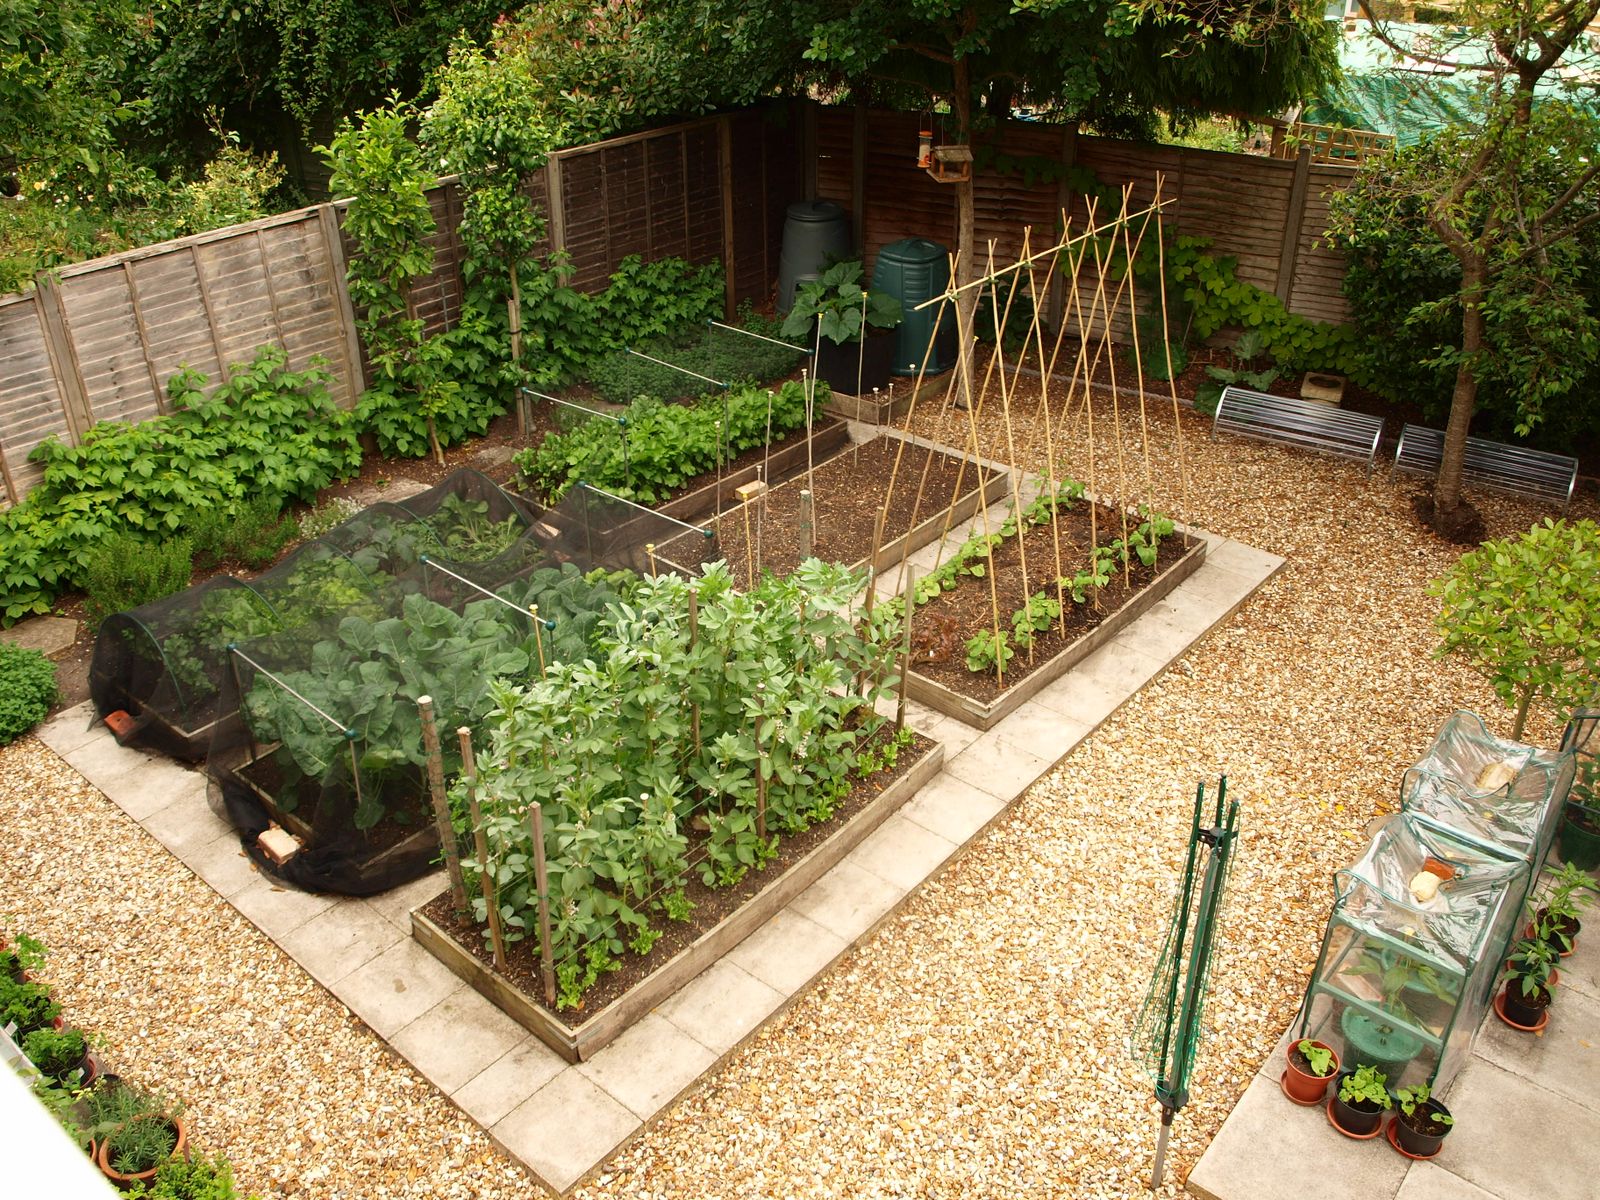
This is what the plot looked like a few years ago, with the paving-stones in pristine condition, and the shingle looking new still:


This is the plot in July 2014. Look closely at the paving-stones at the left of the photo. Those are the 15-year-old ones.


So you can see that I am going to be busy. Best to get it done before the main growing-season starts though. If you're wondering how the wood and shingle got to be where it is, the delivery man put it there for me, lifting it over the garden wall with the crane on the back of his truck. Phew, that saved me a lot of work!

Woodblocx bed in the background

Just want to leave you with an arty photo, showing the tree-rings in the sleepers. Can you work out how old my wood is??


Actually it looks as if some of the wood is a lot older than the rest. The rings on the top-left one are much more closely-packed, aren't they?

Monday, 26 January 2015

Harvest Monday - 26th Jan 2015

I'm still here! Still managing to harvest at least something to show off for Harvest Monday.

Here is another photo of the Baby Leeks I wrote about yesterday:


They look better when cleaned up:


In addition I have picked another batch of Brussels Sprouts.


As always, I picked just enough for a 2-person serving, about 250g when picked, about 200g when prepared for cooking.


Every time I think they must be just about finished, I find some more have grown. The little tiny sprouts up at the tops of the plants - the last ones to mature - are actually the nicest of the lot!


That's all the produce from my garden this week, so why not head over to Daphne's Dandelions and see what everyone else has got...

Sunday, 25 January 2015

Baby Leeks

As mentioned a few days ago, I had recently concluded that my second batch of Leeks was not going to grow any more and I might as well pull them up. To be fair, my main crop of "Toledo" Leeks (long gone now) was pretty decent and I was satisfied with them. This second batch was only ever a long shot. Back in the Spring I had initially sowed far too many seeds and I ended up with a load of seedlings and no space, so I kept them in a some flower-pots and then planted them out a couple at a time whenever the harvesting of some mature ones freed-up some ground.

By the Autumn they had put on a bit of weight, but I don't think they have grown perceptibly for at least the last two months. A few of them had been trampled-upon by the foxes, despite being covered with netting, and they were generally a pretty sorry sight:


If you think that photo looks a funny colour, you're right, because the surface of the soil was covered with frost when I took the photo, which made everything come out looking very strange.

One or two of the Leeks were about an inch in diameter, but most of them were only about the size of a large Spring Onion.


Well, I have now pulled up all but the largest four (hedging my bets again, still hoping they might grow a bit more...)


After a wash and a trim they didn't look too bad:


And here they are in the kitchen, awaiting the chef's attention.


Yes, they certainly do look more like Spring Onions than Leeks.


One thing I have particularly noticed with these home-grown Leeks is how strong their aroma is. Shop-bought Leeks hardly seem to smell of anything, but these ones of mine fill the room with "scent". Why don't they make air-fresheners with fruit and veg smells? A room filled with the scent of Strawberry, Tomato or Leek might be quite popular. Not sure about the Garlic one though...