Thursday, 11 June 2020

The first of the new potatoes

There's something magical, something deeply satisfying, about digging up homegrown potatoes!


Because of this special appeal, despite having limited space, I always grow a few potato plants. These days I have settled on growing 12 containers of them, using big (35-litre) black plastic pots, each planted-up with two seed tubers. With this limited number I'm never going to be self-sufficient or have a year-round supply of potatoes, but it's enough to give us a few very special meals in the early Summer. I say "early Summer" because I grow mostly First Early and Second Early varieties which mature in June and July, as opposed to the bigger Maincrop ones which are not lifted until Autumn. This means that I can get my crop harvested before the almost-inevitable Late Blight comes along.

In this overhead view of my plot you can see the 12 potato pots towards the Left of the photo.


This week I lifted the first of my 2020 potato crop. Knowing when to do this is a matter of judgement rather than a science. Normally, when a potato plant produces flowers it's a sign that tubers are forming, but not all varieties produce flowers and these are sometimes very insignificant. This year hardly any of mine have produced flowers. The other main sign to look for is the foliage going brown and beginning to flop. Some of mine are at this stage now.


If I were to leave all my plants until they were completely ready for harvesting we would have a lot of potatoes all at once, so I think it makes better sense to harvest a couple of the pots before they are 100% ready. This means that the initial yields will almost certainly be modest, but the individual potatoes should be small and very succulent. The first of mine to be harvested this year was "Colleen", a First Early variety, planted on March 21st - in other words eleven and a half weeks ago.


As expected, the yield was small - 16 tubers of useable size (from 2 seed tubers), weighing a total of just over 600g.  As I suspected, there were several very tiny ones, which would have grown bigger if they had been left.


Based on this little "test harvest", I'll leave it another week or ten days before taking the next pot, and during this time I'll make sure to water them well in order to help the tubers swell.

I should add that in terms of quality, these "Colleen" potatoes were lovely. They were very clean tubers and when cooked they had that light, almost insubstantial texture that is what I want from a new potato. I will say though that they are probably better steamed than boiled, because their skins lifted off when I boiled them, which spoiled their looks somewhat!

Tuesday, 9 June 2020

Finger carrots

In addition to devoting most of one of my raised beds to growing "big" carrots, I'm also having a go with a few of the little carrots which people call "Finger carrots" or "Cocktail carrots". This type is typically small and proportionally long and thin - like these ones I grew in 2017:


The best variety of Finger carrot seems to be "Amsterdam", which comes in various versions such as "Amsterdam 2", "Amsterdam 3" etc. I bought a pack of "Amsterdam 2 Solo" from Wilko, for the princely sum of 50p. A pack contains at least 200 seeds, which is more than enough for my needs.

On May 24th I sowed a generous number (maybe 25 - 30?) of the seeds in each of two tall pots filled with finely sieved soil with a bit of added compost. You definitely want to remove any stones. In the hot weather, they germinated in just a few days. [NB: keep the soil moist to improve germination rates.]


Now those pots are actually quite small in diameter so I will definitely be thinning out the carrot seedlings in order to leave maybe 12 or 15 in each pot.


The seeds hadn't all germinated when I took these photos. It's a good idea to wait until you judge that all those that are going to come up have come up, then you can remove the ones you don't want, leaving the others reasonably well-spaced.


During summertime carrots like these will take 2 - 3 months to develop fully. In the meantime I'll be making sure to water them frequently, but I'll stand the pots in saucers and water them from the bottom, so that the carrots put out long roots to search for the moisture.

With a bit of luck I'll end up with a small number of very special carrots, ideal for eating raw as a snack - maybe a pre-dinner Nibble like this!


Sunday, 7 June 2020

Lettuce

Lettuce is traditionally the mainstay of many salads, and we use a lot of it in our household. I do my best to make sure that we have lettuce available throughout the Summer months.


Over the years my lettuce-growing efforts have met with mixed success. The soil in my garden is very sandy and dries out very rapidly. Lettuce don't like that, and they often bolt (run to seed prematurely) because of it. I like to increase my chances of success by growing lots of different varieties - though obviously only a few of each. This year I have devoted a half of one of my raised beds to growing lettuce, which gives me space for about 16 - 18 of them at any given moment, depending on size.


Here's a rundown of what types I have this year...

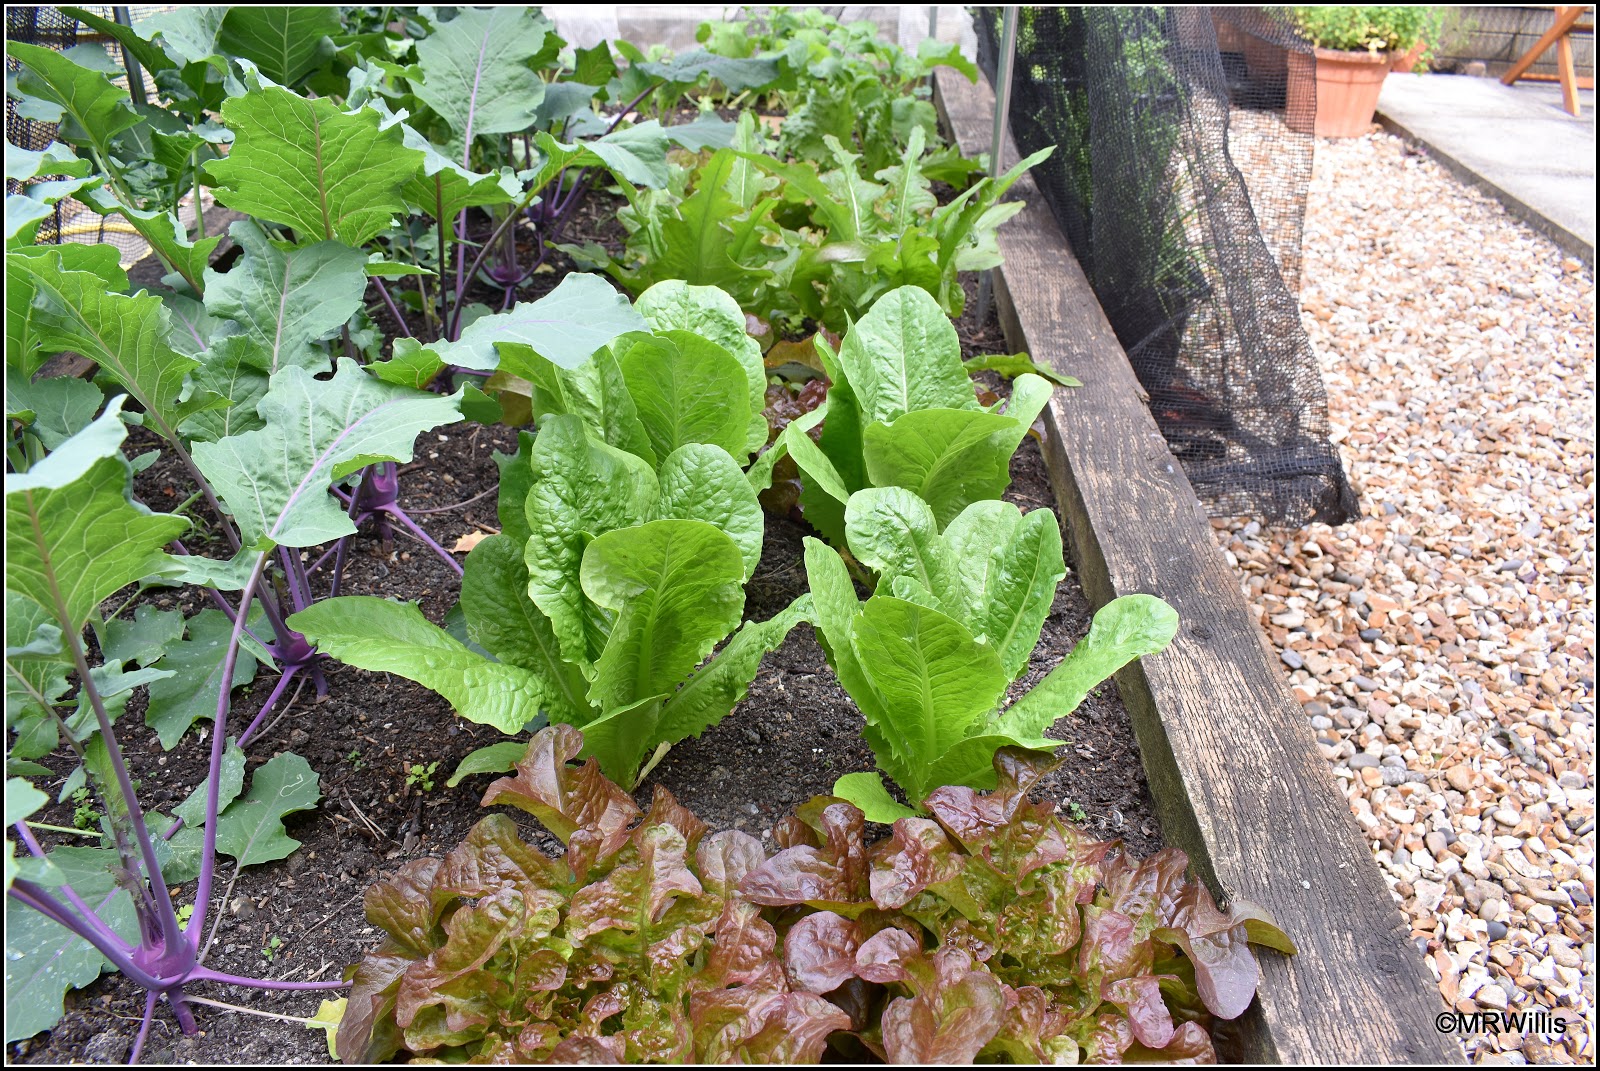
First is "Saxo", a looseleaf red/bronze variety which lends itself to the "cut and come again" method of harvesting, whereby you take just a few leaves at a time rather than cutting the whole lettuce off at the stem.

"Saxo"

Then we have "Lobjoits Green Cos", a Cos / Romaine type. These are typically harvested whole.

"Lobjoit's Green Cos"

Next, "Cocarde", a green and bronze oak-leaf variety, which grows very big if you allow it to.

"Cocarde"

When I planted these four I thought they were all the same (they came from a mixed pack), but they aren't. There are three of one type and one of another.


The three are like this. I reckon they are "Lollo bionda" or something similar. Certainly soft and frilly!


I believe the odd one out is "Yugoslavian Red". The remains of a pack of that variety went into the mixed sowing. The leaves are bigger than the previous one, and more "blistered".


Right at the end of the row I have a pair of "Great Lakes", an Iceberg type. These were planted later than the others so they are currently much smaller though they will hopefully get very big in due course.


Most of the lettuces pictured above are nearly ready but not quite. In the interim we have been making the most of this tray of "Baby Leaf Salad" - in reality the leftover seedlings of "Saxo" and "Lobjoits Green Cos".


I have cut leaves from that tray of lettuce so many times! It's actually a very economical way to grow lettuce, both in terms of cost and in terms of space. I've kept mine productive by giving it an occasional dose of seaweed-based liquid fertiliser.

One of the keys to success with lettuce is successional sowing, sowing little and often so that you don't end up with a glut. Waiting in the wings is my next lot of seedlings, ready for planting as soon as space becomes available.


I also have another tray of tiny seedlings, only recently germinated, so we're not going to be short of lettuce any time soon!


Friday, 5 June 2020

Early brassicas

I suspect that most people (like me) associate brassicas with the Winter season. Cabbages, Kale, Brussels Sprouts, they all seem like things to be eaten when the weather is cold. However, there are brassicas that are suitable for every season of the year. I'm growing some Summer-cropping brassicas this year: Kohlrabi, Broccoli and Brokali (the latter being a hybrid of Broccoli and Kale).

Kohlrabi "Kolibri F1"

I don't normally grow Summer brassicas, but this year is different, due to the pandemic and the lockdown arrangements that have been necessitated by it. When the virus began to be really serious and the lockdown was imposed, it appeared that food supply (especially of fresh vegetables) might become difficult, and I wanted to have some vegetables in the garden that would deliver an early harvest for us, just in case we couldn't buy any.

To give you an idea of how quickly these vegetables grow, I should mention that I sowed the seeds on 25th March, so from sowing to harvest will be something like two and a half months.

Kohlrabi seedlings - 10th April

Well, the harvest is nearly ready. The Kohlrabi needs maybe another week or ten days. I don't want it to get too big because it would probably become tough, but equally harvesting too soon would be to waste its potential. I think I'll let them reach about the size of a tennis ball. They are currently about the size of a ping-pong ball.


If you're not familiar with Kohlrabi, which is not widely used in the UK, let me say that as the name suggests (Kohl = cabbage, Rabi = turnip), this vegetable tastes like a cabbage but feels like a turnip. The flesh, which is white even inside the purple-skinned varieties) is crisp and juicy. It can be eaten raw - maybe grated as a salad ingredient - or cooked just like a "proper" turnip. The young leaves are also edible, though older ones are tough.

The Broccoli and Brokali are a little further away from being mature, I think, though it's quite hard to tell at present. I have three plants of each type, but unfortunately I've forgotten which is which and they do look very similar! One of the two is already forming little central flower-heads, but the other is not.


Actually, it would be very convenient if the two types would mature at different times, because that would spread out the harvesting period. I don't really want six plants all cropping simultaneously, since there are only two of us to eat the veg.


I want to squeeze into this post and update on something that is definitely NOT brassicas - apples...

I have two apple trees growing in large (60-litre) pots. This year they are side-by-side, about 3 feet apart, in the hope that they would assist each other with pollination. Strangely, one of the trees ("Laxton's Superb") has produced masses of fruit, but the other ("Winter Banana") has not. In the hope of getting some bigger, better-quality fruit this year I have been ruthless with thinning out the little apples, especially on the Laxton's. I have made sure that there are no more than two fruit on each spur:


I've noticed something very odd. In many cases one of the remaining pair of apples has developed a lot faster than the other, leading to a big disparity in size. I suspect that the tree may decide to abort the smaller fruits and put its energy into the larger ones.


At this time of year fruit trees often shed a lot of fruitlets anyway, in what gardeners term the June Drop. It's Nature's way of ensuring that the trees don't produce more fruit than they can sustain.

Wednesday, 3 June 2020

Weedkiller problems

Prompted by an enquiry from a reader (Hello Debbie!) I thought it was about time I wrote another post about weedkiller, in order to keep this issue "in the public eye" rather than let it be forgotten.


Most of my regular readers are aware of this already, but there are still people (for example new gardeners) who don't know that much of the commercial compost sold these days is contaminated with weedkiller. Mostly these chemicals are used in agriculture to suppress broad-leaved weeds in grazing pasture, and in domestic lawncare products. They find their way into allotments and domestic gardens via two primary routes: the agricultural products (usually Aminopyralids) come in with animal manure - often provided free of charge to allotmenteers - and the lawncare products (usually Clopyralids) enter via municipal green waste, which is frequently used as a significant ingredient in bagged compost.

There is legislation and regulation covering the use of such products, but in my experience it is often bypassed or ignored. I have in the past raised complaints with manufacturers (e.g. Dow Agrochemicals / Corteva) and with regulators and health authorities (e.g. DEFRA, HSE), but to be honest, I made little progress with either. They still continue to brush aside such complaints, denying that there is an issue, and refusing to accept responsibility. Until someone in high authority (or perhaps a prominent gardening personality) takes this up, the issue will remain one which you and I have to cope with on our own. My approach has been to stop buying products made by anyone who has supplied me with contaminated material. Top of my hate-list is Westland, whose products have consistently been bad.

The trouble is that these substances are incredibly powerful and persistent. Despite manufacturers claims that they break down rapidly, I have found that their effects last for literally years. Once they are in your garden it is almost impossible to eliminate them, because they get into the soil and into any home-made compost that you make.

This year, because of the difficulties presented by the COVID-19 pandemic, I have bought very little compost (only 3 bags of "100% organic" composted stable manure from Harrington and Jessup, and 3 bags of Melcourt Sylvagrow). With one exception (described later) I have had no problems with seedlings raised in these materials, but as soon as I planted into garden soil (e.g. in my raised beds) the problems reappeared. The plants most affected are beans. This is a Runner Bean leaf (as are also the ones in my photo at the start of this post).


These distorted leaves are on a climbing French Bean "Cobra".


Fortunately this year the problems I am encountering are not severe and the beans will probably be OK, though it is likely that their vigour will be less than if they had been uncontaminated. I'm fairly sure that they have been affected by weedkiller residues in the soil of the raised bed and in the home-made compost which I applied to it.

The "exception" I mentioned above relates to a batch of Broad Beans which I sowed in small plastic pots. I sowed four such batches, and they were all OK except one. The beans in that one batch came up distorted and blackened at the edges.


Those beans were from the same pack as another batch that came up looking fine, and were sown in compost from the same bag. The only thing I can think of that may have caused the damage is that I used pots that had not been washed, only brushed out. It is possible that some residue of last year's contaminated compost remained in them - it only takes a minute quantity to cause damage. Broad Beans seem to be the vegetable most susceptible to harm caused by these weedkillers and are often used as a test for its presence. You plant some beans and see how they fare, before committing to growing anything else in the compost you are using.

Some years ago (I think it was in 2014) when I first became aware of this issue, my tomato crop was very badly hit and almost all my plants were affected. Since then I have become very aware of the signs of contamination. The first sign is abnormally thin, spindly (sometimes described as "fern-like") foliage, with distorted or curled-in leaves. A couple of my plants this year have some leaves like this:


Abnormal bending - often in a spiral fashion - of the leaf-stems is also another common sign, and can be mistaken for the normal curling-in effect that can occur on tomato leaves when cold nights follow hot days. So far, none of my plants are exhibiting this symptom this year, but let me show you a photo from 2108:


Damaged and distorted leaves obviously affect a plant's ability to absorb energy from the sun, so its vigour will be reduced and the whole plant may be stunted. The amount and quality of fruit is also likely to be adversely affected. This photo of a tomato fruit was taken in 2014:


As I have mentioned, the levels of weedkiller contamination in my garden this year are not severe, and my plants will probably deliver a decent yield despite it, but I still feel aggrieved that it's there at all!

At least as a result of this post perhaps some newbie gardeners will now be able to understand the reasons behind previously un-diagnosed plant damage in their own gardens. I urge you all, if you get the chance, to lobby for a review of the use and regulation of these dangerous chemicals! I maintain that sellers of commercial compost have a duty to ensure that it is fit for purpose and will nurture not damage our plants.

I have written about this subject several times before, so if you want to know more, please use the SEARCH facility in the side-bar of my blog and look for the word "weedkiller".

Saturday, 30 May 2020

The Broad Beans keep me waiting

My Broad Beans have finally deigned to set some pods.


Now that I can see these tiny pods, I really really want them to hurry up and mature! Looking back at my records I see that last year my first Broad Beans weren't harvested until 18th June, but the previous year I picked some on 6th June. Of course different years have different weather conditions, and I don't grow the same varieties of bean every year, so all I can say is that my 2020 beans will be ready "soon".


One of the varieties I'm growing this year, and the first that I planted, is "Express", which is supposed to produce an extra-early harvest, but it doesn't seem to be playing along with this. It is growing in the same bed as some "Imperial Green Longpod" and some "Witkiem Manita", but it's looking as if they may all be ready at the same time, which is annoying, because I had been hoping for a more spread-out harvesting period this year!

In view of the coronavirus situation and the initial uncertainty of food supply, I didn't throw away any of my spare Broad Bean plants this year; I just squeezed them into some little corners of the garden. Ironically, the biggest and healthiest-looking of all my beans are these "Imperial Green Longpod" ones, late-planted spares that ended up at the bottom of the garden next to my log-pile, Comfrey patch and second compost-bin.


These plants are definitely the ones with the most flowers, but I know from past experience that many of them won't set pods.


Well they say that "What's worth having is worth waiting for", so the beans had better be good!

Wednesday, 27 May 2020

Planting cucumbers

In the absence of a greenhouse or polytunnel, all my cucumbers are grown outdoors - and quite successfully too, I must add. Of course this means I have to judge when the weather is right, and not plant them out too soon. Well, keeping a close eye on the 10-day weather forecast, I reckoned that yesterday (Tuesday) was the right time to do it - lots of sunshine during the days, and mild nights for the foreseeable future.

I had everything ready to go for the task - tubs filled with compost and enhanced with fertiliser; poles (Hazel rods 6.5 feet tall, tied at the top) erected; plants hardened-off - so planting was actually a very quick job.


The only advice I can offer here is to avoid planting too deeply. Cucumbers dislike having their stems in contact with damp / wet soil, so if you can, plant them on a little mound.

This is the first of my two cucumber tubs. I've put in it 2 x "Delikatess" and one each of "Diva" and "Passandra". These ones will be used to produce what I'll call "normal" (though small) cucumbers.


The second tub also has four plants, 2 each of "Vorgebirgstrauben" and "Venlo Pickling". These ones will be used to produce tiny fruits for pickling as gherkins of cornichons.


You might be wondering what the lines of string are for. Well, they serve two purposes: to provide some support for the plants until they manage to grab the Hazel poles; and to deter the nocturnal animals. I have found that sometimes a fox will actually climb into a big pot if it believes there's a chance of finding something edible in it (a juicy worm, perhaps?).


With the weather these last few days having been sunny and hot, I thought carefully about when to plant the cucumbers (I mean what time of day). I didn't want them to get scorched and dehydrated, so I waited until the site of their new home was going to be in the shade for at least 12 hours. I've also moved a potted Bay tree a few times, arranging it so as to provide a bit of shade for the young cucumbers. Once the plants are established they will enjoy the direct sunlight, but they do need a chance to settle in first.

In my usual fashion, I have some spare plants just in case there are any casualties, and I have to admit that I have used one of them already.... the rootball of one of the young plants disintegrated as I was removing it from its pot, and the roots were damaged, so I have discarded that one and used a spare.