Saturday, 7 May 2011

Plans for the succession

Hooray! We got some rain last night and this morning  - the first for nearly six weeks. Decent heavy rain too, and enough to properly wet the soil. The plants will be very grateful.

Since Mark's Veg Plot (the real one, I mean, not the virtual one) is very small, I have to think carefully about how to get the maximum yield from the available space. Even when the beds are full, there is always other stuff coming along in pots and seed-trays, awaiting its turn.

These are Endives and Lettuces. I sowed a small number of four different types of Endive in the one seed-tray, but as you can see, one type completely failed to germinate. The Lettuces are three red varieties all mixed in together - "Rossa Romana", Red Cos and "Marvel of Four Seasons". In this picture the young leaves of the latter are still pale green.


A few days later, the lettuce seedlings have filled-out a lot and gone much darker.


Even the "Marvel of Four Seasons" is beginning to show some red speckling. (And notice the raindrops on these lettuces! We had almost forgotten what rain was...)


These lettuces and curly endives from an earlier batch are ready for planting out. If only I had somewhere to plant them!


Another salad ingredient of which I am very fond is Rocket (or Aragula). It lives up to its name well, since it grows exceptionally fast. You can eat it at the microgreens stage, or leave it to mature fully. We like it on a "Soho" pizza (specially designed for the Sloane Rangers...) As you can see, it is not necessary to devote a huge space to growing this crop - a recyled supermarket fruit container will allow you produce a viable quantity. Just keep sowing it at frequent intervals!


These are young Flower Sprouts - "Petit Posy". Apparently they are a cross between Curly Kale and Brussels Sprouts. These things are brand new ("The first new vegetable in 10 years"...), so I have no idea how they will turn out, but I'm hoping that they will give me a nice late Autumn crop, at a time when little else is available. I will transplant them soon and grow them on in individual pots and plant them out into their final growing positions in a couple of months' time.


This is the next batch of Land Cress. It grows much more slowly than most salads, so you have to be patient. I grew this lot from seed, and I have progressively thinned it until I am left with 12 plants, which is all I require.


Land Cress does not require running water as Watercress does, but it does enjoy very moist soil. Growing seedlings in shallow seeds trays that dry our rapidly on sunny days can be a bit risky, so I have devised a way of keeping the young seedlings well-watered. Their seed-tray (which has drainage holes in its base) is perched atop another seed-tray without drainage holes, which is filled with water, acting as a reservoir.


I'm currently thinking about sowing seeds for Cavolo Nero and Sprouting Broccoli, but I'm off on holiday shortly, so I think I will wait until I return. Little tiny seedlings require careful supervision ,and it's not fair to ask a friend to provide this. Our good friend Rosemary will be doing some watering for me, but she has enough to do in her own garden at this time of year without needing to be supervising seedlings for me!

Friday, 6 May 2011

More garden Beauties

My garden gives me two types of pleasure:- it produces plants that are good to eat, and it produces plants that look nice to look at.

Right now there are so many beautiful things I want to photograph... (although actually many of these things will also eventually be eaten!). I'm away from home on a business trip at present, so I can't really write about what is happening in my garden, but here's a little selection of photos taken last weekend...

This Allium is one from a batch I planted several years ago and had considered extinct. This year one little flower has popped up again.

Allium
These chives are primarily a culinary herb of course, but their flowers are really decorative.

Chive flowers

This variegated Sage looks impressive, but its value as a herb is less than that of the stronger but less-showy plain green type.

Variegated Sage
 This is my new fern Dryopteris Erythrosora. I love the bronzy foliage. I expect it will go green later in the year.

Fern
 The tomato plants are just beginning to produce their first flowers. Aren't the stems hairy??

The first Tomato flower
 I'm not telling you what this one is. You should know by now. It was one of those in my recent "Do you know your seedlings?" post.

You know what this one is, don't you?
  The Land Cress is finished now, but I have left it to flower. This is in the corner next to my Cucumber tub, where it adds a bit of welcome colour to an area that would otherwise be very drab at present.

Even the Land Cress that has gone to seed looks quite nice
 What about this? An earwig perched on a stem of that plant with white flowers that I have still not been able to conclusively identify. Not beautiful in the conventional sense, but interesting I think.

Earwig - maybe not beautiful, but interesting nonetheless
Can't wait to get back home to see how things have progressed while I've been away. Still no rain in Fleet, I understand, so Jane as been in charge of the hosepipe...

Thursday, 5 May 2011

The tomatoes go to their final homes

Now that we're in May, it's time to plant out the tomatoes, putting them into their final growing-tubs. They are certainly getting too big to remain in those 5" pots.


For me, the number of tomato plants I grow is really determined by the space I have available. I would dearly love to have a glut of tomatoes in the Autumn, but I don't think that is going to happen! I know from previous experience that I will have space for about 12 large tubs.

I know this is a gross over-simplification, but for me tomatoes come in basically two types - the "determinate" ones that never get very tall and therefore don't require support; and the "indeterminate" ones that do grow tall and do require support. I usually grow some of each. This is what I have this year:-

Determinate
Maskotka - cherry-sized fruit, red
Tumbling Junior Yellow - cherry-sized fruit, yellow!

Indeterminate
Ferline - medium-sized fruit, red (this one is the best variety you can get for blight-resistance)
Rainbow Beefsteak - large, up to six different colours (each plant produces fruit of only one colour though!)
Green Zebra - medium-sized fruit, stripey green
Sungella - medium-sized fruit, yellow
Tropical Ruby - smallish, plum-shaped fruit, red

This is how I provide suport for the indeterminate tomato plants.


These are cunning gadgets originally marketed as cane-supports for use with grow-bags, but they also happen to fit quite conveniently in the big plastic tubs I use.


After setting up the cane-support, I fill the tub with compost (some home-made, some commercial) and a handful of pelleted chicken manure. Then I put in the tomato, planting it quite deeply to promote the formation of a strong root system, and secure it to the cane with a few turns of soft garden twine. A good watering, and we're done...


Here is the end result: 8 pots with canes, for the tall varieties, two without (one plant each of Maskotka and Tumbling Junior Yellow).


I also put in two Physalis plants. According to the seed packet, these will only reach a height of 50cm / 20", so I have not provided them with any support.


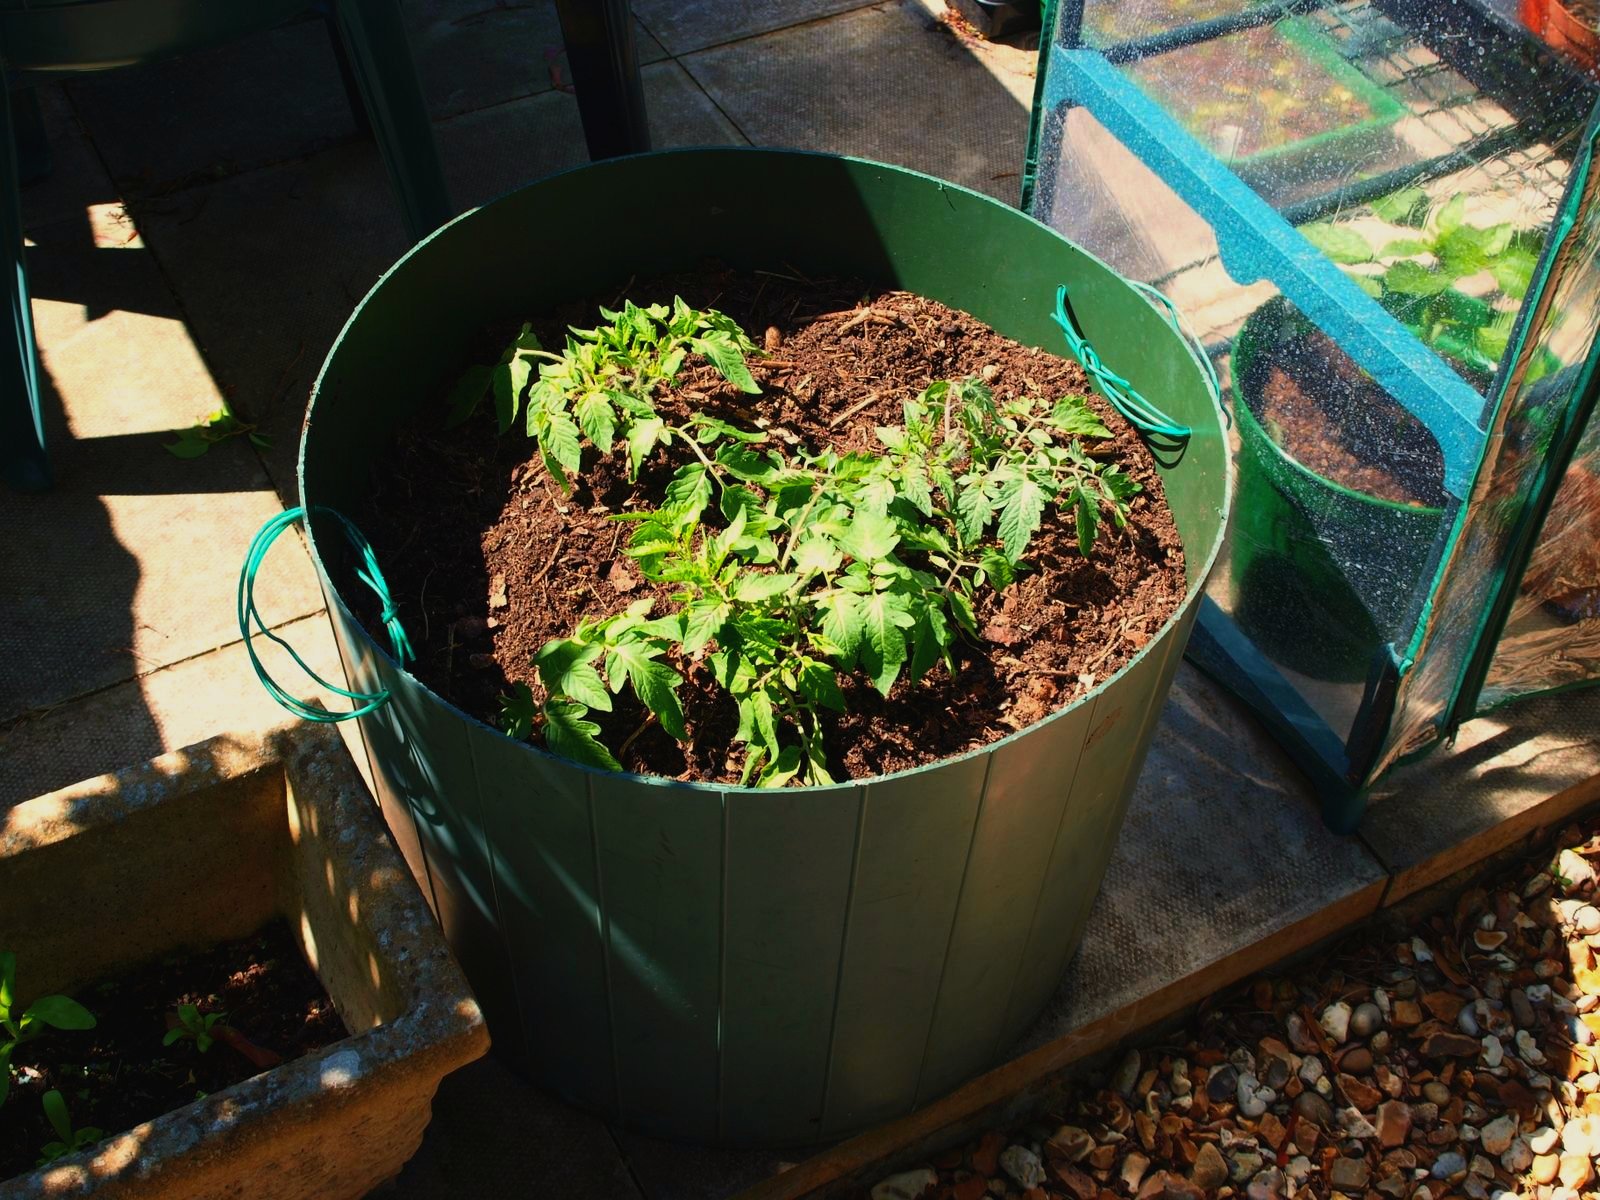
Now this year's "Piece de Resistance" - three more plants in the huge tub I made from half of that old water-butt that Rosemary gave me. This tub is going to live on the patio. In it I have put two plants of Maskotka, and one of Tumbling Junior Yellow.


This massive pot is filled with home-made compost (it would hold about £20-worth of commercial stuff!) and weighs a ton. To help with moving it about whenever necessary, I have fitted it with two handles made of old washing-line cord. Tomato plants are thirsty and dislike erratic watering (this can promote the dreaded Blossom End Rot), so I reckon it is best to put them into really big pots, since these will be less likely to dry out and easier to keep at a constant level of moistness than small ones will be. Tomatoes in small pots may need to be watered twice a day, which can be a very time-consuming commitment.

Phew! I'm glad that job is done. Getting the tomato plants sorted out is a major milestone in my gardening year, and I always feel a bit relieved when I have achieved it. The work doesn't stop there though, because these plants will need much more care and attention before I can reap my reward. They will require side-shooting, tying-in, watering, etc, etc, throughout the Summer. Not that Im complaining - I love growing tomatoes, and I think it's worth all the effort. My biggest worry is the knowledge that outdoor tomatoes are very vulnerable to blight, and once blight comes along there is not much you can do about it, so the effort may all be wasted in the end. I sincerely hope it's NOT.

Wednesday, 4 May 2011

The Beans are in...

My climbing beans have been planted now. I have provided them with a support frame made of 8-foot bamboo canes, held together with plastic clips specially designed for this task (a couple of pounds well spent in my opinion - saves ages of pfaffing about and lots of stretching up aboves one's head trying to tie knots in string!).


According to most experts, I should have planted one bean per cane, but I haven't. I have planted two per cane. This is simply because I am greedy! I have climbing beans of 7 different varieties, and I didn't think that two of each was enough. (You will see that I put up seven pairs of poles). In theory, the bean plants will be much smaller because they will be very crowded, but I'm prepared to take a chance on it. If I look after them (and I will), they will probably be just fine.


The plants themselves are not looking very good, unfortunately. Many of the leaves are ragged, torn and dry at the edges. This is because over the last few days they have had a real battering from the sustained strong winds we have been experiencing. If I had had somewhere where I could have put them under cover, I would have done so, but regrettably there was "no room at the inn"...


I hope they will recover when the wind dies down (if it ever does!), but I have kept all the spare plants just in case I have to replace some casualties.  I think I may also sow a few more seeds, just in case. Remember the Umbrella Principle??

I have resorted to some desperate measures in order to reduce the wind damage. If only I had thought about this earlier... those cloches have been sitting idle down by the back fence for the last 10 days, and I could have put my bean plants underneath them. [And this next photo just confirms the fact that I need a fourth one.]


The bright sunshine is deceptive. It makes things look like Summer, but that wind is a killer! The cloches will not fit OVER the bean plants (because of the poles), but maybe they will divert some of the wind.

For the record, by climbing beans are:-
Runner beans "Aintree" and "Red Rum"
"Mayflower"
"Cherokee Trail of Tears"
"Selma Zebra"
Borlotto "Lingua di Fuoco" (including those extra dark-coloured ones I saved from last year's crop).
"Coco Blanc a Rames" (aka "Lazy Housewife")
French bean "Cobra"

Just in case I forget (and I probably will), the dark-coloured Borlotto beans are at both ends of each row.

I have also got seeds for two different varieties of Dwarf Bean, but I have not sown them yet. Mid- to Late-May sounds like a good time for that...

Tuesday, 3 May 2011

Planting out the Celeriac

Over the weekend I planted out my Celeriac. This vegetable will allegedly not do well if it is exposed to very cold temperatures when it is young, but I reckon that the chances of us getting any more really cold weather this Spring are quite small, and I was keen to get the Celeriac in the ground as soon as possible because it takes a long time to mature.


As regular readers will know, I have grown my plants from seed which was sown indoors on 1st March. Since then I have gradually acclimatised the plants to outdoor conditions, and they have spent the last couple of weeks outside but protected at night time by one of the plastic mini-greenhouses. I felt that they now looked strong enough to fend for themselves.

I have 8 sturdy plants, all looking really healthy, but I only have room to grow 6, so I have done my usual "Selection of the fittest" process, and two have been relegated to the Spares area. I am hoping not to need them, and they may well end up as more donations to the Hospital Fete...


We have had really dry weather for the past few weeks, and the soil in my raised beds is almost like powder! Since I know that Celeriac is an especially thirsty plant I soaked the planting area really well, such that the soil became almost boggy. This will give the plants a good start, but I will be keeping a very careful eye on them to ensure that they are never short of water. Here they are in their final home, next to the lettuces. They are spaced at intervals of approximately 12" / 30cm.


This will be my third year growing Celeriac. The first year I had effectively no crop at all. Last year a couple of my plants produced roots about the size of a tennis ball. This year I am determined to do better! Although I thought I had given my plants enough water last year and the year before, I have read that Celeriac needs "copious" amounts of water if it is to do well, so I will probably be watering them every day during the Summer.

"Why bother growing Celeriac?" you may ask. Well, it's a challenge, isn't it? All gardeners enjoy a challenge. I know I can buy a fully matured Celeriac bulb in the supermarket for about £1 these days, but it's just not the same as having your own home-grown one! It's just a matter of perfecting the technique...
Monday, 2 May 2011

It's only a salad...

It was my turn to cook today. I didn't actually cook much, and what I did cook was done in advance. I decided to do a meal that was basically a collection of salads.


Inspired by Diane of Diane's Texas Garden I experimented with Cedar plank cookery for the first time. I don't eat fish, so I didn't cook any salmon, but I did chicken instead. Since it's April, not July, I cooked it under the electric grill in the kitchen, not in the barbecue in the garden. The basic principle of this is that you heat a (pre-soaked) cedar-wood plank until it is very hot, place it over the coals (or under the grill) and cook your food on it. This imparts to the food a tangy, smoky flavour. To stop the chicken drying out, I covered it with some foil.


My verdict: OK, but not as good as I had hoped. Not as strongly-flavoured. I think maybe I wasn't brave enough! If I had got the cedar wood even hotter the flavour would probably have been stronger. In the Instruction Manual (yes, you CAN get an Instruction Manual for a plank!) it says "When the plank begins to smoke and crackle, it is ready." Next time...

Here are some of the other things I prepared...

Asparagus (home-grown, of course), with boiled egg and lemon-flavoured Hollandaise sauce. This time I cooked the Asparagus in advance, and served it cold. This way you can appreciate the flavour even better. I'm sure that many of my blogging friends would serve this with home-produced eggs, which would be just perfect.


Tomato salad with (home-grown) Red (aka Purple) Basil. I just wish I could have had some home-grown tomatoes. The shop-bought ones are always bland-tasting in comparison.


Mozzarella cheese marinated in Extra Virgin olive oil and (home-grown) fresh Oregano. The milky sweetness of the soft cheese was a lovely foil to the pungent sharpness of the oil.


Home-grown Baby Leaf Salad. A mixture of lettuces, spinach and Oriental Greens. Oil from the marinated Mozzarella acted as a dressing.


Home-grown radishes. Notice that this time we had a few of the "French Breakfast" two-tone red and white ones. They taste pretty much the same as the plain red ones, but are perhaps a tad more decorative.


Some lovely olives - definitely NOT home-grown - but delicious nonetheless. These are of two types: Kalamata ones (stones left in) at the front, and "Black Cherry" (pitted) at the back. The Black Cherry ones had been marinated in something that included orange zest because they were very tangy.


And some home-baked Spelt bread (Jane takes the credit for this, not me...). This is bread as it ought to be: a crisp crust but soft interior, and with a delightfully nutty taste. I didn't photograph this, but you just KNOW that we had lashings of soft salty butter on that bread...


All the above was ably complemented by a bottle of great wine - a Wickham Vineyards Dry White 2009.


This is a wine from a Hampshire vineyard, not more than 40 miles from where we live, and a vineyard moreover that is part of the Wineshare company/club, to which we have a subscription. The vines we rent are in the Cotes de Duras region of South-West France, but the club has several vineyards, this one in Hampshire being the most recent acquisition.

If this elegant, vibrant wine was the Silver medal winner in the 2009 UK Vineyards contest, I wonder how good the Gold medal winner was!

You know what was the only problem with this meal? We would have liked to have eaten it outdoors, sitting in the sunshine in the garden. However this was definitely not an option because it has been incredibly windy the last three days, making being outdoors very unpleasant.

Sunday, 1 May 2011

Who's the Daddy?

Many of you will know that in our family we generally refer to Baby Leaf Salad as "Daddy Salad", because my daughters saw me grow so much of it so often that they thought it characterized me.

Just wanted to show you that I am still living up to this reputation.

This is the normal type - mixed lettuces:


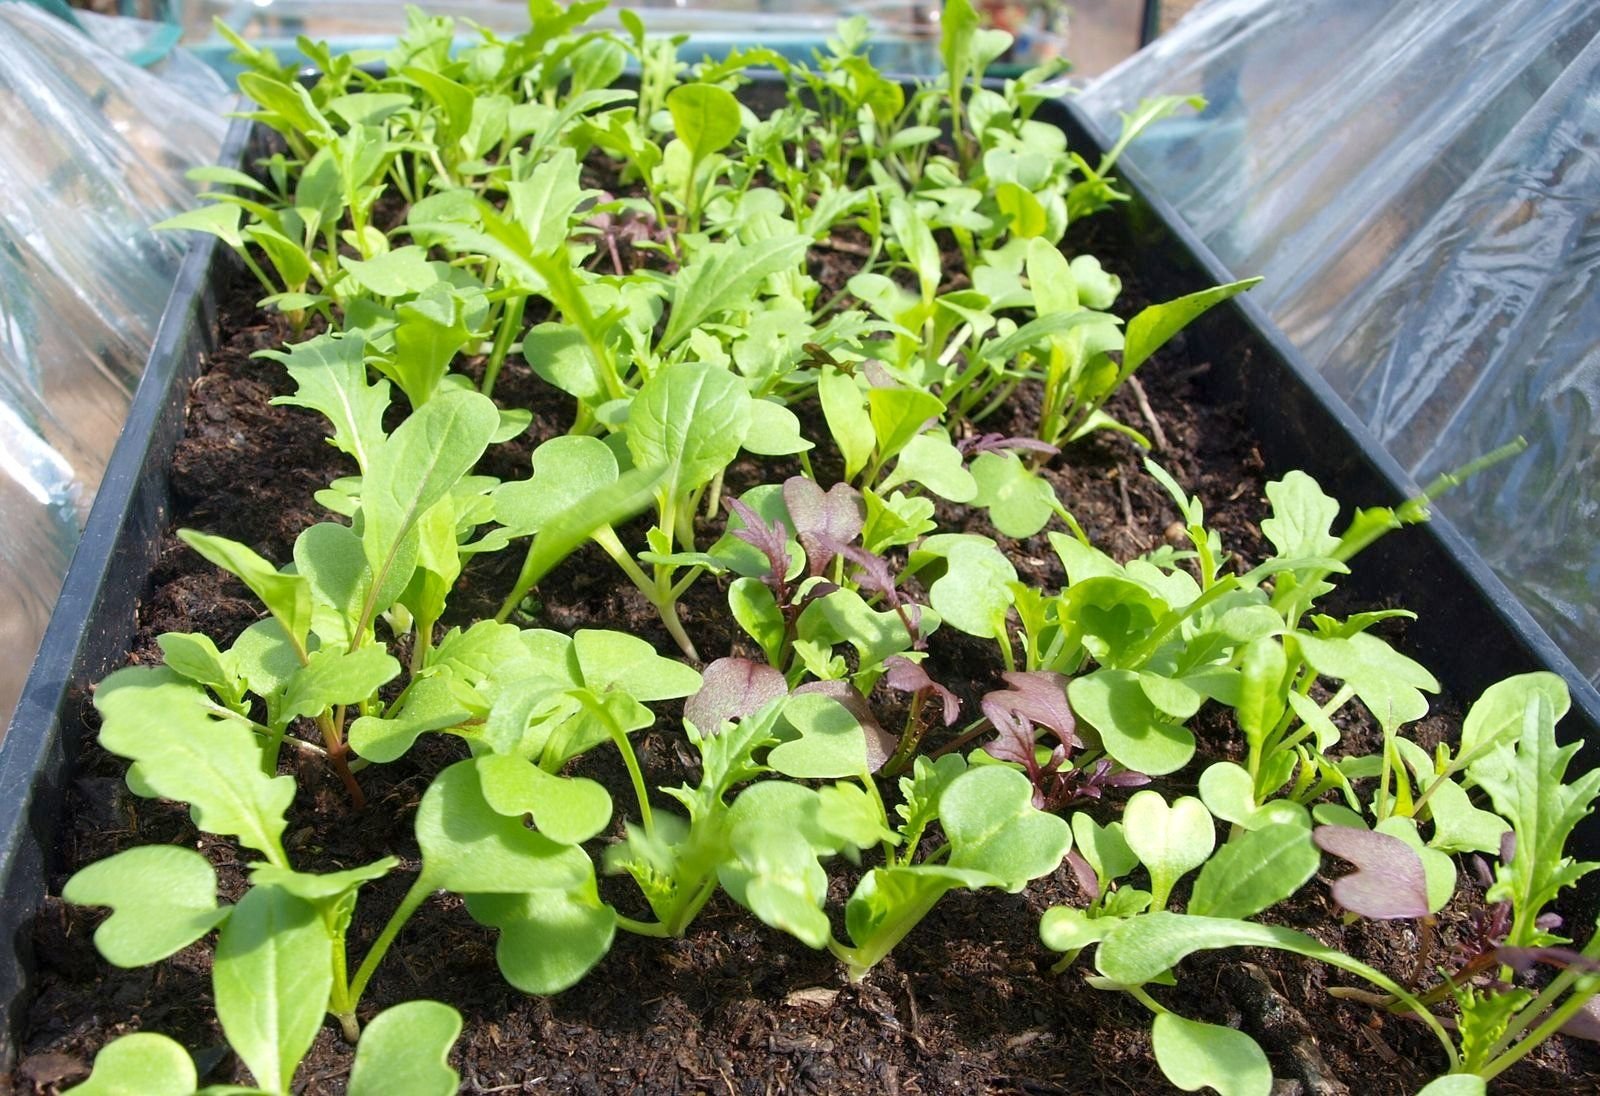
This one is an oriental version:


And this is another:

Komatsuna, Mustard, Bekana

This spinach is still immature, but I have started to harvest just a few leaves. This container has two types in it - "Fiorana F1" and "Mikado F1".

Spinach

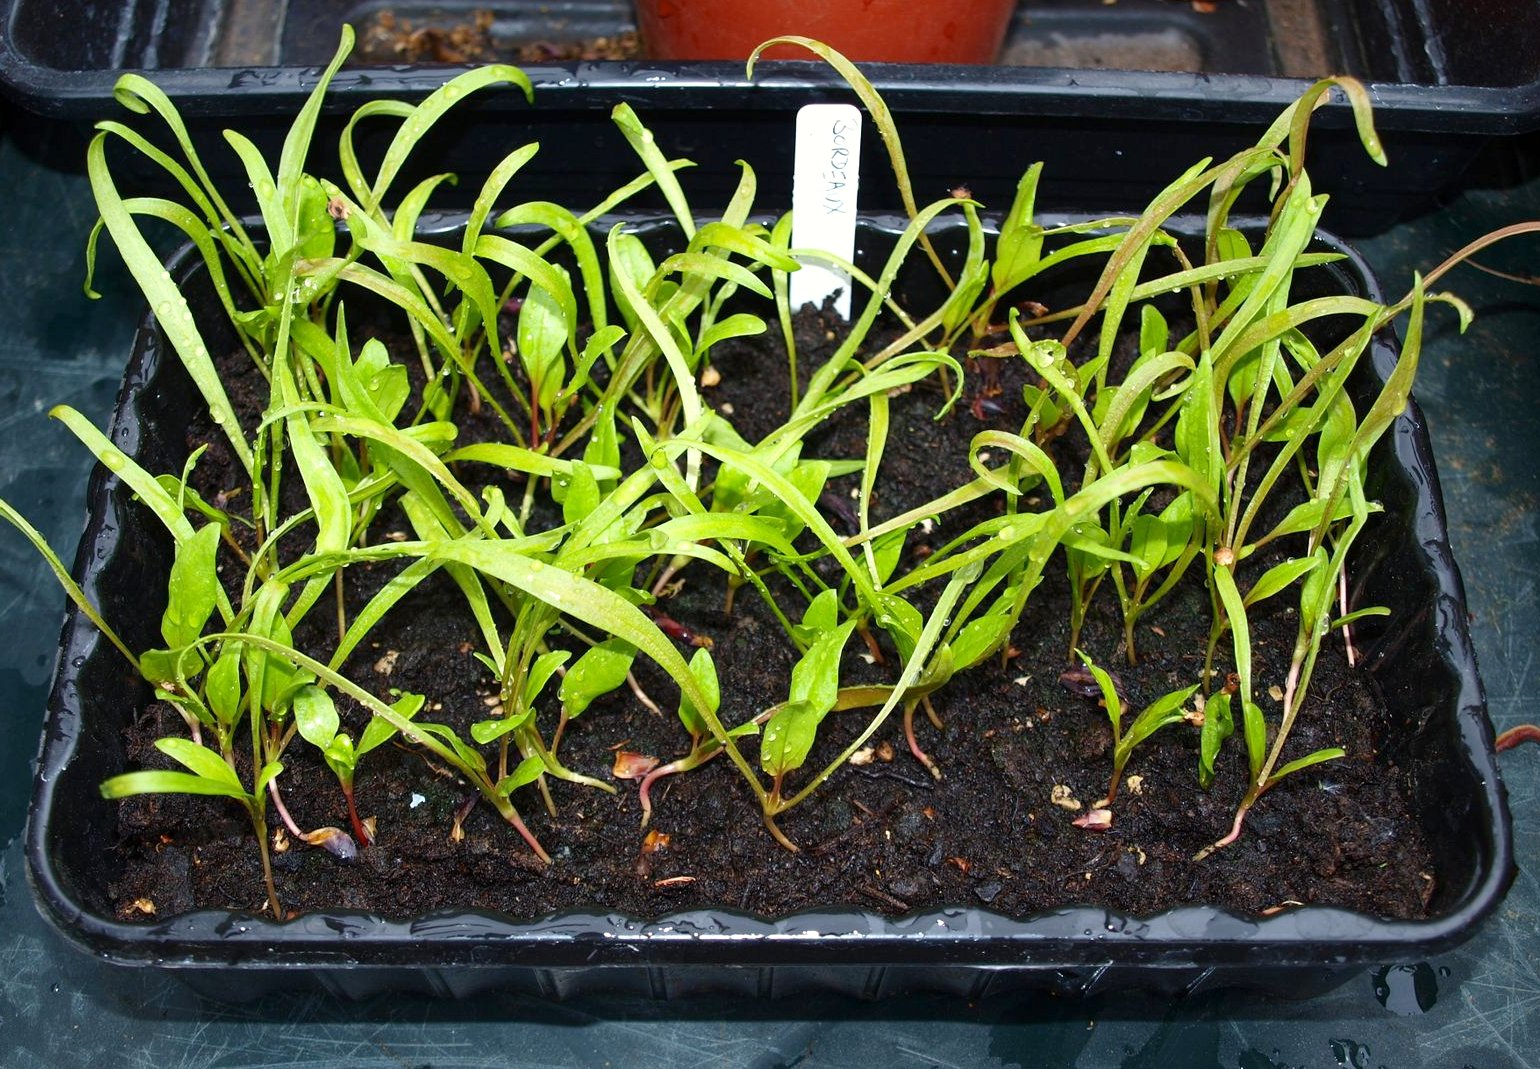
This is a type of Spinach called "Bordeaux", again still immature, but I'm growing it with the intention of using it at the Baby Leaf stage, and not expecting it to reach maturity. This is why I have sown it so densely.


This is my latest fad - Red Basil, harvested very young - almost at the "microgreens" stage. Ready in only about three weeks from sowing. It's lovely - sweet, "clovey", but not overpowering. Try it!

Red Basil

This Red Basil was added as an "enhancer" to some of the Daddy Salad...
Anyone can grow Daddy Salad. You don't need a garden. All you need is a seed-tray or an old washing-up bowl, a small quantity of compost, and a few seeds. You'd be mad not to give it a go...

Finally, a reminder that with Daddy Salad, successional sowing is strongly recommended. The salad grows very quickly, and will not keep for very long, so it is best to sow a new batch every couple of weeks. My last photo shows one tray reaching the end of its life whilst another is just starting.