Pages

Sunday, 25 February 2018

Germination begins...

My house is beginning to fill up with trays and propagators full of seeds and seedlings! I'm trying hard to be sensible and not sow seeds too early, which means that most of the ones I have sown are hardy types like brassicas, alliums and Broad Beans. Although these would probably not germinate yet if sown outdoors they would still be OK if put outside after germination, especially if they were in a coldframe or under cloches.

Onions

I originally set my Broad Beans to germinate in my big coldframe. This was on 28th January.


Nothing happened. It was obviously too cold for them, so I brought them indoors, and within a few days they began to pop up.


I sowed 32 seeds, and so far 28 of them have germinated. Fortunately the place where they are sitting now, next to the French Windows, gets lots of sunlight during the morning, so I think they will be OK there for a few days, until the current extremely cold weather moves on. After that they will go outside, and will hopefully be ready for planting at about the end of March.


A few days ago I sowed three different types of Leek seeds, two of Cabbages and one of Brussels Sprouts. These are in unheated propagators on a windowsill above a radiator.


The first ones (Cabbage "Golden Acre") are just beginning to germinate.


My plan it that once they have come through, I will move them outside to the coldframe so that they are "raised hard" - in other words they will be in cooler conditions but with more natural light, which should make them strong sturdy plants that don't go leggy. When they are big enough they will be transplanted into bigger, possibly individual, pots.

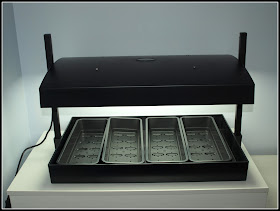
My chillis are also beginning to germinate. So far 4 of my 20 varieties have put in an appearance. They start off in the airing-cupboard, and once they germinate I move them to the Growlight House.


In most of my pots there are 5 chilli seeds, but they don't all germinate at the same time!


My only complete germination failure for a very long time has been the "Ailsa Craig" onions that I sowed on 5th February. Not a single one has come up. The reason is clear though: the seeds were too old. They were given to me by a friend (so therefore I don't know how old they were when I got them), and I must have had them two or three years myself. On Friday I bought some fresh seed and re-sowed, so maybe these ones will do better!

Nothing much is happening outside in my garden, or at my new plot, at present. It's just too cold. It makes sense to leave things as they are for a bit longer, and wait for warmer weather. Time to concentrate on some indoor pastimes maybe - like baking bread. This is the first sourdough loaf I made at home after that course I went on the other day. Seems to have worked out OK...


Friday, 23 February 2018

Potato-growing jargon-buster

This article explains some of the terminology concerned with growing potatoes – such as “First Early”, “Second Early”, etc and provides advice on when to plant as well as sowing-to-harvesting times.

Potatoes "chitting" - See below...

Potato types
Most types of potato fall into one of three main categories related to their harvesting times. No prizes for guessing that a “First Early” type is normally harvested before a “Second Early” type! The term “Maincrop” also gives us a clue that this type is the one with the biggest expected yields.
 
First Early potatoes are the classic “New Potato” types. They are the first to be planted and mature very quickly (typically 10 weeks). Gardeners often vie with one another to produce them as early as possible in the year. This type is often harvested when the tubers are very small, at which stage their flesh will be light and insubstantial and their skins so thin that they can be rubbed off with the fingers. The expected yields are small – maybe 500g per seed-tuber. Examples include "Sharpe's Express", "Rocket" and "Belle de Fontenay".

"Lady Christl" - 1st Early

Second Early potatoes are often (though not necessarily) planted at the same time as the First Earlies, but take longer to mature (typically 13 – 14 weeks). The tubers they produce are usually a bit bigger and firmer than the First Early types, but still tender. A typical yield would be 700 – 800g per seed-tuber. Examples include "Charlotte", "Kestrel" and "Nadine".

"Charlotte" - 2nd Early

Maincrops (sometimes sub-divided into “Early Maincrop” and “Late Maincrop” types) are usually planted later than the early varieties and take longer to grow (typically 20 weeks or more), which means they are harvested in late Summer or early Autumn. Their big advantages are that they produce much heavier and bulkier yields, and the tubers will normally remain in good condition for many months if stored properly. The flesh of Maincrop potatoes is often a lot more substantial and more filling than the other types. Grown in a container, a typical yield would be approx. 1.5 – 2kgs per seed-tuber. Examples include "King Edward", "Desiree" and "Sarpo Mira".

"Maxine" - Early Maincrop

Flesh types
The flesh type of potatoes can differ markedly from variety to variety – some are “waxy” (with close-textured, smooth flesh), and some are “floury” (with flesh that goes soft, crumbles or breaks up when cooked).

When choosing which varieties to grow you should think about how you like potatoes cooked: floury potatoes are good for mashing and for baking to make beautiful fluffy Jacket Potatoes, but they often disintegrate when boiled. A firmer, waxier, variety is best for boiling or for making chips / French fries. When buying your seed potatoes always enquire about this – a reputable supplier should be able to tell you what you need to know.

Once you get past the novice stage, you will probably also want to think about the size, shape and colour of the potatoes you grow. Will they be large, medium or small? Will they be round, or oval or long? Will they be white, yellow, creamy – or even red, black or multi-coloured? Coloured potatoes are quite trendy, but personally I’m not a great fan of them. I find that the colour usually fades on cooking and ends up a dirty, unappetising grey! (There are exceptions of course, such as “Blue Danube”, which retains its colour well).
 
Planting times
The decision on when to plant potatoes depends a lot on your local weather. Potato foliage is very susceptible to frost damage, and because of this it is inadvisable to plant too early unless you can provide some suitable protection. My suburban garden in Fleet, Hampshire, is about 30 miles south of London, and the climate here is relatively mild, but even so our last frost of the year is usually in mid-May.

Each year I plant my potatoes in late March or early April, but with protection as described below. In a city, the temperatures are often higher than out in the suburbs or countryside and you will therefore be able to plant earlier. I’m lucky enough to have some small plastic greenhouses which are each just the right size to accommodate four of the pots in which I grow my potatoes.


If you don’t have anything like that, another option is to cover your plants with a couple of layers of horticultural fleece when frost is forecast. In an emergency you can also achieve (for a short space of time) much the same effect with some pages of newspaper, weighed-down with bricks or something similar.
 
Storage considerations
Neither the First Earlies or Second Earlies keep very well, and are seldom stored for later use. They are too delicious anyway – definitely best eaten within days (preferably hours) of harvest. Maincrops, on the other hand, will keep for months if properly stored. If you plan to store potatoes for a long time, here are a few tips:
  • Dry the potatoes in the open air (preferably in sunshine) for a few hours, until you are able to rub off most of the soil / compost. Drying also fixes (hardens) the skin which helps with avoiding moisture loss.
  • Remove any damaged tubers – eat them or discard them, because they will soon rot
  • Put the good tubers into breathable containers, such as paper or hessian/burlap sacks. Plastic will cause the tubers to sweat and therefore potentially to rot
  • Store the potatoes in lightproof containers, preferably in a dark place. If light reaches them they will turn green and become toxic
  • Store the sacks / containers in a cool but frost-free location, such as a garage or well-insulated shed. If they get too warm, the potatoes will quickly begin to sprout
  • Check the stored tubers frequently (maybe once a month?) to see that they are OK.
  • Discard any that show signs of rotting.
  • Do what you can to protect your potatoes from rodent damage 

Potatoes being stored in a hessian bag


Other potato-related terminology
  • Haulm - an old-fashioned English word meaning the foliage of the potato plant.
  • Chit - a young shoot or sprout on a seed potato, from which the leaves will in due course grow. Sometimes used as a verb – “To chit” means to allow the seed tubers to produce shoots.
  • Tuber - the part of the plant that you eat. The part that people call “the potato”. It grows underground, on the roots of the plant.
  • Seed tuber - a tuber that has been saved after harvesting, and which when planted will produce another plant – so the equivalent of a seed.
  • Earthing-up also Hilling (USA) - progressively covering with soil the emerging shoots of a potato plant as it grows, causing the underground tuber-bearing part of the plant to be taller. Also prevents light reaching the developing tubers and making them turn green (and therefore poisonous).
  • Salad potato - normally a First or Second Early type, often with waxy flesh, grown for using cooked and cooled, in a salad.
  • Blight - normally refers to Late Blight - a disease of solanaceous plants (such as the potato and tomato) that is caused by a fungus (Phytophthora infestans) and is characterized by decay of stems, leaves, and in the potato also of tubers. The most common and most deadly disease affecting potatoes. There is no known cure, and once the disease strikes it is best to cut off and burn the plant’s foliage. The underground tubers will probably be OK if you act promptly! Some potato varieties have a certain resistance to Blight, especially those developed by the Sarvari trust, whose potatoes are mostly given names including the word “Sarpo” – e.g. “Sarpo Mira”, “Sarpo Axona” etc.
  • Scab – a common disease of potatoes, leaving the tubers covered in unsightly but harmless brown lesions or scabs. The incidence of Scab can be decreased by including plentiful organic matter in the growing-medium.

Wednesday, 21 February 2018

Planting shallots

Last October, when I first visited my new plot at Courtmoor Avenue, the garden was full of over-mature vegetables, rapidly rotting in the Autumn rain. If this had been any other garden I would have put those veggies straight onto the compost heap. However, I was aware that the owners of the plot had been cultivating that garden for many years (decades) and had been in the habit of saving their own seeds year-on-year, so I decided that I would do what I could to keep that tradition going.

Amongst the neglected veggies were a couple of rows of shallots, most of which were soft and unuseable. Nevertheless I selected a few of the most promising ones and put them on a wire rack in my garage to dry, with a view to planting them this Spring. Some of them went soft before they were dry so they had to be discarded, but enough are left to enable me to have a go at maintaining the succession.


A few of the shallots are starting to sprout, so they are definitely alive. It's a bit too early to plant shallots outside still, (I'd normally recommend leaving it until late March), but I knew these ones needed to "get their feet in some soil" soon, so I decided to put them in some compost-filled modules and start them off indoors.

I discarded some that seemed soft, but I was still left with a decent number of fairly good ones. I planted up three trays of 15, so 45 in total.


I don't expect them all to grow. I would be happy with 15, to be honest.


This is the "approved" way to plant shallots - deep enough to cover their shoulders, but with the top of the stems well above soil level:


After planting the shallots, I watered them in, and put the trays on my potting bench in the garage, which gets a reasonable amount of light. Here they will be protected from frost, and will hopefully spring into life before very long. When I see this happening I will move the trays out to one of my coldframes, where the shallots will start to acclimatise gradually to outdoor conditions. If shallots are planted out without protection while the weather is still very cold they are prone to bolting.

In a few weeks time I'll be planting some potatoes rescued in similar fashion, and then later on some French and Runner Beans. I wouldn't be surprised to see some other things appear spontaneously too. It's often more difficult than you might think to completely eradicate a plant!

Monday, 19 February 2018

Sowing chilli seeds

I'm sure most of my regular readers know by now that I usually delay sowing my chillis until after Valentine's Day. My view is that if they are sown any earlier than this they are likely to struggle, and may become leggy due to lack of light and warmth. Anyway, for better of for worse, I sowed mine this past weekend.

Whilst shopping in our local Morrissons supermarket on Saturday I noticed these little 3" / 76mm pots for sale:


At only 75p for a pack of 10, I thought they were a bargain, and just right for starting off my chillis in.

I'm going to use the same procedure that I normally use. I sowed several (in most cases 5) seeds in each of those pots, which I have filled with moist John Innes No.1 compost (a specialist seed compost). The pots are then labelled, placed in seed trays encased in large plastic bags and put into the airing-cupboard until the seeds germinate. I'm prepared for the fact that each type of chilli will germinate at a different rate. After the first couple of days I'll check at least twice a day, and as each one germinates I'll move the pot into my Growlight House, which provides a good level of light, though almost no additional heat.

Garland "Growlight House"

Since my collection of chilli seeds continues to expand, thanks mainly to swaps and gifts from friends, the most difficult part of the process these days is deciding which types to grow. This year I have chosen the following varieties: (some of these are nicknames, of course)

Aji Limon, Aji Limo, Cayenne, Golden Cayenne, Chocolate Cayenne
Tenerife, Piri Piri, Fish, Panama 3, Panama 6
Cozumel Fat, Turkey Short Thin Red, Turkey Long Red, Nepali, Whippet's Tail
Scotch Bonnet, Bellaforma, Greek Chilli, Hungarian Hot Wax, Hungarian Goulash.

My thanks to the friends who gave me many of the above.

Most of the pots have 5 seeds in them. There were a couple for which I didn't have 5 seeds, but as long as I get a decent germination rate I should end up with plenty of plants. In theory, I will only keep one or perhaps two of each variety, even if they all germinate. However, I always find it hard to throw away perfectly viable seedlings, so you never know...

Since I was in a sowing mood, I also sowed a couple of pots of peas, for growing indoors to make peashoots as a salad ingredient. One lot of "Douce Provence" and one lot of "Early Onward" (just because this is what I had.)


Saturday, 17 February 2018

Sourdough workshop

A couple of months ago, Jane and I attended a pasta-making course, and it proved to be a huge success. In view of this, our expectations were high yesterday when we attended a Sourdough Workshop at Bread Ahead at Borough Market, London. Cutting a long story short, we were not disappointed!


Our attendance on this course confirmed our opinion that here is no substitute for real hands-on participation, facilitated by a good instructor with a depth of experience. Our instructor was Manuel - not, as you might think, Spanish, but French - a baker with 26 years of experience, a calm, relaxed and friendly manner, and a very evident passion for baking bread. Under his direction we all (10 students, ranging from complete novices to competent home bakers) produced four completely different breads, and a pizza for our lunch too.

Those free shower-caps you get in hotel rooms are useful bits of kit!

We "began at the beginning", as they say, with Manuel telling us a bit about the history, principles and basic concepts of sourdough bread, before going on to begin our own Starters. Making a sourdough Starter is incredibly easy (50g Rye flour and 50g water added every day for six days), but it is certainly the "magic ingredient". We of course used some Starter that had been prepared earlier - taken from the bakery downstairs in fact. At the appropriate moments we also learned about "Poolish", pre-ferments and "Hard Starters". Significantly, none of the starters were remotely like the ones I have been using, which probably explains why my results to-date have not been stellar! Perhaps the biggest eye-opener though was the method of kneading that Manuel taught us - really energetic and rough (plus very messy). We certainly learned very quickly what a useful tool a small flexible plastic scraper is!

Plastic scraper

From start to finish we were very impressed with how well organised our class was: Manuel had the assistance of one lady (Fran) who dished out the ingredients and equipment as required and coped with the washing-up, whilst he himself demonstrated, explained and helped the students where necessary. In his unhurried yet energetic style he inspected, adjusted, finished-off and occasionally rectified everyone's efforts, so that everyone ended up with competent, and in some cases outstanding bread.

Borodinsky Rye loaves proving

Baking with sourdough requires lots of pauses for dough to rise or rest or prove, so parts of one recipe were "interleaved" with parts of others to avoid long periods of inactivity. I have to say that except for during the official breaks the pace was fast. There was a lot to do, so never a dull moment. As an ex-instructor myself, I was very aware how nice it was to have a group of people who were all so keen to learn. In my work I often had students who really did NOT want to be there! Our group yesterday was good - everyone got on well together and helped each other to learn.

The breads we made were:
A classic White Levain
A French-style Baguette
A no-knead white loaf with raisins and Fennel seeds
A "Borodinsky" Russian-style Rye loaf flavoured with molasses, Coriander seed and Caraway seed
And of course, our lunchtime pizza. [NB: probably the best pizza I have ever eaten!]

White Levain in the centre foreground

No-knead white with raisins and Fennel

Baguettes

Naturally we got to bring home the bread we made, (paper bags and carriers provided) so between us Jane and I had 8 loaves. Some of it has had to go into the freezer, which will probably reduce its attractiveness a bit, but we just can't eat it all at once. I always want to eat bread like this as soon as possible. I'm usually standing over it as it cools, with my hand poised on the butter-knife, waiting for it to be the right temperature for us to start eating it.

In addition to the bread, we also brought home our Starters, which now have to be fed daily for the next five days before being ready to use. Bread Ahead thoughtfully provided each student with a bag containing just the amount of Rye flour they need to complete their Starter, so that they didn't have to rush out to the shops straight away to buy some. Little things like that make a big difference to people's perception of a course, and don't cost a huge amount of money. At this point I should perhaps mention that a place on this course normally costs £160, but we had ours for free since Jane won them as a prize in a competition. (I'm hoping she'll win a butchery course next!). Thankfully, we also received a booklet with all the details of what we had covered, and the recipes. Without this I think I would struggle to remember everything, because there was a lot to take in.

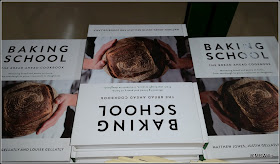
Jane and I both read this initially as "Instruction Manual"!

This course was great fun and massively inspirational. I would recommend it to anyone. I'm just dying to get stuck in and make another loaf now!

Wednesday, 14 February 2018

Irrigation device brings Chilli success

Each year for the past several years I have tried to keep some of my chilli plants throughout the Winter, so that I can get an earlier harvest, compared to plants grown from seeds. I have had varying degrees of success with this. Most often the casualty rate is high - more than 50% is normal. This year, the survival rate has been much better. I kept 8 plants and so far I have lost only one. The thing that has made the difference is this:


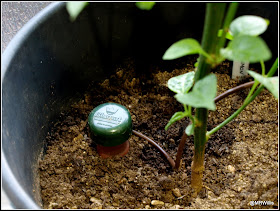
This is a self-watering kit - well, actually two kits, each with three devices. Each of the devices has a porous hollow ceramic cone with a plastic tube attached. The cone is filled with water and pushed into the soil near the roots of a plant, like this:


The tube (about three feet long), connects to a suitable water reservoir:


Capillary action ensures that the plant sucks up just the right amount of water - not too much and not too little. All you have to do is top up the water in the reservoir every now and then. It seems to work well, because most of my plants are still looking pretty strong, with lots of leaf. These two reside in our (seldom used) 'Family Bathroom'.

Aji Limon (L) and Aji Benito (R)

Having six of the devices, I naturally used them on six of the plants I wanted to keep. Five of them are fine, but one died very suddenly - I mean almost literally overnight. I still don't know why. I left the casualty for a while, in the hope that it might revive, but sadly it didn't, and I had to admit I had lost it.

Two other plants had got off to a less comfortable start - one on an indoor windowsill, and one on a garage windowsill. The garage is unheated, but within the shell of our house, so frost-free. To both of these plants I applied my usual watering regime. Neither has done well. Both have slowly but steadily died back from the tips of the branches, only the lowest of which now remain green.


When the casualty mentioned above was removed, I transferred its irrigation device to the plant which had been in the garage, and moved it to join the others in our spare bedroom.


The newcomer is seen second from the Left in the photo above. A closer look reveals that it is definitely still alive, with a couple of new leaves on it.


Hopefully it will pull through!

My feeling right now is "Why didn't I try these self-watering devices sooner?" The results so far are definitely very encouraging.

Sunday, 11 February 2018

Winter fungi

Many readers will know by now that I am very interested in fungi. I'm not, and never expect to be, a great expert on this subject. For me it is just a hobby, but a fascinating one.

A tree-stump with at least 5 different types of fungus

Until I started taking a serious interest in fungi, I thought of them as things you only found in the Summer and Autumn, and I didn't believe that they would be in evidence during the Winter. I now know that that is not true. There are fungi to be seen all year round - just different ones at different times. Having been studying fungi for about two years now, I'm beginning to know what is in season. As one of the members of the "Mushroom Spotters UK" Facebook Group, to which I belong, recently said "Winter is the season of brackets, crusts and blobs!". I'll demonstrate...

A bracket fungus is one that grows out horizontally from its host, like a shelf. It normally doesn't have any significant stem (aka "stipe"). This is an example:

Ganoderma sp.

Where I live, in NE Hampshire, Birch trees abound, and one of the most commonly-seen bracket fungi is the Birch Polypore - Fomitopsis betulina - also known as the Razor-strop fungus because apparently they were used in the old days for sharpening razor blades!

Fomitopsis betulina

The Birch Mazegill - Lenzites betulinus - is also very common.

Lenzites betulina

Their colours vary a lot. This one is the same species.

Lenzites betulinus

The undersides have a very distinctive maze-like pattern of spore-bearing slots. Hence the name "Mazegill".

Lenzites betulinus

The Blushing Bracket - Daedaleopsis confragosa - is a lover of Willow and Poplar trees which often grow in wet, boggy soil - again quite common around here! This fungus gets its name from the fact that it starts off life being a sort of off-white colour and as it ages it gradually goes a deep red, as seen in the next two photos.

Young Daedaleopsis confragosa

Mature Daedaleopsis confragosa

OK, now for some crust fungi. As the name suggests, this type normally grows along the surface of its host rather than jutting out from it like the brackets. Having said that, crust fungi do often curl up at the edges to make sort of cup-shapes. I have been unable to find a positive ID for this one, but it is a classic example of the "Curtain Crust" type:


Perhaps the most common crust fungus in my area is the Hairy Curtain Crust - Stereum hirsutum - aptly named because it has hairs on its upper surfaces. You can just about see some here:

Stereum hirsutum

Often seen on rotting fallen branches of deciduous trees is the fungus called Stereum rameale (it doesn't appear to have a common name). Superficially similar to the Stereum hirsutum, this one lacks the hairs.

Stereum rameale

Other types of crust fungi lie very close to their host substrate, often lurking on the underside of a fallen branch, where they are not immediately visible. This one is Basidioradulum radula - the Toothed Crust. It has a multitude of little spines.

Basidioradulum radula

Of course, fungi come in all shapes and sizes, so let me just show you this lovely purple-coloured specimen. I'm not sure of its identity, but it may possibly be (or be related to) Chondrostereum purpureum - Silverleaf Fungus.


Finally, let's see some blobs. (No, that's not an official term). Many of these are different types of jelly fungus.

By far the most common round here is Tremella mesenterica - Yellow Brain Fungus.

Tremella mesenterica

The Purple Jellydisc, though diminutive in size, is also very prolific.

Ascocoryne sarcoides

There is another closely related one called Ascocoryne cylichnium:

Ascocoryne cylichnium

During January, I saw lots of the black Exidia types, like this Exidia plana.

Exidia plana

You can't get much more blob-like than this, which I think is Exidia nucleata aka Myxarium nucleatum  - Crystal Brain Fungus.


I could go for ages like this, but I'm going to end my post today with photos of three edible fungi very much in the news on all the fungi-foraging websites during Winter. The first is Flammulina velutipes - Velvet Shank.

Flammulina velutipes - showing upper surface

This very good-looking mushroom is named after the velvety texture of its stems:

Flammulina velutipes - showing the velvety stem

Now we have Pleurotus ostreatus - the Oyster Mushroom, named after its alleged resemblance to the similarly-named bivalve marine mollusc.

Pleurotus ostreatus

Finally, one which I was really pleased to find for the first time just a few days ago, the Scarlet Elf Cup - Sarcoscypha austriaca. Opinions vary concerning its edibility. Everyone seems to agree that it's not poisonous, but few people think it tastes nice. We have to agree that it looks stunning though. Imagine these in a salad...

Sarcoscypha austriaca

I hope you have enjoyed my little fungus-foray today. Hopefully I have convinced you that there are plenty of fungi to see even in the depths of Winter. I intend to post more about my finds in the not too distant future.