Pages

Sunday, 31 October 2010

Autumn fare

How's this for the archetypical English meal, perfect for a wet, gloomy Sunday evening in October on the day the clocks went back (coincidentally, Halloween):

Game casserole (a mix of pheasant, partridge and venison), including onions, mushrooms, carrots, thyme and bayleaf, cooked in a low oven for about three and a half hours
Celeriac mash (60% potato, 40% Celeriac)
Brussels sprouts
Parsnips (home-grown)

Add 1 bottle of Good Ordinary Claret (courtesy of Waitrose)

Add 1 box of Terry's "Orange Chocolate Sensations" (Afterwards, of course)

Sounds OK?

By the way, no Trick or Treaters made it to our house today -- was it because the wet weather 'dampened their spirits' or what? So, I suppose we have to eat all those fun-size chocolate bars ourselves then...

And just because I don't have any appropriate photos of the above, here's a picture of Fiona's cat Voltaire!

Voltaire obviously has sophisticated tastes when it comes to reading material...

Pickled Red Cabbage

At this time of year, many gardeners in the UK will have Red Cabbages ready for harvesting. This type of cabbage, whilst being nice enough, is less "flexible" in the kitchen than the green or white types. One way of eating it that is popular in the UK is braised (slow cooked in the oven, often with some apples or raisins added to sweeten it). This is traditionally served as an accompaniment to the well-known dish Lancashire Hotpot (slow-cooked lamb with onions, potatoes etc). However, Jane has given me a really easy recipe for pickled Red Cabbage, which will enable you to keep on enjoying this vegetable for many weeks after harvesting it.

Pickled Red Cabbage


Easy Pickled Red Cabbage

Pickled red cabbage is very easy to make, especially if you keep some ready-spiced pickling vinegar, such as Sarsons, in stock. A whole red cabbage will make 4 - 6 jars of pickle, but this recipe is so easy that if you have spiced vinegar to-hand it is worth using even a small (perhaps left-over) piece of cabbage to make a single jar.


If you don't have any pickling vinegar  in stock, you need to prepare some. This is how you do it:-  put a bottle of malt vinegar in a pan with either a sachet of pickling spice or a muslin bag (or J-cloth tied with string) containing your preferred combination of dried chillies, peppercorns, bay leaves, cloves, coriander seeds, sliced dry ginger, a cinnamon stick and mustard seeds. Heat until just boiling, remove from the heat and leave until completely cold and remove the bag of spices.  The vinegar is then best left to infuse overnight, while the cabbage is salting.

Prepare the cabbage by shredding it as finely as you can - a food processor or mandoline is ideal - (but if you use a mandoline PLEASE use a finger guard!). Put it into a large non-metallic bowl, layering it with lots of salt - at least 100g for a whole cabbage - and mix together so that all  the shreds are coated in salt. Cover tightly with clingfilm and leave it to stand overnight.

Next day, rinse off all the salt - filling the bowl with water and draining a few times will dissolve it - then drain in a non-metallic sieve, pressing well to remove all the water. The cabbage will at this stage be a very unappetising colour of blue.

Pack the cabbage as tightly as you can into cold, sterilised jars, then pour in the vinegar to completely cover  the cabbage, turning the jars and prodding (a wooden satay stick is ideal) to remove air bubbles so that the vinegar reaches every bit of cabbage. The colour will immediately begin to turn back to red.

Check that the insides of the jar lids have a plastic coating rather than metal (which can corrode if it comes into contact with vinegar) - if they don't, put a layer of clingfilm over the top before putting the lid on. Seal tightly.

Most pickles need time to mature but you can start eating red cabbage after only a week and it is best within a couple of months of being made. It will keep much longer than that if it has to, but starts to go soggy and will not be at its best.

Serve with cold meats and cheese... or with pork pies... or with pasties... or meat-and-potato pies... or...

Here are some more photos...


Even if Red Cabbage was not nice to eat, you'd grow it for its ornamental value wouldn't you? Do you think each one is unique, like the finger-print???

Saturday, 30 October 2010

Celeriac

This is the story of the smallest Celeriac in the world...probably


Not handsome by any standard!

Fact: we love Celeriac. Ergo: I had to try to grow some. Actually, it is much more readily available here in the UK than it used to be, though still not reliably available when you want it. I suppose that if I were honest with myself I would conclude that it's not really worth growing it myself, because you can buy a decent-sized Celeriac bulb in the shops for about £1.25 or £1.50 at the right time of year. BUT, I wanted to grow some, just for the love of it, the challenge.

I have described growing Celeriac in one of my earlier blogposts (17 August 2010), so I'm not going to say much about it here. I just want to tell you about the results. This is only the second year I have grown Celeriac. The first time it was more or less a complete failure. There was plenty of foliage, but the bulbs didn't swell. I put this down to overcrowding, and this year I grew fewer, but at wider spacings. They have performed a bit better, but the size of the bulbs is still disappointingly small. In retrospect I have realised that the plants were in the same bed as the previous year, and it could be that the soil in that one doesn't suit them. It is actually my most recent raised bed, and contains mostly imported topsoil. The older beds have had the benefit of several years of my home-made compost, so if I try Celeriac again I shall grow it in a different bed.

Moments before harvesting

Harvested. What a mass of tangled roots...

The next picture shows the bulb after being trimmed. Not exactly huge... the coin in the picture is a 50p.

Trimmed

We decided to use the Celeriac in a "remoulade" -- it's a bit like coleslaw, made with celeriac, carrot, mayonnaise, mustard and lemon juice. The recipe is actually one of Hugh Fearnley-Whittingstall's. It appears in his book called "River Cottage Everyday". He calls it "Two Root Slaw". Peeling the Celeriac was no mean feat -- since it's so knobbly you have to take a lot of care (and this one of mine was so small I didn't want to waste any of it!)

Peeled

Grated...

Combined with the other ingredients... Finished

I'm not normally a fan of coleslaw-type stuff, but this Celeriac remoulade is "to die for" as they say! Ours went really well with cold boiled eggs and some French-style sausage.

White Rose

Just wanted to show you a picture of what will probably be the last flower on my white Rose bush for a few months...

Simple beauty!

Friday, 29 October 2010

Endive blanching - the result

On 11 October I described my method of blanching Endives to make them less bitter. Remember this?

Endive blanching - the start

Well, yesterday (28 October) I harvested the two Endives in that picture. The one under the bucket was not very good: several of the outer leaves had gone brown and slimy (probably got too cold during the frosty nights last week, since they would have been in contact with the plastic). I was able to rescue the heart of the Endive though, so all was not lost. The one tied with string was much more successful; in fact it was exactly what I had been hoping for. This is what it looked like when I untied the string:

The end result

Here they are both together, on the kitchen worktop, awaiting preparation. (The best one is on the right of the photo). They are destined to be used as part of a French-inspired meal featuring Gratin Dauphinoise, Celeriac Remoulade, Salade aux Lardons and Saucission Sec...(and probably a bottle of "our own" Cotes De Duras wine).


By the way, this fine loaf (home-made by Jane) made with Spelt flour is also going to feature in the meal mentioned above, perhaps with the addition of some nice unsalted butter...

Spelt loaf

The broad-leaved Batavian Endives are also looking good.

Broad-leaved Endive

They could be harvested now if necessary. I have not used any artificial methods for blanching them, since the hearts tend to go quite pale of their own accord.

Thursday, 28 October 2010

"Variations on a bean" -- by Borlotti

The title sounds like a piece of Italian Baroque music, eh?

Today I shelled the remainder of my beans, which had been drying in the airing-cupboard for the last couple of weeks. I was amazed at the wide variations in colour amongst the beans, even the Borlotti, which were all from plants of the same variety (Lingua di Fuoco).

Colour variations amongst the Borlotti

A few of the beans I had saved were not Borlotti. To be honest, these were ones that I had missed earlier in the season, and which had therefore gone past the stage where they could be used for their pods. There were some each of the Runner Bean varieties "Aintree" and "St. George", and one or two climbing French Beans "Cobra". The two types of Runners produced very different colour beans. The "Cobra" beans are the small black ones in my pictures.

These are the Runners, and the "Cobra"

These are all Borlotti

Just for curiosity I weighed the beans: there were very nearly 400g of Borlotti and about 80g of the mixed Runners and French. Hardly a massive harvest, but it was interesting growing them, Here's the whole collection on display...

The whole collection

So what am I going to do with them? I'll keep them for a month or two and then probably cook them up in something "Mexican" - I love the combination of beans and chilli (especially chipotle). I am going to set aside the five very dark-coloured beans (see first photo) and sow them next year, to see if I can get more of this very attractive colour.

"In storage"

Wednesday, 27 October 2010

Dividing Ferns

I have a potted fern in my garden that I have grown from a volunteer seedling that just appeared one day a few years ago -- presumably brought in as a seed by the birds. I have had it growing in a blue/grey glazed pot in which it looks quite nice (in the Summer time that is, when the foliage is fresh and green). This year I have had it arranged in amongst my herbs and lavender at a corner of my patio, adding a bit of different texture to the arrangement. Right now though it looks unsurprisingly "tired".


The fern had developed into two distinct parts, so I recently decided to divide it and re-pot both parts separately. Dividing a plant like this is desirable for two reasons: firstly it allows you to double your stock, for free; and secondly it allows you to ensure that the original plant doesn't get too overcrowded in its pot. I'm no great expert on ferns, but I have made the assumption that a good time to do this task is at a point when the plant is beginning to enter a period of dormancy, and before conditions get too cold.


You can see that this is effectively two plants

So, I eased the plant out of the pot (well, actually "wrestled" would be more accurate), at which point it looked like this:

The rootball was very densely matted

I then divided it carefully down the middle with an old kitchen knife that I use as a gardening implement. I tried using a spade, but this didn't work -- the fern's rootball was too springy, and the spade just bounced off! After the division, I trimmed off about half of the roots of each piece.

The plant now divided into two

After this it was just a matter of re-potting the two bits. I put the smaller one back into the original pot, and found a larger terracotta one for the bigger plant, so that it has some room to expand. I trimmed off most of the fronds to reduce the opportunities for slugs and suchlike to overwinter amongst any decaying vegetation.

The plants re-potted

 I'm going to keep both plants under the cover of one of my mini greenhouses over the Winter, to give them some extra help with recovering from their "Op".


Winter quarters


By the way, are there any fern experts out there who can conclusively identify this type of fern for me?

Tuesday, 26 October 2010

Son-of-Wilma wins the race

Regular followers of my blog may remember that 'Son-of-Wilma' is a tomato plant of the very compact variety 'Wilma' that I have grown from a volunteer seedling rescued from its self-seeded location amongst my parsnips and carrots. I potted it up and grew it on outdoors for a while, but since it started its life well behind normal tomato-growing schedule, I soon had to protect it with one of my plastic mini greenhouses and then a couple of weeks ago I brought it indoors and it now resides on the Dining-Room windowsill. The additional warmth has allowed Son-of-Wilma to bring some fruit to maturity.

Son-of-Wilma's fruit are ripe!

The fruits are not very pretty - many of them showing signs of slug damage from their time outdoors - and the foliage is also rather unsightly now - mostly yellow rather than green, probably because I have not been feeding the plant (to be honest, I had used up all my tomato food, and didn't think it worth buying another bottle at this late stage of the year). But who cares what colour the leaves are? The important point is that I have got ripe tomato fruits in late October, which is pretty unusual for me. Son-of-Wilma won the race against time and produced ripe fruit before it was too late!

Monday, 25 October 2010

Celery Leaf Miner

Some of my parsnips have been attacked by the Celery Leaf Miner. This is not unusual. In fact I'm surprised it hasn't happened earlier.

The Leaf Miner is a type of insect that burrows into the leaves of plants like celery and parsnips, feeding between the upper and lower leaf surfaces, thus letting in air and leaving characteristic wiggly whitish / silvery trails. The damage caused is usually not fatal, but it looks unsightly.


Leaf Miner damage


I usually only remove any leaves that are badly affected, and then mainly for cosmetic reasons, and I'm not unduly worried by this pest. It doesn't attack the roots of the plants, so they are usually able to survive.


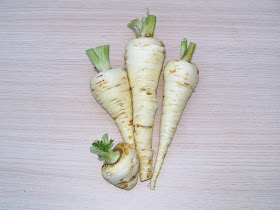
Here's some proof that my parsnips are still OK. Harvested these today. Three nice ones, and one in the "could do better" category...


Sunday, 24 October 2010

My own Fungus Foray

My intention of participating in the Hampshire and Isle of Wight Nature Society's Fungus Foray earlier in the month was thwarted by adverse weather conditions, but today I carried out my own foray. I went for a walk on nearby Velmead Common, an area of mixed heathland and woods, which is open for public access.


Sunlight streaming through the trees on Velmead Common

This is a view of one of the more open areas


Heathland on Velmead Common

The vegetation on the Common is kept in check by a small herd of rare breed cattle (not sure which breed -- could it be the Hampshire Black do you think??)


One of the Velmead Common cows

The Common is an ideal place to look for fungi. It has a wide variety of habitats -- some of them in full sunlight, some of them in shade. And October is the best time of the year to find fungi, because they seem to thrive in the damp but still relatively mild conditions. So, I had a walk round the Common to see what I could find. There were LOADS of different types. In fact I had to come home before I really wanted to, because the memory card in my camera was full! I offer you then just a selection of my best photos...

 I have practically no expertise in fungus-recognition, so I am not going to caption most of the following pictures, though I have been having a browse through the River Cottage Handbook No.1 - Mushrooms, by John Wright.  Maybe some of you will be able to enlighten me as to which varieties I saw.


This one is definitely Sparassis Crispa - the Cauliflower fungus


Coriolus Versicolor - Many-zoned Polypore


Piptoporus Betulinus - Birch Polypore


I reckon this one is a Boletus (or Cep) of some sort

Jane says this one must be the "Meringue" fungus...


Just for good measure (nothing whatsoever to do with fungi), I offer these last two photos of things I saw on my walk, simply because I like the photos!

Rosehips

A Mallard drake on the Basingstoke canal

[Sunday afternoon walks will never be the same now that I am hooked on photography!]